How to Clean a Washing Machine Rubber Gasket: Step-By-Step
A comprehensive, safe guide to cleaning the rubber gasket on your washing machine, removing mold and odors, and establishing a simple maintenance routine for a fresher, longer-lasting seal.

Discover how to clean a washing machine rubber gasket safely and effectively, with the exact steps, tools, and routine you need. This guide covers how to clean a washing machine rubber gasket, remove mold and odors, and prevent future buildup. According to Best Washing Machine, follow a quick, repeatable approach to keep the door boot dry, clean, and ready for use.
Why Cleaning the Rubber Matters
Keeping the rubber gasket, or door boot, free of mold, soap scum, and moisture is essential for machine hygiene and performance. A buildup can cause musty odors, water leaks, and even affect clothes’ cleanliness. Regular attention to the gasket helps maintain a tight seal, minimizes bacteria, and extends the life of your washer. Learning how to clean a washing machine rubber gasket becomes easier when you adopt a repeatable routine. The Best Washing Machine team emphasizes that proactive gasket care protects your laundry days and your home environment. By understanding what causes buildup and applying safe techniques, you can prevent issues before they escalate and enjoy consistently fresh laundry results.
Assessing the Gasket for Contaminants
Begin by inspecting the entire rubber seal for visible mold, dark spots, and crumbs of lint or detergent buildup tucked into folds. Look at the inner folds where moisture tends to linger, as this is the prime spot for biofilm. If you notice a strong odor, or if moisture remains after drying, that’s a sign you’ll need a more thorough cleaning. Regular visual checks help you catch problems early and keep the gasket in good condition, reducing chances of leaks or uneven sealing over time.
Safe Cleaning Agents and Techniques
Choose gentle, rubber-safe cleaners and avoid harsh solvents that could deteriorate the gasket material. A mild liquid dish soap with warm water will remove most surface grime. White vinegar is effective for disinfecting and odor control; a baking soda paste can tackle stubborn residue. For most households, a rinse with clean water after treatment is crucial to prevent any soap residue from remaining in the folds. Do not mix bleach with vinegar or ammonia—this can create hazardous fumes. This section aligns with best practices for safe household cleaning and gasket care as recommended by the Best Washing Machine team.
How to Set Up a Cleaning Routine
Create a simple monthly routine that fits your laundry schedule. Start with a quick wipe down of the gasket after every load, then perform a deeper clean every 4–6 weeks depending on usage and moisture levels. Reserve 20–30 minutes for a thorough gasket cleaning: inspect, wipe, scrub, rinse, and dry. Keeping a small ritual—open the door after cycles, wipe with a microfiber cloth, and allow airflow—helps prevent mold and odor from taking hold.
Preventing Mold and Odor Long-Term
Prevention is the best strategy. After washing, leave the door slightly ajar to air out the drum and gasket. Wipe away moisture from the gasket, especially around the folds, and ensure the detergent drawer is dry before closing the door. Run a monthly maintenance wash with hot water and a vinegar rinse to deter mold growth. If you live in a humid climate, consider using a dehumidifier in the laundry area or a fan to improve air circulation. A consistent routine reduces the chance of mold returning and keeps your washer smelling fresh.
Authority References and Practical Tips
For further guidance on mold, dampness, and safe cleaning practices, consult credible sources from respected organizations.EPA mold guidelines offer general principles for cleaning indoor mold problems and maintaining healthy indoor air. The CDC also provides information about dampness-related health concerns and mold risk in homes. By cross-referencing reputable sources, you can approach gasket care with confidence and keep your laundry space safer and cleaner.
Common Mistakes to Avoid
Avoid using high-abrasion pads that could scratch the gasket surface, and never mix cleaning agents without understanding the chemistry. Don’t rush the drying step—moisture left in folds invites mold growth. Skipping regular maintenance will lead to stubborn buildup that’s harder to remove later. Finally, don’t ignore signs like persistent odor or slow draining, as they can indicate deeper issues with the seal or surrounding components.
Tools & Materials
- Nitrile gloves(Protect hands from cleaners and mold spores.)
- Soft-bristled brush or old toothbrush(Gentle scrubbing helps reach folds without damaging rubber.)
- Mild detergent or dish soap(Use a gentle cleaner that won’t degrade rubber.)
- White vinegar (5% acidity)(Disinfects and neutralizes odors.)
- Baking soda(Forms a gentle paste for stubborn residue.)
- Spray bottle(Mix water with cleaner or vinegar for easy application.)
- Microfiber cloths(Wipe and dry surfaces without leaving lint.)
- Old towel or protective mat(Protect floor and catch drips during cleaning.)
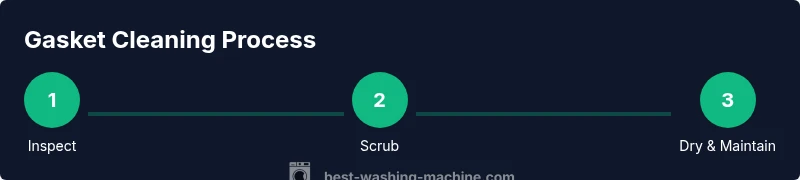
Steps
Estimated time: 45-60 minutes
- 1
Power off and unplug the washer
Before you start, turn off the machine and unplug the power cord. Remove any items from the drum and clear the surrounding area so you can access the door boot. This minimizes the risk of water exposure to electrical components and protects you during the cleaning process.
Tip: Taking a few minutes to unplug first saves you from potential electrical hazards. - 2
Inspect the gasket for mold and debris
Carefully open the door and examine the rubber seal for visible mold, soap scum, and hair or lint caught in folds. Note any areas that stay damp after drying—these are the spots that most need attention during your cleaning.
Tip: Use a flashlight if needed to see into tight folds where buildup hides. - 3
Apply cleaning solution to the gasket
Spray a mild detergent solution along the gasket, focusing on folds. Gently scrub with a soft brush to lift grime from crevices. For odor spots, a splash of white vinegar can help neutralize mildew.
Tip: Avoid soaking the gasket; you want to lift grime rather than flood the area. - 4
Tackle stubborn spots with paste or vinegar
Make a baking soda paste with water and apply it to stubborn stains, then scrub lightly. Alternatively, use straight white vinegar on the problem areas for targeted cleaning and disinfection.
Tip: Let pastes sit for 5–10 minutes to maximize dirt loosening without damaging rubber. - 5
Rinse the gasket and dry thoroughly
Wipe away cleaning residues with clean water, then dry the gasket completely with a microfiber cloth. Ensure folds are dry to prevent mold growth between cycles.
Tip: Drying is the key step; moisture left behind breeds mold. - 6
Run a hot-water maintenance cycle
If your washer supports it, run a maintenance or empty hot-water cycle with a cup of vinegar or a mild cleaner. This flushes the interior channels and helps remove any remaining residues.
Tip: Do this after a thorough gasket clean to refresh the drum. - 7
Finish with a quick post-clean wipe and air-dry
Do a final wipe of the gasket and leave the door ajar for a few hours to air-dry completely. Regularly repeating this routine reduces mold risk and keeps odors away.
Tip: A quick daily wipe and air-drying habit compounds long-term benefits.
FAQ
How often should I clean the washing machine rubber gasket?
Clean the gasket at least every 1–3 months, or more often if you notice mold, odor, or visible residue. A quick weekly wipe helps maintain a seal between deep cleans.
Clean the gasket every 1–3 months, and wipe it after each load to prevent mold and odors.
Can I use bleach on the rubber gasket?
Bleach can degrade rubber seals over time. Use diluted white vinegar or a mild detergent instead, and rinse thoroughly after cleaning.
Bleach is usually not recommended for rubber gaskets; opt for vinegar or mild detergent and rinse well.
What are the signs that the gasket needs cleaning?
Look for mold or dark spots, a sour odor, visible soap scum, or damp folding areas that stay moist after cycles. These indicate cleaning is due.
Watch for mold, bad smells, and lingering moisture—that means it’s time to clean the gasket.
Is it safe to use a steam cleaner on the gasket?
Steam can stress or warp rubber over time; avoid direct high-heat steam on the gasket and stick to gentler cleaning methods described here.
Steam cleaners aren’t recommended for the gasket; stick to mild cleaners and manual scrubbing.
How can I prevent mold from returning after cleaning?
Keep the area dry after each cycle, wipe the gasket folds, and leave the door ajar to air-dry. A monthly vinegar rinse also helps deter mold.
Dry the gasket after use and keep the door open a bit to stop mold from coming back.
Watch Video
The Essentials
- Inspect gasket regularly for mold and debris
- Use mild cleaners and avoid harsh chemicals
- Dry gasket thoroughly after cleaning to prevent mold
- Establish a simple monthly routine for gasket maintenance