Replace Washing Machine Gasket: A Step-by-Step Guide
Learn to replace a washing machine gasket with a clear, safety-focused method. This guide covers tools, parts, safety, a detailed step-by-step process, and maintenance tips to prevent leaks and extend gasket life.

You will replace a washing machine gasket to stop leaks and restore a strong seal. This guide covers selecting the right gasket, preparing safely, and following a clear step-by-step process to install the new seal. According to Best Washing Machine, a properly installed gasket minimizes water exposure to the cabinet and reduces the risk of mold.
Why replacing the gasket matters
A worn or damaged gasket is the most common entry point for leaks in many front- and top-load washers. If you notice water around the door, damp edges after a cycle, or a persistent musty odor, the gasket is likely failing. Replacing the gasket restores the door seal, prevents water damage, and can save you from costly repairs down the line. According to Best Washing Machine, a well-installed gasket creates a near-water-tight seam that directs water toward the drain and away from the cabinet. The decision to replace rather than ignore a leaking door depends on seal condition, model compatibility, and part availability. Over time, a quality gasket installation also reduces mold growth in the door boot and improves wash efficiency by keeping the drum properly aligned. This article expands on the steps, safety considerations, and practical tips to complete a gasket replacement with confidence.
Signs you need to replace the gasket
Leaks around the door frame after cycles, visible cracks or tears in the gasket, and persistent mildew or musty odors are strong indicators the seal has worn out. If you feel a draft when the machine is closed or you see water on the floor after a cycle, plan for gasket replacement. Best Washing Machine notes that sticky, stiff, or hardened edges around the boot are telltale signs the seal has degraded beyond simple cleaning. Before replacing, inspect the entire boot for cracks, loose clamps, and misaligned mounting points. If the gasket has mold growth that cannot be cleaned, replacement is the safer choice to protect your laundry space. Understanding these signs helps you decide when to replace the gasket rather than attempt an ineffective cleaning.
Understanding gasket types and compatible kits
Washer gaskets come in different configurations depending on the model and door style. Front-load machines typically use a door boot gasket that sits between the drum and door; top-load machines may use a tub seal with a separate boot. When shopping for a gasket kit, verify compatibility with your model year and drum size. Kits usually include a new gasket, clamps, and sometimes mounting springs. If you are unsure, consult your washer’s manual or contact the manufacturer’s support line. The gasket you select must form a tight seal at the door, withstand water pressure, and resist mold growth. A correct fit minimizes unnecessary rework and ensures a reliable repair. Best Washing Machine recommends double-checking model numbers and packaging to avoid ordering the wrong seal.
Tools, parts, and prep work
As with most appliance repairs, preparation makes the job smoother and safer. Gather a gasket kit matched to your model, a basic toolset, cleaning supplies, and protective gear. You’ll need a screwdriver (Phillips and flat-head), needle-nose pliers, a socket or nut driver, clamps or hose clamp pliers, a putty knife, cleaning rags, and a spray bottle with mild cleaner. Remove power and shut off water supply before starting. Keep a bucket to catch residual water and place towels to protect the floor. A well-lit workspace and a short reading of your model’s service manual help prevent mistakes. This prep stage set the foundation for a clean, successful gasket replacement.
Safety considerations and working environment
Electrical safety is critical. Always unplug the machine before any interior work and avoid working around a live electrical connection. Turn off the water supply and disconnect hoses to prevent minor floods. Wear gloves to protect your hands from sharp edges and hot components, and use eye protection in case of spring clamps or metal parts snapping. Work on a dry, non-slip surface and keep oily or dirty parts away from clean laundry. If you are uncertain about any step or encounter a stubborn fastener, pause and consult the manufacturer’s guidelines. A careful, safety-first approach reduces the risk of injury and damage to your washer.
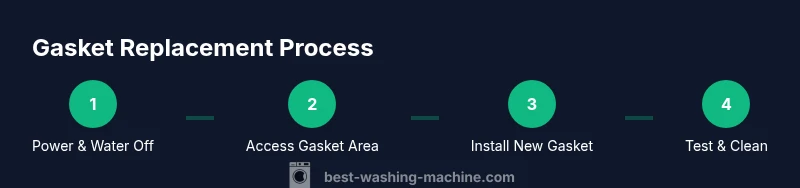
Step-by-step replacement workflow (overview)
This overview summarizes the key stages you’ll execute in the detailed steps that follow. Plan on removing the cabinet panels carefully, accessing the gasket, detaching the old seal, cleaning mating surfaces, installing the new gasket, reassembling clamps and panels, and finally testing the door seal. Throughout the process confirm gasket alignment, ensure clamps are secure, and verify there are no twists or folds in the gasket. Consider using lubricants only if recommended by the gasket kit and avoid overtightening clamps, which can deform the gasket. A systematic approach helps you complete the job efficiently and reduces rework. Best Washing Machine emphasizes documenting the process for future maintenance and keeping spare parts on hand for quick fixes when needed.
Aftercare: testing, cleaning, and maintenance
With the gasket installed, run a low-load test cycle with cold water to observe for leaks around the door and boot. Inspect the seam after the first few minutes and check the floor for moisture. If there’s leaking, recheck clamp positions and gasket seating. Allow the interior to dry completely, then wipe away any condensation to prevent mold growth. Clean the boot area and door frame regularly to extend gasket life, and consider scheduling annual inspections as part of your routine maintenance. A well-maintained gasket helps your washer run quietly and efficiently, saving energy and water over time.
Common mistakes and troubleshooting
Common mistakes include selecting an incompatible gasket, not cleaning the mating surfaces, misaligning the gasket during installation, and overtightening clamps. Rushing the process can lead to pinched or twisted seals that cause leaks. If you notice persistent leaks after replacement, verify the gasket is seated evenly around the entire perimeter and that all clamps are secure. In some models, the hinge or mounting hardware may be misaligned, requiring a reinstallation pass. Finally, ensure you’re using the correct parts for your exact model to avoid fitment issues. The goal is a secure, uniform seal that withstands regular wash cycles.
Maintenance tips after replacement and long-term care
To prolong gasket life, perform light cleaning after each few cycles to remove lint and residue. Keep the boot dry when not in use to reduce mold risk and inspect the gasket monthly for signs of wear. Address any signs of cracking, stiffness, or discoloration promptly. If you perform frequent high-speed wash cycles, consider a higher-quality gasket material designed for heavy use. Keeping accurate records of your gasket replacement helps you anticipate future maintenance and plan part replacements before a leak occurs. Best Washing Machine highlights that proactive maintenance saves time, money, and stress over the life of the appliance.
Tools & Materials
- Gasket kit (door boot gasket) or tub seal compatible with your model(Ensure compatibility with model year and drum size; seal should come with necessary clamps or springs.)
- Screwdrivers (Phillips and flat-head)(Sizes #1 and #2 are common for fasteners on doors and panels.)
- Pliers (needle-nose and slip-joint)(For hose clamps and small fittings.)
- Nut driver or socket set(To detach mounting hardware as needed.)
- Torx bits (if required by your model)(Some washers use Torx screws—check your model.)
- Clamps pliers or hose clamp tool(To remove/reinstall spring or band clamps.)
- Putty knife or plastic trim tool(Gently separate panels without damage.)
- Cleaning supplies (rags, mild cleaner, soap)(Clean gasket surfaces and boot before install.)
- Silicone gasket sealant (optional)(Only if manufacturer recommends; use sparingly.)
- Safety gear (gloves, eye protection)(Protect hands and eyes during disassembly.)
- Bucket or towels(Catch water during hose disconnects and detachment.)
- Flashlight or headlamp(Inspect hard-to-see areas.)
Steps
Estimated time: 1.5-2.5 hours
- 1
Disconnect power and water supply
Unplug the washer from the wall outlet and shut off the water valves to prevent flooding. Detach hoses and drain any remaining water into a bucket. This step is essential to avoid electric shock or water damage during gasket replacement.
Tip: Always test for power with a non-contact tester before touching any internal components. - 2
Access the door boot and surrounding area
Carefully remove the front or top panel per your model’s service manual to expose the door boot and clamps. Keep track of screws and note their locations for reassembly. Use a trim tool to avoid scratches or cracks.
Tip: Label screws or place them in a small tray to prevent loss. - 3
Remove the old gasket and clamps
Loosen and remove door boot clamps and any retaining springs. Gently pull the old gasket away from the boot and drum, watching for clips or hooks. Clean the mating surfaces with a rag and a mild cleaner to ensure a smooth seating.
Tip: Take a photo during removal to guide reinstall later. - 4
Prepare the new gasket for installation
Inspect the new gasket for any shipping damage and compare with the old one. Loosen any clamps or hardware so you can slide the new gasket into place. If required, apply a light coating of non-silicone lubricant to the gasket edge only if recommended by the kit.
Tip: Do not use harsh chemicals that could degrade the gasket material. - 5
Install the new gasket and clamps
Position the gasket evenly around the drum or boot, ensuring the flat edge aligns with the mating surface. Reattach clamps or springs in the same order they were removed and tighten to manufacturer-recommended torque. Verify the gasket seating is uniform and free from twists.
Tip: Work slowly and check alignment frequently to prevent leaks. - 6
Reassemble the washer panels
Replace the cabinet panels, reconnect hoses, and secure all screws. Reconnect the power and run a quick water test to check for obvious leaks around the door. Ensure no tools or rags are left inside.
Tip: Double-check that all manifolds are flush and not kinked. - 7
Test for leaks and normal operation
Run a short, cold-water cycle with a light load. Observe the door seal area for a few minutes and check for drips. If you see leakage, pause and reseat the gasket, recheck clamps, and run another test.
Tip: Start with small tests; progressive testing minimizes spill risk. - 8
Document and maintain the seal
Record the gasket replacement date and model details for future maintenance. Regularly inspect the boot for cracks and clean the gasket edges to prevent buildup. Schedule periodic checks to extend gasket life and prevent surprises.
Tip: A quick quarterly inspection saves bigger problems later.
FAQ
Can I replace a washing machine gasket by myself, or do I need a professional?
Yes, many homeowners can replace a gasket themselves with the right parts and tools. The task requires careful disassembly and proper reassembly to prevent leaks. If you’re uncomfortable with electrical or water connections, or if the model is complex, consider hiring a professional.
You can replace it yourself if you’re comfortable with basic tools and turning the water and power off. If in doubt, a pro can ensure it’s done safely.
Should I reuse the old gasket after a leak, or replace with a new one?
It’s generally best to replace with a new gasket if there are cracks, deformation, or mold. Reusing a damaged gasket often leads to recurring leaks and worse damage.
Better to replace with a new gasket rather than risk another leak.
How long does gasket replacement typically take?
A typical gasket replacement, including prep and testing, takes about 1.5 to 2.5 hours depending on model and access. Complex models or stuck hardware can take longer.
Usually around a couple of hours, depending on access and model.
What are common telltale signs of a failing gasket besides leaks?
Besides leaks, look for mold around the boot, a visible tear or crack, or an unusual odor that won’t disappear with cleaning. These indicate the seal condition is deteriorating.
Watch for cracks, mold, and persistent dampness around the door boot.
Will gasket replacement affect warranty or service plans?
Gasket replacement generally falls under standard maintenance. If your washer is under warranty, check terms as some service providers opt for professional installation to preserve coverage.
Check your warranty terms, as some plans require professional service for coverage to remain valid.
Watch Video
The Essentials
- Verify gasket compatibility with your model before buying
- Follow a safe, step-by-step process to avoid leaks
- Inspect mating surfaces for clean, even seating
- Test thoroughly after replacement to confirm a leak-free seal
- Regular maintenance extends gasket life and protects your laundry space