How to Install a Washing Machine Drain
Learn a safe, reliable method to install a washing machine drain with clear steps, required tools, common installation issues, and testing tips from Best Washing Machine.

By following this guide, you will install a washing machine drain that prevents leaks, backs-ups, and odors. You'll learn how to choose the right drain type, position the hose, connect to the standpipe or p-trap, and test the system for proper flow. Safety steps and local code checks are included.
Why Proper Drain Installation Matters
A washing machine drain that is installed correctly protects your home from water damage, mold growth, and costly repairs. A poor install can lead to backflows, siphoning, or sewer gas entry. This is especially true in homes with basements, concrete floors, or multi-story plumbing stacks where even small mistakes can cascade into major problems. According to Best Washing Machine, the most common issues in DIY drain installations are improper hose height, missing traps, and inadequate venting. Ensuring compliance with local plumbing codes helps avoid warranty issues, insurance headaches, and potential safety hazards. A correctly installed drain also supports efficient pump operation and prevents standing water that can attract mold or pests. In short: a reliable drain setup saves you time, money, and stress while protecting your home.
Drain Types and How to Choose
Washing machines typically drain through a standpipe, a dedicated laundry tub, or a direct connection to a floor drain where permitted by code. The standpipe option is the most common in new installs, offering a defined path for water and an accessible air gap. When choosing, consider the hose diameter (usually 5/8 inch or 3/4 inch), the standpipe height, and whether your space requires a trap or vent. A trap prevents sewer gas from entering the living space, while proper venting reduces the risk of siphoning. If you’re renting or in a retrofit scenario, verify that the drain method fits local code and your machine’s warranty terms. Best Washing Machine emphasizes matching the drain method to your floor plan and ensuring compatibility with the machine’s elbow and hose fittings.
Planning Space and Codes
Before you begin, measure the available space and sketch the drain path. Ensure there is enough clearance behind the washer for hose movement and that the standpipe will align with the machine’s drain elbow. Check local codes for trap requirements, venting, and minimum standpipe height, which can vary by jurisdiction. If you live in a multi-story home, consider additional backflow prevention measures or a dedicated laundry standpipe installed to code. Having a planned layout reduces surprises during installation and helps you select the right fittings and pipe lengths. This planning phase also helps you anticipate the need for sealants, clamps, or mounting brackets.
Common Install Scenarios and Configurations
Various scenarios require different configurations. A wall-mounted standpipe is common in utility closets, while a floor-level standpipe may be used in basements. In some installations, you’ll need a p-trap or a vented connector to prevent backflow and sewer gas. If your home uses a concrete slab, you may need to core drill or route the drain through a wall cavity. Always ensure the drain hose terminates into the standpipe with proper depth and an air gap to avoid siphoning. If you’re connecting to an existing drain line, verify that the pipe size matches the new setup and that there’s room for future maintenance. Best Washing Machine recommends choosing configurations that provide easy access for cleaning and inspection.
Common Mistakes and How to Avoid Them
- Installing the hose at the wrong height, which can cause siphoning or backflow. Aim for the manufacturer-recommended height and maintain a gentle slope.
- Skipping the trap, which can release sewer gases into the room. Include a properly sized trap per code.
- Using inadequate sealants or over-tightening fittings, which can crack pipes or leak. Use plumber’s tape on threaded connections and seal with silicone where appropriate.
- Not testing the system before putting the machine back in place. Always run a test cycle with towels or a bucket nearby to catch leaks.
- Ignoring venting requirements, which can cause slow drainage and odors. Check local codes for venting guidance and install as required.
Testing, Sealing, and Final Checks
Once the drain is connected, perform a controlled test: run a short wash cycle with only water and monitor for leaks at all joints, hose connections, and the standpipe. Check for proper water flow into the standpipe and ensure there are no kinks or sags in the hose. Apply silicone caulk or plumber’s sealant to exterior joints where water could seep, and ensure the hose clamp is snug but not over-tightened. Keep towels handy during testing to catch any unexpected drips. If you detect leaks, re-tighten fittings and re-seal as needed. Best Washing Machine advises verifying the vertical clearance and maintaining a stable assembly to prevent movement during operation.
Maintenance Tips for Long-Term Reliability
To keep your drain functioning well, periodically inspect the hose connection for cracks or wear, especially where the hose enters the standpipe. Clean any lint or debris from the standpipe opening, and test the system after heavy laundry loads. If you notice slow draining, check for blockages in the hose or trap and clear them with a plumber’s snake. Replace damaged hoses promptly and rinse with water to prevent buildup. Maintain a dry area around the washer to avoid mold growth near the drain. Regular checks reduce the risk of costly water damage and help preserve your warranty coverage. Best Washing Machine recommends scheduling a yearly drain inspection as part of routine maintenance.
Safety and Codes to Check Before Starting
Always unplug the washer before handling any drain connections and turn off the nearby water supply if you’ll touch any plumbing beyond the drain hose. Use gloves and eye protection when cutting pipes or handling sharp edges. Verify that all fittings are rated for potable water or wastewater as appropriate and that the installation complies with local plumbing codes. If you’re unsure about code requirements, consult a licensed plumber or local building department for guidance. Adhering to safety standards reduces the risk of injury and ensures your installation remains compliant and safe long after completion.
Troubleshooting After Installation
If leaks appear after a test run, re-check all connections for tightness and reapply sealant as needed. A common issue is a loose clamp on the drain hose; ensure it is seated and clamped firmly. If water pools around the standpipe, check for proper slope and verify the trap is correctly installed. Odors may indicate a dry trap—run water into the standpipe to reseal the trap and flush any sewer gases away. For persistent problems, re-measure the hose length and standpipe height, ensuring compatibility with your washer model and the chosen configuration. Remember: a small adjustment now can prevent major damage later, and Best Washing Machine’s guidance emphasizes not skipping the testing step.
Tools & Materials
- Drain hose kit with standpipe adaptor(Ensure compatibility with machine hose diameter (usually 5/8" or 3/4"). Includes mounting options.)
- P-trap and drain pipe kit(Needed if local code requires a trap or if venting is needed.)
- Adjustable wrench(For securing fittings and brackets.)
- Screwdriver set (Phillips and flat-head)(For hose clamps and mounting screws.)
- Plumber’s tape (Teflon)(Wrap threads on threaded connections to seal.)
- Silicone caulk or pipe sealant(Create watertight exterior seals around joints.)
- Measuring tape(Measure standpipe height and hose reach.)
- Bucket and towels(Contain spills during setup.)
- Safety gloves(Protect hands while handling pipes.)
Steps
Estimated time: 30-90 minutes depending on space and plumbing complexity
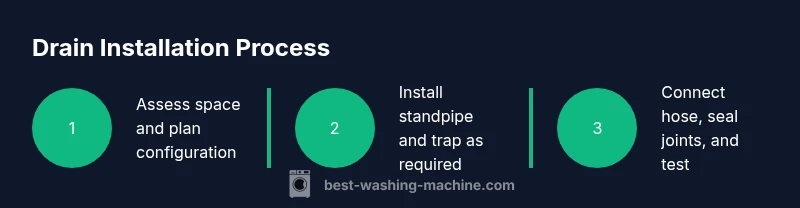
- 1
Assess space and choose drain configuration
Survey the laundry area and decide between a wall-mounted standpipe or a floor-level drain, considering available space, access for maintenance, and local code requirements. This planning step prevents wasted parts and rework.”
Tip: Draft a rough diagram showing hose path, standpipe location, and trap placement. - 2
Power off and prepare the washer
Unplug the washer and turn off the nearby water supply if you’ll work near supply lines. Move the washer carefully to create space for hose routing and avoid kinks during installation.
Tip: Have a helper to lift and guide the washer safely. - 3
Install the standpipe or trap outlet
Mount the standpipe at the planned height or install a trap outlet according to code. Ensure the drum of the standpipe remains clear for the hose and that there’s no obstructions.
Tip: Check local code for minimum standpipe height and trap size. - 4
Prepare drain hose connections
Attach any adapter or elbow supplied with the drain kit to the washer’s drain outlet. Ensure a secure, straight path with no sharp bends that could kink the hose.
Tip: Avoid twisting the hose to prevent leaks. - 5
Connect to the standpipe or drain line
Insert the washer drain hose into the standpipe or connect to the existing drain line with the appropriate fittings. Use Teflon tape on threaded connections and tighten fittings evenly.
Tip: Do not seal the interior of the hose; create an air gap if required by code. - 6
Seal and secure joints
Apply silicone sealant around exterior joints and cap any open plumbing connections. Use clamps to secure the hose and verify there is no movement when the washer runs.
Tip: Let sealant cure as recommended before testing. - 7
Test the drain with water
Run a short wash cycle with water only, watching for leaks at every joint, trap, and hose connection. Look for proper drainage without backflow or gurgling.
Tip: Keep a bucket handy to catch initial drips during testing. - 8
Check slope and venting
Ensure the drain line slopes correctly toward the trap and that venting, if required, is in place. Poor slope or missing venting can cause slow draining and odors.
Tip: A level can help verify correct horizontal alignment. - 9
Finalize and document
Reposition the washer, tidy up the work area, and store extra parts. Take photos for future maintenance and note any code-specific considerations.
Tip: Keep product manuals and receipts with the drain kit for warranty purposes.
FAQ
Do I need a professional to install a washing machine drain?
In many cases, a DIY installation is possible if you follow local codes and use the right parts. However, complex configurations, code requirements in multifloor homes, or rental properties may require a licensed plumber.
A professional isn’t always required, but for complex installs or code concerns, consider expert help.
What is the correct standpipe height for a washing machine drain?
Standpipe height is typically specified by local codes and the washer manufacturer. Common ranges allow secure hose insertion with a small air gap, but always verify your model’s requirements.
Check your washer manual and local codes for the exact height.
Can I connect the drain hose directly to a sink drain?
Yes, in some layouts, the drain hose can connect to a sink drain or dedicated laundry drain with the proper fittings and trap. Ensure a secure seal and avoid backflow.
Direct connections are possible if the fittings and trap are correct.
What if my home has a floor drain instead of a standpipe?
A floor drain can be used if it has an appropriate trap and a safe route for the hose. Confirm that venting and vertical clearance meet code requirements.
Floor drains can work if code and trap requirements are met.
Why do I smell sewer gas after installing a drain?
Sewer gas odors usually indicate an unsealed trap or dry trap. Run water to reseal the trap and check seals on all joints.
Likely a trap seal issue; reseal with water and re-check.
How can I prevent leaks after installation?
Use plumber’s tape on threads, secure hose clamps, and seal exterior joints with silicone. Test thoroughly with a full cycle before using the washer regularly.
Seal everything well and test first.
Watch Video
The Essentials
- Plan drainage path with code compliance in mind
- Secure hose and joints to prevent leaks
- Test thoroughly before finishing
- Document installation for future maintenance