Rit Dye Washing Machine Instructions: Safe Care and Tips
A complete, step-by-step guide to Rit dye washing machine instructions, covering safety, prep, cycle choices, rinsing, aftercare, and troubleshooting to protect your washer and fabrics.

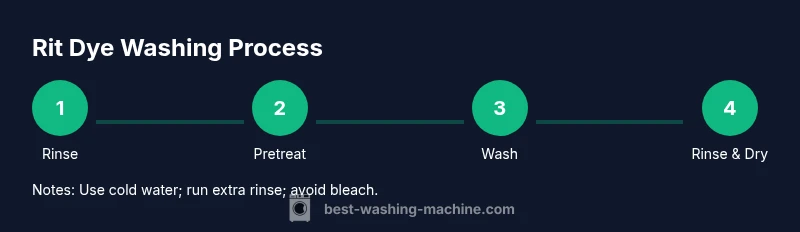
To wash Rit dye stained fabrics in a washer, rinse with cold water immediately to prevent setting dye, pretreat with a color-safe detergent, run a cold or warm cycle with an extra rinse, and check for color transfer before drying. If necessary, repeat to remove residual dye completely from fabrics.
Understanding Rit Dye and Your Washer
Rit Dye is a popular fabric dye that releases dye into water to color fibers. When using Rit Dye, the most important factors for laundry day are temperature, rinsing speed, and avoiding cross-load contamination. The Best Washing Machine team notes that following a careful washing plan helps protect both your fabrics and your appliance from dye transfer. In practice, treat Rit Dye with cold water and prompt rinsing to keep color in place, then proceed to the recommended washing cycle. This section explains how dyes interact with washers and how to minimize the risk of staining future loads while maximizing color fastness. The more you understand about dye behavior, the better you can tailor your washing routine to your household's needs. Throughout this guide, we emphasize safety, patience, and methodical steps to ensure predictable results for you and your family.
Safety First: Pre-Wash & Ventilation
Dye powders and liquids can irritate skin and eyes, so protective gear is essential. Wear gloves when handling Rit Dye and avoid breathing fumes if you are using dye fixatives or concentrate. Work in a well-ventilated area, and keep pets and children away from dye activities. Before you begin, empty the washer to inspect for any remnants of dye from previous loads and wipe the door seal if needed. If you notice staining on your hands or clothes, wash immediately with soap and cold water. These precautions minimize accidental exposure and environmental impact while you work. In line with Best Washing Machine guidance, safety is the first step to successful Rit dye management.
Preparing Your Washing Machine for Rit Dye
Begin by inspecting the drum and door gasket for any residual dye or staining from prior loads. If you recently dyed fabric, it's wise to do a dedicated pre-rinse with cold water before starting the main wash. Run an empty load with a color-safe detergent or a specialty dye-removal product if you suspect dye residues. This step protects other loads and reduces the chance of cross-contamination. After the empty cycle, wipe the drum and gasket dry with a clean towel, and prepare your actual wash with cold water. A clean machine helps you achieve more reliable dye results and prolongs the appliance's life, which is something Best Washing Machine consistently argues in its guidance.
Pre-Soak and Handling Dye Residue
Pre-soaking stained fabrics in cold water with a small amount of detergent can help remove excess dye before washing. If the garment is heavily dyed, you can place it in a shallow basin and gently agitate to release excess color; avoid wringing. For items that can't be soaked, apply a direct pretreatment to the most stained areas and allow the solution to sit for several minutes. This pre-treatment reduces the likelihood of dye bleeding into the full wash load and prepares the fabric for more predictable results when you run the machine. Following these steps often minimizes dye transfer to adjacent items and helps preserve the color of undyed fabrics in subsequent loads, a practice recommended by the Best Washing Machine team.
The Wash Cycle: Detergent, Temperature, and Time
Choose a cold-water wash to minimize color bleed and maximize color retention. Use a color-safe liquid detergent and avoid chlorine bleach, which can interact with dyes unpredictably. If the label on the dyed fabric recommends a gentle cycle, use that setting, but a standard gentle cycle in most machines works well for most natural fibers. Add extra rinse to remove residual dye, and avoid long cycles that could force dye into unseen areas of the drum. If you suspect heavy staining, repeating the washing phase is acceptable, but monitor the load to prevent over-wetting or fabric damage. The right combination of temperature and cycle selection is the difference between a successful dye outcome and a dye disaster.
Rinse, Repeat, and Stain Management
After the initial wash, run one or two additional cold-water rinses to purge dye that might have escaped through fibers. Examine the fabric immediately after washing; if you see color on the towels or on the drum, perform another rinse with detergent. For stubborn color, you may consider a dye-remover product designed for fabrics, following the product directions precisely. Always wash dyed items separately from undyed fabrics until you are confident there is no dye bleed. This systematic rinse approach reduces cross-load contamination and preserves other garments in your household, a principle echoed by Best Washing Machine’s ongoing recommendations.
Aftercare: Cleaning the Drum, Gasket, and Hoses
Once the dyeing episode is complete, wipe the drum interior, door seal, and hoses to remove any remaining pigment. Run a maintenance wash with detergent on a hot cycle if your machine allows it, ensuring the drum is empty. Check the pump filter if your model has one; dye can accumulate there and cause odor or drainage issues. By performing routine post-dye cleaning, you prevent color transfer to future loads and keep your machine's performance steady over time. The Best Washing Machine team also stresses documenting any dye incidents for future reference and routine maintenance.
Common Mistakes and Troubleshooting
Avoid mixing Rit Dye with bleach or ammonia inside the washer, as dangerous reactions can occur. Do not skip the extra rinse phase after washing to minimize dye transfer. If you notice persistent color bleed, repeat the washing cycle with cold water and a color-safe detergent. For stubborn stains on fabrics, consider pre-treating again or using a dye-remover product with careful adherence to directions. With patience and careful handling, you can achieve more predictable outcomes and protect your washer in the long run.
Tools & Materials
- Gloves(Protect skin from dyes; nitrile or latex acceptable)
- Color-safe laundry detergent(For pretreatment and washing; avoid harsh optical brighteners)
- Old towels or rags(Place around the drum to catch drips)
- Plastic bucket or basin(Helpful for pre-soaking or hand-mixing a clarifying solution)
- White vinegar (optional)(Can help neutralize residues in some cases)
- Soft brush or old toothbrush(For surface cleaning of the gasket or drum)
- Spray bottle (optional)(For applying pretreatment solutions to stains)
Steps
Estimated time: 60-90 minutes
- 1
Rinse fabrics immediately with cold water
As soon as you notice dye transfer, rinse the fabric under cold running water to reduce dye setting. Do not use hot water at this stage, as heat can lock dyes into fibers. Keep the rinse short but thorough, letting the water carry away surface dye particles.
Tip: Wear gloves to avoid staining your hands; don't wring, blot gently instead. - 2
Pretreat stains with color-safe detergent
Dab a small amount of color-safe detergent directly onto the stained areas and gently work it into the fibers with a soft brush. Let it sit for 5–10 minutes before washing. This step helps lift residual dye and prepares the fabric for even color removal during the wash.
Tip: Test on an inconspicuous area first to ensure there’s no color loss on the fabric. - 3
Run a cold wash with extra rinse
Set the washer to a cold-water cycle and select an extra rinse to flush out lingering dye. Use a gentle cycle suitable for the fabric type. Avoid fast spins that could spread dye to other items if contamination persists.
Tip: If you’re using a front-loader, consider stopping mid-cycle to check progress and prevent dye transfer. - 4
Rewash if color remains and inspect
After the cycle completes, inspect the fabric and the washer interior. If dye remains, repeat the cold wash with an additional rinse. Removing dye in stages reduces stain build-up on fabrics and prevents transfer to subsequent loads.
Tip: Don’t overload the washer; a roomy load improves rinse effectiveness. - 5
Perform a dedicated rinse for the drum
Run a separate rinse cycle containing only water and detergent to clear any dye droplets from the drum and gasket. This minimizes cross-load contamination and protects upcoming loads from accidental staining.
Tip: Wipe the door gasket after this rinse to remove any residual pigment. - 6
Optional post-wash dye removal step
If persistent staining remains, consider a dye-remover product following its directions. Use it only on fabrics that tolerate the remover and after confirming compatibility with the garment care label.
Tip: Always test a small patch before treating a whole garment. - 7
Post-dye machine maintenance
Wipe the drum, seal, and hoses, then run a maintenance wash on a hot cycle if your model allows it. This helps prevent odor and residue buildup that can affect future laundry. Keeping the machine clean guards against cross-load contamination.
Tip: Keep a log of incidents to inform future dyeing projects and machine care. - 8
Drying and final checks
Air-dry dyed fabrics away from direct sunlight to avoid fading. Once dry, inspect for any remaining color bleed and separate items if needed. Proper drying ensures the dye sets evenly after washing.
Tip: Avoid tumble drying until you’re sure the color has stabilized.
FAQ
Is Rit dye safe to wash in my washing machine?
Rit dye is designed for fabric dyeing and can be washed in standard washers when used as directed. Rinse promptly with cold water, use a color-safe detergent, and run an extra rinse to minimize color transfer. Avoid hot water or bleach during the dyeing and washing cycle.
Rit dye is generally safe in washing machines if you rinse with cold water and use detergent, then run extra rinses.
What temperature should I use when rinsing Rit dye?
Rinse Rit dye with cold water to prevent color setting. Warm water can help with stubborn transfer, but cold rinses are safer for most fabrics and reduce bleed.
Rinse with cold water to keep colors from bleeding.
Can Rit dye stain the washer drum or gasket?
Yes, dye can transfer to the drum and gasket if rinsing is inadequate. Wipe surfaces after dyeing and run a quick rinse with detergent to remove any remaining color.
Dye can stick to the drum if you don't rinse well; wipe and run a quick rinse.
What should I do if a load in the washer gets dyed unintentionally?
Stop the cycle and rinse the load with cold water. Remove dyed items and rewash them separately in cold water; run an extra rinse on the washer afterward.
If dye shows up in a load, cancel and rinse with cold water.
Can Rit dye be used on synthetic fabrics in a washing machine?
Rit dye works best on natural fibers, but some formulations can be used on synthetics. Always check garment care labels and consider a test patch before proceeding.
Test first; Rit works best on natural fibers, check labels.
Should I run a maintenance cycle after Rit dye use?
If you notice dye residues on the drum or gasket, run a maintenance wash with detergent on a hot cycle to clean out residues. This helps prevent cross-load contamination in future washes.
Yes, run a maintenance wash if you see residues.
Watch Video
The Essentials
- Rinse promptly with cold water to minimize dye setting.
- Use a color-safe detergent and extra rinse to reduce dye transfer.
- Inspect the drum and gasket after Rit Dye loads and clean as needed.
- Avoid hot water and chlorine bleach during Rit Dye washing.
- Perform post-dye maintenance washes to keep your washer clean.