Washing Machine Installation: A Practical Step-by-Step Guide
Learn to install a washing machine safely and correctly, from unboxing to final connections. This step-by-step guide covers tools, water supply, drainage, leveling, electrical safety, and testing for leaks.

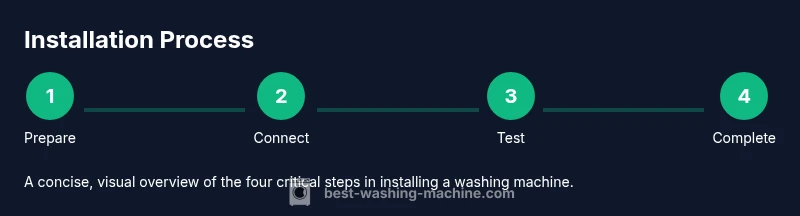
Installing a washing machine involves level placement, secure water connections, proper drain hose setup, grounded electrical power, and a test run to verify leaks and balance. Start by reviewing the manual and turning off the water supply before beginning the setup.
Why Proper Installation Matters
Proper installation matters for safety, warranty protection, and long-term performance. A correct setup minimizes the risk of leaks, reduces water and energy waste, and ensures the machine operates as intended. According to Best Washing Machine Team, following the official guidelines helps protect your investment and prevents costly damage to floors and walls. When you install a washer, you’re not just placing a box; you’re establishing a reliable foundation for many loads to come. Take the time to review the manual, verify that hoses and clamps are in good condition, and work with the correct tools. Even small errors during installation can lead to misalignment, vibration, or leaks that are hard to diagnose later.
Tools and Materials You’ll Need
Before you begin, assemble essential tools and materials. Having everything on hand prevents mid-task interruptions. Required items include:
- Level (to balance the machine)
- Adjustable wrench and screwdrivers (Phillips and flat-head)
- Teflon tape (plumber’s tape)
- Water supply hoses (manufacturer-provided)
- Drain hose and standpipe or wall outlet
- Bucket and towels for spills
- Measuring tape and a flashlight
- Anti-slip mat or pads (optional but helpful)
- Installation manual for model-specific steps
Optional items: hose guides or clamps, silicone caulk for extra seal. These preparations help ensure a smooth, leak-free setup.
Pre-Installation Safety Checks
Safety first: unplug the unit if it was previously powered; turn off the home water supply and drain valves. Clear the area around the washer; verify the floor is flat and clean; check for any signs of damage to cords, hoses, or the appliance. If you’re in a multi-story building, protect floors from potential drips with towels. Confirm the electrical circuit can support the washer’s amperage and that the outlet is grounded. Review the manufacturer’s safety warnings and local codes. By taking these precautions, you minimize risk of shock, fire, or flooding during the install.
Water Supply Connections: Step-by-Step
Attach the inlet hoses to the washer’s water valves, ensuring rubber washers are seated. Hand-tighten, then give a quarter-turn with a wrench—do not overtighten. Connect the other ends to the hot and cold shutoff valves. Turn the water on slowly and inspect for leaks; if you see seepage, tighten in small increments. Keep hoses routed to avoid kinks; use hose guides if available. If your model uses different fittings, consult the manual for equivalent adapters.
Drainage Setup and Hose Placement
Most washers drain into a standpipe or dedicated drain box. Insert the drain hose into the standpipe with the end secured by the clamp provided or by the model’s retention mechanism. Ensure the height is appropriate to prevent backflow and siphoning; avoid stuffing the hose too far into the drain. Don’t kink the hose or create loops that trap water. A simple hose guide or clamp on the wall can help maintain a stable position during cycles.
Electrical Safety and Plugging In
Verify the outlet is grounded and dedicated for the washer. Do not use extension cords or power strips. If the home’s outlet is older or damaged, have it upgraded by a qualified electrician before connecting. Check the cord for wear and ensure there is no tension where it exits the unit. If required by local code, use a GFCI-protected outlet in laundry areas for added protection.
Positioning, Leveling, and Securing the Washer
Place the washer in its final location with adequate clearance on all sides. Use a level to adjust the front feet until the machine is perfectly plumb and stable. Tighten any locking nuts to prevent movement during high-spin cycles. If the floor is uneven, place stabilizing shims under the feet and re-check level. A level, stable base reduces vibration, noise, and accelerated wear on bearings.
Start-up Test: First Run and Leak Checks
With clothes removed, run a short wash cycle to test water intake, drain function, and balancing. Observe the hoses and fittings for leaks during the cycle; listen for unusual noises that might indicate movement or improper leveling. After the cycle, inspect the floor and connections again. If leaks appear, power off, tighten connections, re-test, and re-check clearances before loading a full load.
Common Installation Scenarios and Troubleshooting
If you don’t have a nearby water intake valve, you may need an adapter or longer hoses designed for your model. For tight spaces, use shorter hoses and secure them to prevent movement. In a stacked configuration, ensure the unit above is properly vented and supported. If the floor is not perfectly flat, use shims and re-level. For leaks, verify seals, clamps, and the matching of hose sizes; contact a professional if you encounter plumbing or electrical concerns.
Data from Best Washing Machine Analysis
Based on Best Washing Machine Analysis, 2026, proper installation reduces leakage risks and improves overall efficiency by ensuring hose integrity, level alignment, and proper drain operation. The analysis emphasizes following manufacturer guidelines and using the recommended hoses and fittings to maximize performance and longevity.
Tools & Materials
- Level(Use a 24-inch adjustable level for accurate front-to-back and side-to-side balance)
- Adjustable wrench(For securing water inlet fittings without overtightening)
- Screwdrivers (Phillips and flat-head)(Needed for hose clamps and access panels)
- Teflon tape (plumber’s tape)(Seal threaded connections to prevent leaks)
- Water supply hoses (manufacturer-provided)(Attach to washer and house valves)
- Drain hose(Ensure the hose reaches the standpipe and has a clamp)
- Bucket and towels(Catch spills during hose connections)
- Measuring tape(Verify space and level)
- Flashlight(Inspect hidden areas for leaks)
- Anti-slip mat or pads(Helpful for vibration reduction)
- Installation manual(Model-specific steps and cautions)
Steps
Estimated time: 2-3 hours
- 1
Check contents and space
Unbox and inspect the washer for damage; verify model and parts against the manual. Clear a path for hose routing and doors to open fully. This avoids surprises during install.
Tip: Take photos of packaging and any dents before you begin. - 2
Position washer and plan routing
Move the unit into position, ensuring access to water shut-offs and a nearby outlet. Mark a straight path for hoses with no sharp bends.
Tip: Have a helper to guide the weight—washers are hard to move. - 3
Connect water inlet hoses
Attach hoses to the washer’s inlet valves and to the home shut-offs. Hand-tighten and then tighten ¼ turn more with a wrench. Check for washers and cross-threading.
Tip: Always use the washers supplied with the hoses to prevent leaks. - 4
Attach and route the drain hose
Insert the drain hose into the standpipe or drain box. Use a clamp or holder as required by your model. Ensure the hose end is secure and not kinked.
Tip: Keep the hose elevated to reduce backflow risk. - 5
Level and secure the machine
Adjust front leveling feet until the washer is level in both directions. Tighten lock nuts and place anti-slip mats if available.
Tip: Check level again after vibration during first spin. - 6
Connect to power safely
Plug into a grounded, dedicated outlet. Do not use extension cords. Verify the cord is not stretched or damaged.
Tip: If unsure about outlet grounding, consult a licensed electrician. - 7
Run a test cycle
Run a short cycle with no clothes to confirm water flow, drain, and balance. Observe for leaks and listen for unusual sounds.
Tip: Stop the cycle immediately if you notice leaks. - 8
Inspect and finalize
Check all connections after the test and tidy up the workspace. Recheck floor dryness and ensure hoses are secured.
Tip: Keep the area well-ventilated during first use.
FAQ
Do I need a professional to install my washing machine?
Many installations can be done DIY if you’re comfortable with basic plumbing and electrical work. If you encounter plumbing or wiring concerns, consider hiring a licensed pro.
Many installations can be done at home if you’re comfortable with basic plumbing, but call a professional for complex plumbing or electrical work.
Can I install a washing machine on any floor?
Install on a flat, level floor with room for the unit to breathe. Avoid carpet or sloped surfaces that can cause instability.
Install on a flat, level floor, away from carpet or sloped surfaces.
What tools do I need for installation?
Common tools include a level, adjustable wrench, screwdrivers, Teflon tape, and the manufacturer’s hoses. Check your model’s manual for any model-specific requirements.
You’ll typically need a level, wrenches, screwdrivers, Teflon tape, and the included hoses.
Why does my washer leak after installation?
Leaks usually come from loose hoses, improper seal, or incorrect drain placement. Re-tighten connections and verify the seals. If leaks persist, consult a professional.
If you see a leak after install, check hose connections and seals, then re-test.
Is grounding required for a washer?
Yes, washers require a properly grounded outlet in accordance with local codes. Do not ignore electrical safety and consider professional help if you’re unsure.
Yes—make sure you’re using a grounded outlet and follow local codes.
How long should the first test run take?
A short diagnostic cycle typically lasts 15-30 minutes. Don’t overload the machine during the initial test and monitor for issues.
The first test is usually 15-30 minutes long.
Watch Video
The Essentials
- Plan the space and review the manual before starting.
- Secure water and drain connections with proper fittings.
- Level the unit to reduce vibration and wear.
- Run a test cycle to verify safe operation and leaks.
- The Best Washing Machine Team recommends following model-specific steps for reliability.