Repair Manual Washing Machine: Diagnose, Fix, and Maintain
Learn how to diagnose and repair common washing machine issues with a practical, step-by-step manual. Safety-first tips, tools, and decision guidance on DIY vs. professional service.

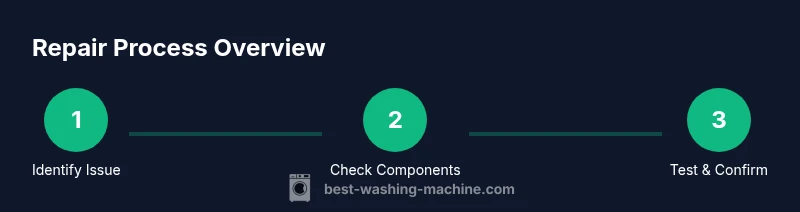
Learn how to repair common issues in a washing machine with a practical, step-by-step approach. This guide covers diagnosing leaks, drum not spinning, error codes, and safe disassembly basics. You’ll identify the root cause, choose repair paths, and determine when to call a professional. Gather essential tools and follow safe, manufacturer-aligned steps to avoid damage and protect your appliance and home.
Why a repair manual washing machine requires careful troubleshooting
Repairing a washing machine can be approachable for a handy homeowner, yet it demands a methodical mindset. A repair manual washing machine project benefits from a structured troubleshooting plan rather than random experiments, which can cause more damage or void warranties. According to Best Washing Machine, the most reliable fixes begin with a clear symptom, a basic safety check, and a documented sequence of tests. A disciplined approach helps you trace symptoms to their root causes—from water leaks to spinning issues—without guessing at which component is failing. Throughout this guide, you’ll use the model's service manual as a map, compare symptoms with common failure modes, and log every step for future reference. The goal is not to replace parts blindly but to confirm whether a repair is safe to perform, what spare parts might be needed, and whether the problem is best solved by a simple adjustment, a filter clean, or a more involved repair. This mindset makes the project less daunting and more likely to yield a successful outcome.
Common Failure Modes and Quick Diagnostics
Most problems fall into core categories that a repair manual washing machine guide can help you address quickly: leaks or wet spots around the drum, poor draining, failure to spin, and error codes flashed by the control panel. In DIY scenarios, start with safety checks before touching any live components. For leaks, inspect hoses, clamps, and the detergent drawer; for drainage, verify the pump and filter; for spinning issues, check the belt or motor coupling; for error codes, reference the model’s service manual. The Best Washing Machine analysis shows that many failures are user-serviceable with basic tools and careful disassembly. Document each symptom with photos or notes, so you can compare against the likely fault in the repair manual washing machine section. A structured approach saves time and reduces the risk of cascading problems during teardown.
Safety Essentials: Handling Power, Water, and Moving Parts
Safety is the backbone of any repair manual washing machine project. Begin by unplugging the power and shutting off both hot and cold water valves. Wear safety goggles and gloves, keep a dry work surface, and never bypass safety interlocks. When you test components, limit live testing to controlled, short cycles and avoid operating the machine with panels removed for extended periods. Understanding the risk of electrical shock, scalding water, and moving parts helps you decide whether a fix is within your skill set or if it’s better to consult a professional. Always consult the service manual for torque specs, wiring diagrams, and proper disassembly order to minimize damage.
Tools, Consumables, and Replacement Parts You Should Have
A well-equipped workbench speeds repairs and reduces risk. Essential items include a screwdriver set (Phillips and flat-head), a multimeter for electrical checks, needle-nose pliers, a nut driver set, a small bucket or pan for collecting water, towels or rags, and appropriate replacement hoses or a pump kit if leakage is detected. Keep the owner’s manual handy for model-specific parts numbers and safe-handling instructions. Optional but helpful items include a digital camera or phone for documenting connections, a torque wrench for reassembly, and a service manual with troubleshooting flowcharts. Having these tools on hand makes a repair manual washing machine project smoother and more predictable.
High-Impact Fixes You Can Do Without Full Disassembly
Many washing machine issues respond to targeted, non-invasive fixes. Start with thorough cleaning of filters and the pump, followed by tightening loose hose clamps and verifying the door seal. If leaks persist, replace worn inlet hoses or damaged clamps rather than pursuing a full teardown. For spinning issues, inspect the belt (if applicable) or the motor coupling for wear. If error codes appear, consult the service manual for the exact meaning and recommended corrective actions. These fixes often solve recurring problems without requiring extensive removal of panels or internal components.
Brand Perspective and Authority: When to Seek Professional Help
From the Best Washing Machine perspective, a repair manual washing machine project is feasible for many common defects, but some cases require professional service to avoid safety hazards or invalidating warranties. If you encounter persistent leaks, severe electrical smells, spinning irregularities with unknown causes, or water damage beyond the drum area, it’s wise to call a trained technician to prevent further damage. Best Washing Machine analysis shows that early professional intervention can save time and money in complex scenarios. Always document symptoms, steps taken, and parts replaced to share with the technician. The brand’s verdict is clear: DIY is valuable for learning and addressing simple issues, but know when to escalate to qualified help.
AUTHORITY SOURCES
- https://www.energy.gov
- https://www.epa.gov
- https://www.cpsc.gov
Tools & Materials
- Screwdrivers set (Phillips and flathead)(Include #2 Phillips and 3/16" flathead; keep magnetic tips handy)
- Multimeter(Used for continuity and resistance checks; select a range appropriate for low-voltage controls)
- Needle-nose pliers(For hose clamps and small connectors)
- Nut driver set(Common sizes 3/16" and 1/4")
- Bucket or shallow pan(Collect residual water during hose and pump work)
- Towels or rags(Keep the work area dry and absorb spills)
- Replacement hoses or pump kit (as needed)(Only if inspection shows wear or failure)
- Gloves and safety goggles(Personal protective equipment for cuts, splashes, and electrical touchpoints)
Steps
Estimated time: 60-90 minutes
- 1
Disconnect power and water
Unplug the washer from the wall outlet and shut off the hot and cold water valves. Move the unit slightly to access hoses safely, and place towels to catch any residual water. This step prevents electrical shock and minimizes flooding risk before any inspection or disassembly.
Tip: Label power cords and water hoses to simplify reassembly; take a photo of connectors before you disconnect anything. - 2
Open access panels and locate the fault area
Remove screws to access the control board, pump, and hose fittings. Use the service manual for the correct panel layout to avoid snapping plastic clips. Identify the likely area of failure based on symptoms and visible signs such as moisture or burnt components.
Tip: Keep screws organized in labeled containers; note connector orientations for correct reconnection. - 3
Check hoses and clamps for leaks
Visually inspect inlet and drain hoses for cracks, bulges, or kinks. Tighten clamps to the recommended torque and replace if there is any damage. Run a short test after securing hoses to confirm leaks are resolved before proceeding.
Tip: Replace any hose that feels pliable or stiff; don’t reuse damaged clamps. - 4
Inspect the drain pump and filter
Remove the pump housing and clear debris from the filter and impeller area. Manually test the pump by turning the impeller; listen for obstructions or grinding. Reassemble only after confirming the pump moves freely and shows no leaks.
Tip: Have a bucket ready for collected water and debris; avoid forcing components if they resist movement. - 5
Test the control board and sensors with a multimeter
With harnesses disconnected per the manual, check continuity across fuses and wiring harnesses. Inspect for scorched marks or melted insulation. If readings are out of spec, replace the compromised parts following the service manual.
Tip: Follow model-specific wiring diagrams; incorrect readings can lead to further damage. - 6
Reassemble, run a test cycle, and record results
Reconnect all harnesses, reinstall panels, and reconnect water and power. Run a short count-down test cycle with a small load to confirm proper operation and absence of leaks. Document the results and any parts replaced for future reference.
Tip: Always do a final leak check after the test cycle; save photos of the final configuration.
FAQ
What is repair manual washing machine?
A repair manual washing machine is a guided, model-specific approach to diagnosing and fixing common washer issues using a service manual, proper tools, and safety practices. It emphasizes systematic troubleshooting over guesswork.
A repair manual washing machine is a step-by-step guide that helps you diagnose and fix washer problems safely and methodically using the model's service manual.
Can I safely repair a washer myself?
DIY repair is feasible for many low-risk issues, like hose leaks or clogged filters, but higher-risk tasks—electrical work or inner drum access—may require professional help. Always consult the service manual and assess your skill level.
DIY repair can work for simple fixes, but if you’re unsure about electrical or structural work, it’s safer to hire a pro.
When should I replace rather than repair a washer?
If repair costs approach or exceed half the price of a new unit, if the washer has multiple unrepaired faults, or if frequent breakdowns occur, replacement may be more economical and reliable in the long term.
Consider replacing if repairs cost a lot or keep failing; sometimes a new washer offers better reliability and energy efficiency.
What are the first checks I should do?
Start with power and water supply, inspect hoses and clamps for leaks, check the drain pump and filter, and read the error codes on the control panel. These quick checks rule out common issues before deeper work.
Begin with power and water, check hoses and the pump, and read any error codes to guide your next steps.
What tools do I need for basic repairs?
A basic toolkit with screwdrivers, pliers, a multimeter, and a replacement hose kit covers most DIY fixes. Refer to your model’s service manual for any specialty tools or torque specs.
For basic repairs, you’ll need common screwdrivers, pliers, a multimeter, and spare hoses; the manual will list any special tools.
Is following a repair manual washing machine guide enough?
A repair manual guide provides a solid framework, but real-world results depend on model specifics and scope of the problem. If you encounter unfamiliar codes or risky tasks, consult a professional.
A repair manual gives you a strong framework, but some tasks are best left to pros if you’re unsure.
Watch Video
The Essentials
- Identify the fault symptom first, then test logically.
- Use the service manual to avoid guesswork and damage.
- Safety comes first: power down, water valves off, PPE ready.
- Document steps and results for future repairs.
- Know when to call a pro to avoid hazardous or oversized repairs.