How to replace samsung washing machine door seal
Learn how to replace the door seal on Samsung front-load washers with this practical, safety-focused guide from Best Washing Machine. Includes tools, parts, step-by-step instructions, and maintenance tips to prevent future leaks.

Replacing a worn Samsung door seal can stop leaks and prevent mold growth. This guide shows how to replace samsung washing machine door seal safely and effectively, using a compatible gasket kit and common tools. You’ll learn model considerations, safety steps, and a thorough leak test to ensure a long-lasting seal.
Understanding the door seal anatomy and why it leaks
Door seals (often called door boots in front-load washers) are designed to keep water inside the drum during cycles. Over time, heat, harsh detergents, mineral buildup, and repeated opening can cause the seal to crack, tear, or lose elasticity. When the seal fails, you’ll see water around the door opening, damp cabinetry, or a visible tear along the gasket. According to Best Washing Machine, addressing a worn seal early is cheaper and more effective than chasing intermittent leaks. If you’re dealing with a persistent drip or a musty odor, the fix may be to replace samsung washing machine door seal rather than attempting a temporary patch. Before you begin, confirm you have a compatible gasket kit for your exact Samsung model and a clear, dry workspace.
Understanding the seal’s orientation matters: most washers seat the boot around the drum opening and attach it to the door frame with clamps or a retaining ring. Some Samsung models use a spring-style clamp that secures the boot to the tub, while others rely on modern mounting clips. The replacement kit usually includes the gasket, clamps, and sometimes clamps or mounting rings that should be swapped as a complete assembly. Check your model number, since seal dimensions and attachment points can vary between front-load and top-load designs. If you’re unsure, consult the model-specific diagram in the kit instructions or the manufacturer’s site. A properly seated seal prevents water from sneaking behind the panel and prolongs the life of both the tub and door components.
Beyond the seal itself, inspect the surrounding parts: the tub rim for cracks, the door lock assembly for wear, and the boot for hard spots or stiffness. If you notice rust, deep cracking, or signs of water damage around the frame, you may need additional parts or professional service. The goal is a clean install that returns your washer to a fully watertight state. The following steps outline a practical approach you can adapt to most Samsung front-load models.
Compatibility and gasket variants: matching the right kit
Not all door seals are identical, even within Samsung’s lineup. The most reliable path to a successful replacement is to source a gasket kit validated for your exact model number (often found on the washer’s nameplate). A compatible kit typically includes the door boot, clamps, and sometimes mounting rings. If the model uses a specific boot shape or a different mounting method, an incompatible gasket can cause fitment issues or leaks. When selecting a kit, note whether your washer is a front-loader or a top-loader variant; front-load models usually use a large bellows-style boot that snaps into the tub lip and the door frame. Some replacement options also offer a universal boot with adjustable clamps, but these require careful alignment and potentially extra sealant to ensure a watertight fit. If you’re unsure about compatibility, contact the retailer’s support line or reference Samsung’s official parts lookup. A small mistake in gasket size can lead to spillage during the first test cycle, so double-checking fitment is worth the time. In the Best Washing Machine analysis for 2026, model-specific guidance often proves invaluable for DIY repairs like this.
If you decide to use aftermarket seals, read reviews about fit and longevity, focusing on model-scale accuracy and the integrity of the sealing surface. A well-made aftermarket gasket can save money, but a poor-quality seal may crack prematurely or leak at the seam. In any case, you’ll want a kit that includes detailed installation instructions and secure clamps so you can complete the job with confidence. The bottom line: the right gasket is the cornerstone of a leak-free repair, and the right kit saves you time and frustration in the installation phase.
Tools and parts you’ll need, and how to source them
Before starting, gather the essential tools and the seal kit recommended for your Samsung model. A common replacement project uses a replacement door seal (gasket) tailored to front-load washers, as well as basic hand tools. Here is a practical checklist to keep by your work area. Keep towels handy to catch any residual water during the swap. The goal is to have everything ready so you can complete the job in one sitting without tracking down parts mid-project. The following items are typically necessary: replacement door seal kit (Samsung front-load appropriate), screwdriver set (Phillips and flathead), needle-nose pliers or locking pliers, utility knife or scissors, bucket and absorbent towels, cleaning cloths, isopropyl alcohol for surface prep, and, if the kit recommends it, a silicone gasket sealant. If your kit includes new clamps, use them; if not, reuse the original clamps only if they are in good condition and fit securely. Having a magnetic pickup tool helps retrieve small screws dropped behind the panel. Finally, a camera or phone to document the process can be useful for reassembly references. By preparing these items in advance, you keep the flow steady and reduce the risk of losing fasteners or misplacing the new gasket during installation.
Step-by-step safety and prep: a mindful approach to starting the job
Safety first is non-negotiable with any laundry appliance repair. Begin by unplugging the washer from the power outlet and shutting off the water supply valves to prevent any accidental floods. Move the machine away from the wall to create a clear workspace, then put down a towel or a shallow tray to catch any remaining water. If your model has a bottom access panel, you may need to remove it to access the internal hoses and clamps; refer to the kit’s instructions for location specifics. Wear gloves to protect your hands from sharp edges and use gentle, steady force when detaching hoses and clamps. As you work, take photos of connections before removing them; this reduces guesswork during reassembly. Finally, ensure your work area is well-lit and free from distractions. The objective of prep is to create a predictable environment that minimizes the risk of misplacing components or damaging the tub lip. Best Washing Machine notes that a careful, well-documented approach leads to fewer surprises when you install the new boot.
With power off and water valves sealed, you are ready to access the door seal and begin the removal process. The next section outlines how to safely detach the old seal and prepare the surfaces for the new gasket.
Step-by-step installation: removing the old seal, fitting the new one, and reassembling
Remove the old seal by locating the retaining spring or clamps around the boot and gently prying them loose with your needle-nose pliers. Peel the boot away from the tub lip and note how the seal seats on the tub and door frame. Clean the tub lip and door frame with isopropyl alcohol to remove detergent residue and mineral buildup; this ensures the new seal seats evenly. Align the new gasket so that any embossed orientation marks face inward toward the drum, then slide the boot over the tub lip first, followed by seating it around the door frame. Reattach clamps or springs securely, making sure the seal edge sits flush against the tub and door frame without any twists or folds. If your kit includes new clamps, install them in the same positions as the old ones; if you reuse clamps, ensure they are intact and not stretched. Reassemble the front panel or access panel per the model’s design, reconnect any hoses and the door lock mechanism, and set the panel back in place. Finally, wipe down the area, reattach power, and run a test cycle with towels to verify there are no leaks. If you notice a drip from the seam, stop the machine and reseat the boot, ensuring the gasket sits evenly around the entire circumference.
If the first test cycle reveals a leak, double-check all clamp placements, ensure there are no kinks in the boot, and confirm the gasket surface is clean and free of debris. In some cases, you may need to adjust the boot’s alignment or reapply a small amount of gasket sealant if the kit permits it. The key to a successful installation is patience and meticulous seating of the new door seal.
Time-wise, expect a typical replacement to take about an hour or more, depending on your model’s access, your familiarity with the hardware, and whether any extra steps (like removing the front panel) are required.
Post-installation checks and maintenance: ensuring a long-lasting seal
After installation, perform a thorough leak test. Use a shallow tray or towels around the base and run a short cycle to observe the door seal at multiple points around the circumference. If you see water pooling near the gasket, pause the test and re-inspect the sealing surfaces, clamps, and both ends of the boot. Moisture on the exterior cabinet after the test cycle may indicate a minor misalignment rather than a faulty gasket. For ongoing maintenance, wipe the boot and seal after each load to reduce detergent buildup, and periodically inspect the area for signs of wear such as hairline cracks or hardening at the seal edges. If you notice recurring leaks after several cycles, re-check the installation, ensure the clamps are tight, and consider re-seating the boot. Regular inspection extends the door seal’s life and helps you catch issues before they cause water damage. Best Washing Machine recommends keeping a routine check every few months and addressing any wear early to minimize costly water damage over time.
Authority sources and further reading
For safety guidelines and appliance repair best practices, consult established resources:
- Energy.gov safety basics for home appliances: https://www.energy.gov/
- OSHA guidelines on electrical safety around household appliances: https://www.osha.gov/
- Federal Trade Commission consumer safety and appliance information: https://www.ftc.gov/
These sources provide general safety frameworks that support do-it-yourself repairs while highlighting when to call a professional. Remember, if you’re ever unsure about an electrical or water-related risk, stop, reassess, and seek professional help. Best Washing Machine’s approach emphasizes cautious, informed DIY that protects you and your home.
Tools & Materials
- Replacement door seal kit (Samsung front-load, model-specific)(Includes gasket, clamps, mounting rings; verify compatibility with your exact model number)
- Screwdriver set (Philips and flathead)(Phillips #2 commonly used for front-panel screws)
- Needle-nose pliers(For removing and securing retaining springs/clamps)
- Utility knife or scissors(Cut away old seal edges if necessary)
- Bucket and absorbent towels(Catch residual water and protect the floor)
- Soft cleaning towels and isopropyl alcohol(Clean tub lip and door frame before seating the new seal)
- Silicone gasket sealant (optional, per kit)(Only if the kit or manufacturer recommends it for your model)
- Magnetic pickup tool (optional)(Helpful for retrieving dropped screws)
Steps
Estimated time: 60-120 minutes
- 1
Power down and prep workspace
Unplug the washer, shut off water valves, and move the unit to a clean, dry area. Wipe the floor dry and lay towels to catch spills. This reduces shock risk and makes it easier to work around the plumbing. Why: Your safety and a smooth repair depend on a dry, stable workspace.
Tip: Take a photo of hose connections before you disconnect anything to simplify reassembly. - 2
Access the door seal area
If your model requires it, remove the lower front panel or kickplate screws to reach the door boot clamps. Identify whether the boot is clamped to the tub lip or the door frame. Why: Access is required to detach the old seal without damaging the drum or door components.
Tip: Keep screws organized in a labeled container to avoid mix-ups during reassembly. - 3
Remove the old seal
Loosen and remove the retaining clamps or springs from the boot. Gently peel the boot away from the tub lip and the door frame. Inspect the tub lip for cracks and check the door frame for debris that could prevent a clean seal. Why: A damaged tub lip or leftover debris will cause leaks even with a new gasket.
Tip: Work slowly and avoid tearing the new gasket on sharp edges. - 4
Prepare the mounting surfaces
Clean the tub lip and the inner edge of the door frame with isopropyl alcohol. Remove any detergent residue or mineral buildup that could prevent even seating of the new boot. If there are any nicks, gently sand them or trim rough edges with care. Why: Clean surfaces ensure a uniform seal and prevent leaks.
Tip: Dry the surfaces completely before installing the new gasket. - 5
Install the new door seal
Thread the new boot around the tub lip first, then seat it around the door frame. Attach clamps or springs in the original positions and ensure the seal edge sits flush all the way around. If your kit includes new clamps, swap them in now. Why: Proper seating prevents leaks and extends gasket life.
Tip: Stop installing if you notice kinks—reposition the boot until it sits evenly. - 6
Reassemble and test
Reinstall the front panel and any hoses or connections. Plug in the machine and run a short test cycle with towels in place. Watch for leaks around the gasket. If leaks persist, reseat the boot and recheck clamps. Why: The leak test confirms the installation is watertight before restoring normal use.
Tip: Use a low-water test cycle first to minimize potential mess. - 7
Final checks and maintenance
After a successful test, wipe down the area and schedule periodic inspections of the boot. Keep the area dry and clean to extend the gasket’s life. If leaks recur after several cycles, consider replacing with an OEM gasket or consulting a technician. Why: Ongoing care reduces the chance of future leaks and damage.
Tip: Mark your calendar for a quarterly seal inspection as a proactive measure.
FAQ
Can I replace the door seal myself, or should I hire a pro?
DIY replacement is feasible for many front-load Samsung washers when you have the right gasket kit and basic tools. If you encounter difficult panel removals, a tight space, or uncertain electrical components, consider professional help. Always disconnect power and water before starting.
Yes, you can replace the door seal yourself if you have the right parts and tools, but call a pro if you’re unsure about panel removal or electrical safety.
What are the signs the door seal needs replacement?
Visible cracks, tears, or a misshapen boot indicate replacement. Continuous leaking around the door even after cleaning suggests the gasket may have lost elasticity or alignment. If there’s a musty odor, the seal may be harboring mold due to moisture leaks.
Look for cracks, tears, or water pooling near the door. A musty smell can also indicate mold from moisture leaks.
Do I need to drain the tub before replacing?
Typically not fully drained, but you should minimize remaining water. Shut off the water, unplug the unit, and place towels to catch any remainder. Some models require partial drainage if you remove hoses connected to the tub.
You usually don’t drain the whole tub; just prevent water from spilling by using towels and disconnecting power and water first.
How long does door seal replacement take?
Most DIY replacements take about an hour to two hours, depending on model access to the boot and your comfort with appliance hardware.
Expect roughly one to two hours, depending on access and experience.
Are OEM seals necessary, or can I use aftermarket parts?
OEM seals guarantee exact fit and compatibility but can be pricier. Aftermarket seals can be reliable if the supplier is reputable and the kit specifies your model. Check warranty implications and ensure compatible clamps and rings are included.
OEM parts fit like the original, but a reputable aftermarket kit can work well if it’s listed for your model.
What should I do if the new seal leaks after installation?
First recheck clamp placement and seating around the entire circumference. Ensure there are no twists in the boot and that the tub lip is free of damage. If leaks persist, re-seat the gasket or consider replacing with a different kit or professional help.
If leaks appear, reseat the gasket and verify clamps are tight; otherwise consult a technician.
Watch Video
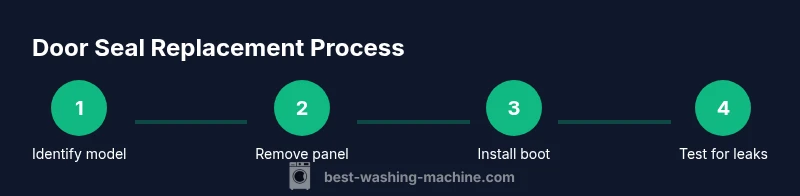
The Essentials
- Identify the exact model to source the correct gasket.
- Prepare by cleaning and protecting the workspace.
- Seat the boot evenly and secure clamps fully.
- Test for leaks immediately after installation.
- Perform regular maintenance to extend seal life.