How to replace washing machine door seal: Step-by-step guide
Learn how to replace a washing machine door seal safely with a complete, model-agnostic approach. This guide covers signs of wear, choosing the right seal kit, tools needed, and a detailed step-by-step process to prevent leaks.

By replacing a washing machine door seal, you’ll stop leaks, reduce odors, and restore drum efficiency. This requires a compatible seal kit, basic tools, and careful alignment. Steps include safely disconnecting power and water, removing the old seal, installing the new kit, and testing for leaks. Follow the step-by-step guidance below for best results.
Why door seals wear out and why replacement matters
Door seals (often called the door boot) in front-loading washers face constant moisture, heat, and detergent exposure. Over time, the rubber material stiffens, cracks, or folds inward, creating gaps through which water can escape. Replacing a worn seal stops leaks, minimizes mold growth, and preserves energy efficiency by keeping the drum sealed during operation. According to Best Washing Machine, the most common failure is a slowly aging seal rather than a dramatic puncture, and proactive replacement saves more expensive repairs later. Before you start, inspect for visible tears, folds that don’t sit flat, and loose clamps around the opening. If you notice rust, torn fabric, or significant deformation, plan a full seal replacement rather than trying to patch a damaged seal. This guide will help you identify the right kit, understand seal types, and approach the job with safety in mind.
Signs you need to replace the door seal
Leaks around the door during or after a cycle are the most obvious sign that the seal is failing. You may notice damp laundry or a persistent musty odor from the washer. Mold growth often forms along folds and crevices where water tends to collect. If the door feels loose, if the glass gasket pulls away from the frame, or if you can see cracks or tears, replacement is recommended. Even minor wear in the gasket can widen with each use, leading to more water damage and higher energy use due to poor sealing. Regular cleaning helps but cannot fix deep cracks; a new seal restores proper compression and prevents water from bypassing the drum.
Types of door seals and compatibility
Most front-loading machines use a rubber door boot that forms a flexible, watertight seal around the door. Some models use a straight gasket, while others have an accordion or bellows-style boot. The replacement process is model-specific: some seals are a single piece that slides into a groove, while others attach with bands or clamps that tighten around the drum opening. When selecting a kit, check your washer’s model number and look for a full boot kit rather than a partial strip. A complete kit will include the seal, clips or springs, and sometimes a repairing tool. If you’re unsure, contact the manufacturer or your local appliance parts supplier.
Planning and safety considerations
Before any disassembly, power down and shut off the water supply to avoid electric shock or a flooded floor. Unplug the machine and, if possible, disconnect hoses at the valves rather than pulling on hoses that connect to the tub. Place towels or a shallow bucket to collect any residual water. Work in a well-lit area on a dry surface and consider asking a friend to assist with lifting panels or guiding the new seal into place. Finally, verify you have the correct model kit; installing the wrong boot is a common source of leaks.
Tools and compatible seal kits you’ll need
A typical replacement involves a genuine or OEM-compatible door boot kit designed for your model. You’ll also need basic hand tools: screwdriver (Phillips and flat), needle-nose pliers, a small pry tool or putty knife, and a soft cloth for wiping the groove. Keep a towel and a shallow tray handy to catch drips. Optional items include rubber-safe lubricant for snug fits and a small flashlight for inspecting tight spots. While some kits can be installed with minimal tools, others may require removing a front panel, so review the instructions that come with the kit.
Step-by-step planning before you start
Take photos of the current setup before you begin to help you reassemble parts correctly. Read the kit’s instructions thoroughly and lay out every piece in the order you’ll use it. Clear space around the washer and place a soft mat beneath to protect the floor. If your model uses clips, magnets, or springs, identify their exact placements. Finally, allocate time for testing and cleanup after installation.
Common mistakes and how to avoid them
Common mistakes include forcing the seal into a groove, which can tear or kink the boot; skipping the proper cleaning of the groove; and neglecting to reinstall clamps securely, leading to leaks. Another error is reassembling panels without verifying the door seals around the entire circumference. Always check that the folded portions of the boot sit evenly and that the seam lines align with the drum opening. Following the kit instructions precisely reduces the risk of leaks.
Testing, cleaning, and final checks after replacement
With the new seal installed, reconnect the power and water supply. Run a low-water or quick cycle with no laundry for a test. Look for any leaks around the door, especially at the bottom and corners of the boot. If you see constant dripping, recheck clamp positions and groove seating. Wipe down the boot to remove any residual cleaners and dry the area to prevent mold. A proper test ensures the seal sits flush and the door closes securely.
Maintenance tips to extend door seal life
Regularly wipe the boot folds with a damp cloth to remove detergent residue and moisture. Use mild cleaners and avoid harsh solvents that can degrade rubber. Dry the area after cycles to minimize mold growth and consider running a monthly maintenance wash on hot with a small amount of vinegar or washer-cleaning product, depending on your manufacturer’s guidance. Storing the machine in a shaded, dry space helps prolong seal life.
Authority sources
- CPSC: Consumer Product Safety Commission - https://www.cpsc.gov
- Energy.gov: U.S. Department of Energy - https://www.energy.gov
- OSHA: Occupational Safety and Health Administration - https://www.osha.gov
Availability and warranty considerations
Replacing a door seal often remains within the scope of home repairs, but some manufacturers require professional service for warranty validity. If your washer is still under warranty, verify coverage before attempting replacement, and retain receipts for the seal kit and any parts. If the model requires a technician, Best Washing Machine recommends using authorized service to avoid voiding coverage. In most cases, using a compatible, model-specific boot kit is essential for a secure fit and long-term performance.
Tools & Materials
- Door seal kit (boot) compatible with your washer model(Includes seal, clamps or springs, and instructions; verify model number)
- Phillips screwdriver(For removing screws securing front panel or door housing)
- Flathead screwdriver or pry tool(Gently loosen clamps and pry up the boot without tearing)
- Pliers (needle-nose)(To loosen or fasten small clamps)
- Putty knife or plastic wedge(Use to release stubborn seal without damage)
- Towels or absorbent cloths(Catch drips and clean the groove)
- Cleaning solution (non-abrasive)(Mild soap or vinegar solution to clean groove)
- Gloves(Protect hands from sharp edges)
- Flashlight(Better visibility in tight spaces)
- Bucket(To transfer any residual water)
Steps
Estimated time: 60-120 minutes
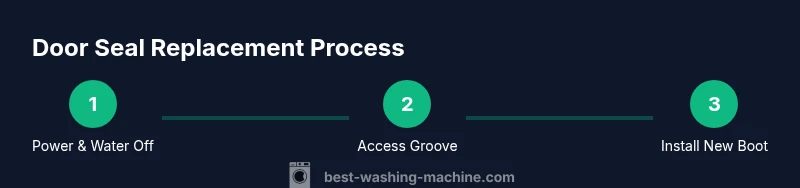
- 1
Disconnect power and water
Unplug the washer and shut off the cold water valve. If you must drain residual water, use the drain hose carefully into a bucket. This prevents electrical shock and floor flooding during disassembly.
Tip: Double-check all power and valve positions before touching any internal components. - 2
Access the door seal groove
Remove the front panel or door boot cover per your model’s instructions. Use a pry tool to release clamps gently and expose the seal groove without tearing the housing.
Tip: Take a few photos during dismantling to guide reassembly. - 3
Remove old seal and retaining hardware
Loosen and remove the clamps, springs, or bands securing the old boot. Gently pull the seal away from the groove to avoid tearing. Discard damaged parts according to local guidelines.
Tip: Keep track of each clip placement for accurate reinstallation. - 4
Clean and dry the groove
Wipe the groove clean with a non-abrasive cleaner and a dry cloth. Ensure there are no detergent residues or mold pockets before fitting the new boot.
Tip: Drying the groove completely reduces seal slippage. - 5
Position the new seal in the groove
Carefully align the boot’s seam and jog the seal into the groove all the way around. Ensure the boot folds sit flat and the printed orientation marks line up with the drum opening.
Tip: If the kit has a guide tab, use it to prevent misalignment. - 6
Secure the seal with clamps or springs
Reinstall clamps, springs, or bands as specified by the kit. Start at a reference point and work slowly around the circumference to avoid gaps.
Tip: Tighten clamps evenly to maintain consistent compression. - 7
Reassemble front panel and housing
Snap or screw the front panel back into place. Confirm all fasteners are tight and that the door closes without binding.
Tip: Avoid overtightening screws which can crack plastic parts. - 8
Test for leaks and finalize
Plug in power, restore water supply, and run a short test cycle with no laundry. Inspect around the door for leaks and re-tighten any loose clamps if needed.
Tip: Keep towels handy during the test in case water escapes.
FAQ
Is it ever okay to replace only part of the door seal?
Generally, you should replace the entire boot kit. Partial patches are unlikely to provide a reliable, long-term seal and may lead to new leaks. If the seal is compromised, opting for a full boot kit ensures proper fit and durability.
Usually you need the full boot kit to guarantee a leak-free seal.
Can I do this repair myself?
Yes, many homeowners replace door seals themselves with the right kit and tools. Follow model-specific instructions, take safety precautions, and test carefully after installation.
Yes, with the right kit and care.
Will replacing the seal void my warranty?
Warranty implications vary by brand. Some manufacturers require authorized service for coverage. Check your warranty terms and retain receipts for parts if you proceed.
Warranty depends on the brand; verify with the manufacturer.
How long does a door seal replacement take?
Most homeowners complete a door seal replacement in about an hour to a couple of hours, depending on model access and how comfortable you are with appliance panels.
Expect about an hour or two, depending on access.
Can I reuse old clamps or springs?
Best practice is to use the new clamps or springs included with the kit. Old hardware can fail and cause leaks even if the boot looks intact.
Use the new hardware for a secure seal.
What should I do if there’s still a leak after replacement?
If leaks persist, recheck seal seating and clamp tension around the entire circumference. Consult the kit’s instructions or contact support if the issue remains.
Recheck seating and clamps; seek help if needed.
Watch Video
The Essentials
- Verify compatibility before buying a seal kit.
- Always disconnect power and water before starting.
- Install the boot correctly and secure clamps evenly.
- Test for leaks thoroughly and clean after installation.