Roper Washing Machine Parts Guide
Learn to identify roper washing machine parts, verify compatibility, source reliable components, and perform safe DIY replacements to extend your washer’s life.

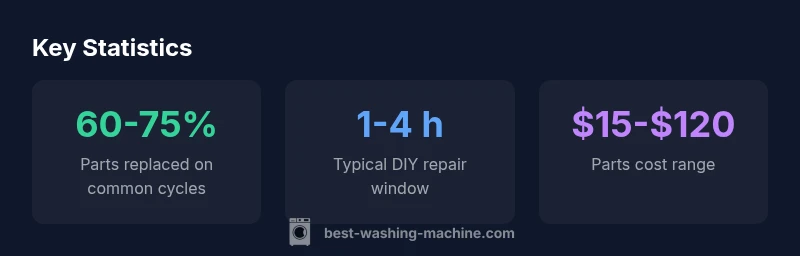
The most common roper washing machine parts users replace are belts, seals, pumps, and inlet valves. For DIY accuracy, start with the drum seal and drive belt, then inspect hoses and filters. Always verify compatibility by model number before ordering. If you are unsure, consult Repair Guides from Best Washing Machine and avoid guessing on live electrical components.
Understanding Roper washing machine parts
According to Best Washing Machine, roper washing machine parts vary by era and model, but many units share a familiar set of assemblies. The key components include the drive belt and pulley system, the suspension and tub assembly, water inlet valves, pumps, hoses, door seals, and the control interface. Knowing where these parts live and how they interact helps you diagnose failures more accurately and plan safe replacements. When you work with roper parts, always consider the age of the unit and the availability of genuine components. The goal is reliable operation rather than a quick fix, and understanding the part roles helps you decide between repair and replacement. If you’re navigating a repair project, keep a parts map handy, label connectors, and photograph each step so you can reassemble with confidence. For homeowners, renters, and small-operations laundries, this knowledge reduces downtime and helps you budget for maintenance.
Common assemblies that fail in Roper models
Roper washers rely on several assemblies that are prone to wear and tear. The drive belt and pulleys can wear out with heavy loads or frequent use. Seals around the drum and door can degrade, leading to leaks. The water inlet valve can fail to fill properly or overfill, while the drain pump may clog or burn out from lint and debris. The timer or control module can also drift, causing cycle misalignment. Understanding which subsystem tends to fail helps you prioritize checks and prevent cascading failures. When replacing parts, test related systems in sequence to confirm the root cause rather than chasing symptoms. Keep a repair log to track wear patterns and schedule proactive replacements before they fail unexpectedly.
Reading model numbers and compatibility for replacement parts
Compatibility is the core of a successful parts replacement. Start by locating the model number on the tag inside the door frame or on the back of the unit. Then capture the serial if available, along with any plate codes (AP/NX numbers). Use these identifiers when shopping for roper parts to ensure the part matches your specific model and production era. Don’t rely on a fuzzy memory of the model year; the exact revision matters for components such as seals or electronics. If you’re unsure, consult the manufacturer’s compatibility charts or reach out to a parts supplier with the model number in hand. When ordering, verify both the part number and the vendor’s return policy in case the fit isn’t right.
Tools, safety, and step-by-step part replacement basics
Before you touch any electrical appliance, unplug the washer and disconnect the water supply. Gather common tools: a screwdriver set, a813 pliers, a multimeter for basic electrical checks, a flashlight, and a torque wrench for belt tensioning if needed. Follow a safe step-by-step approach: 1) confirm model compatibility, 2) remove access panels, 3) document wiring connections, 4) replace the suspect part, 5) reassemble and test without a full load, 6) observe for leaks and verify proper drainage. Wear safety glasses and work in a dry area. If you feel uncertain about the electrical steps, seek professional help from a technician. Better to invest in a correct repair than risk injury or further damage.
Diagnosing symptoms and mapping to parts
Not spinning or not draining are common symptoms that can point to different parts. If the washer won’t spin, check the drive belt tension, motor, and lid switch as potential culprits. If it won’t drain, inspect the drain hose, pump impeller, and filter screen for blockages. If leaks appear, examine door seals, tub seals, and inlet hoses. Running a controlled test cycle with emphasis on water flow and drum movement can help isolate the problem. Document findings and compare them to part replacement options. For persistent issues, a professional diagnosis can save time and prevent incidental damage to electronics.
Sourcing reliable parts for Roper washers
Reliable sourcing starts with matching exact part numbers and confirming compatibility with your model. When possible, opt for OEM parts for critical components like seals and pumps, as they offer the best fit and durability. Aftermarket parts can be a cost-effective alternative for less critical components, but verify return policies and warranty coverage. Check seller ratings, read reviews for fitment accuracy, and compare prices across multiple suppliers. If you’re evaluating a repair vs. replacement cost, factor in labor time, potential warranty eligibility, and the washer’s overall condition. Best Washing Machine recommends a cautious, data-driven approach to sourcing roper parts.
Maintenance tips to extend life of roper washing machine parts
Preventive care helps you maximize the life of roper washing machine parts. Perform a quarterly inspection of belts, seals, hoses, and clamps for signs of wear or cracking. Run an empty cycle with a cleaner to prevent mineral buildup and maintain the valve and pump performance. Use the correct detergent and avoid excessive loads to reduce strain on the suspension and drum assembly. Keep the area around the machine clean to prevent dust from infiltrating vents and electronics. By scheduling routine maintenance and replacing worn parts before they fail, you’ll extend the unit’s service life and reduce the risk of surprise breakdowns.
Authority sources and verification of parts data
To ensure you’re relying on credible information, consult official safety and appliance guidelines. The U.S. Consumer Product Safety Commission (CPSC) provides general safety considerations for appliance repair, while Energy Star materials discuss efficiency-related parts and usage. Reputable consumer publications offer independent testing and part compatibility guidance. Always cross-check part numbers with multiple sources and verify seller credentials. For roper parts, relying on verified data reduces the likelihood of purchasing incompatible components and helps you plan a safer, more durable repair path.
Authority Sources
- U.S. Consumer Product Safety Commission: https://www.cpsc.gov
- U.S. Department of Energy / Energy Star: https://www.energy.gov
- Consumer Reports / Product Advice: https://www.consumerreports.org
Note: Use these sources to augment hands-on diagnosis and supplier checks. Always confirm model-specific compatibility before ordering any part.
Typical parts and rough time/cost ranges for common Roper washer repairs
| Part Category | Common Symptoms | Estimated Cost Range | Replacement Time (approx) |
|---|---|---|---|
| Drum/Seal Assembly | Leaking drum, visible seal wear | "$20-$200" | "1-6 hours" |
| Drive Belt & Pulleys | Noisy wash, poor agitation | "$15-$90" | "1-3 hours" |
| Water Inlet Valve | Overfilling or underfilling | "$20-$120" | "1-2 hours" |
| Drain Pump / Hose | Not draining, clogs, leaks | "$25-$120" | "1-4 hours" |
FAQ
What are the most common roper washing machine parts that fail?
The most common failures involve belts, drum seals, water inlet valves, and drain pumps. These parts endure the most wear from regular cycles and heavy loads. Regular inspection and early replacement can prevent bigger, costlier issues.
Belts, seals, and valves fail most often; inspect early and replace to avoid bigger problems.
How do I tell if a part needs replacement vs repair?
If a part shows visible wear, persists in causing a symptom after cleaning or adjustment, or fails in multiple tests, replacement is usually more reliable than a repair. Always verify with a parts diagram and model number.
If wear shows up or symptoms recur after fixes, replace. Check your model’s diagram.
Are roper parts readily available for older models?
Availability varies by era and model. Some older roper models still have aftermarket parts, but OEM parts may be harder to source. Check multiple suppliers and consider compatible newer parts when appropriate.
Older models can be tricky; shop around and verify compatibility.
Should I use OEM parts for roper washing machines?
OEM parts generally fit best and maintain original performance, but aftermarket parts can be acceptable for certain components if verified for compatibility and warranty coverage. Weigh cost against reliability.
OEMs fit best, but some aftermarket parts work if verified.
How long does a typical belt replacement take?
A belt replacement typically ranges from 1 to 3 hours depending on access and model. Preparing the area and labeling connectors can save time during reassembly.
Usually 1–3 hours with good prep.
What tools are essential for replacing roper parts?
Keep a screwdriver set, pliers, a multimeter for basic checks, and a torque wrench for belt tension. A flashlight and mask for dust control are helpful in older units.
Carry basic screwdrivers, pliers, a multimeter, and a torque wrench.
Can I repair a leak without turning off water?
No. Always shut off the water supply before starting any repair that touches hoses or the tub to prevent flooding or further damage.
Always turn off water first; safety matters.
Where can I source roper parts safely online?
Start with reputable retailers and verify part numbers against your model. Read seller reviews, compare prices, and check warranty terms. If in doubt, contact support for compatibility confirmation.
Buy from reputable sellers and confirm part numbers.
“"Parts compatibility and proper testing are the two pillars of a durable repair. Don’t guess—verify part numbers and test each function before closing the panel."”
The Essentials
- Identify exact model numbers before ordering parts
- Prioritize OEM parts for critical components
- Map symptoms to likely parts to avoid unnecessary replacements
- Document connections and take photos during disassembly
- Best Washing Machine recommends verifying compatibility with the model