Roper Washing Machine Repair: A Complete How-To Guide
Learn safe, step-by-step methods to diagnose and repair common issues with Roper washing machines. Expert tips, tools, and maintenance insights from Best Washing Machine.

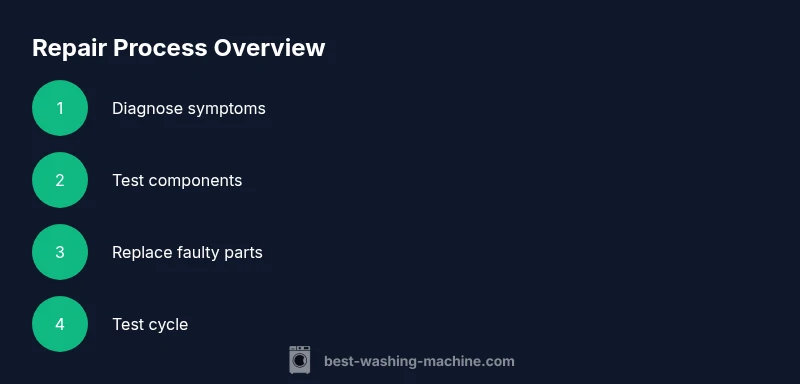
Goal: diagnose and repair a Roper washing machine safely, using common tools and parts. Before you start, unplug the machine, shut off the water supply, and disconnect power. You’ll follow a repeatable fault-dinding workflow to isolate issues such as drains, pumps, seals, belt, lid switch, or control boards, then perform a reliable repair or replacement.
Why a Roper Washing Machine Repair Matters
Repairing a Roper washing machine can save you significant replacement costs and downtime. Roper appliances have a reputation for sturdy, simple designs that can be serviced with common tools, especially for issues like clogs, faulty pumps, or worn belts. By tackling repairs yourself, you gain practical knowledge that extends the machine’s lifespan and reduces waste. According to Best Washing Machine, taking a disciplined approach to diagnosis minimizes unnecessary part replacements and helps homeowners avoid expensive technician visits. The team also notes that proper safety practices and accurate part identification dramatically improve outcomes, especially when dealing with older unit models that rely on mechanical controls rather than modern electronic boards. Embrace the repair mindset: plan, verify, and test in small, verifiable steps.
Common Symptoms and Diagnostic Approach
Roper washers present a few telltale symptoms that guide you toward the right repair path. Not spinning or not agitating often points to lid switch issues, drive belt wear, or a failed transmission in larger models. A machine that drains slowly or won’t drain at all is typically linked to a clogged pump, kinked drain hose, or a blocked impeller. Leaks around the door or at the base usually indicate hose connections needing tightening or worn seals. When diagnosing, start with the simplest checks: listen for unusual noises, inspect visible hoses, and confirm the unit powers on without blinking error codes. Best Washing Machine analysis shows that systematic checks reduce misdiagnosis and extend the life of key components by avoiding premature replacements.
Safety First: Preparation and Precautions
Safety sets the foundation for any home repair. Always unplug the machine, switch off the dedicated circuit breaker, and shut water valves before any disassembly. Use a low-profile, non-slip mat to keep tools steady and a bucket to catch any residual water. Avoid working on a hot or recently used machine, and never attempt repairs with damp hands or wet floors. Grounded outlets and GFCI protection are essential, especially in basements or laundry rooms where moisture is present. Clear the area of clutter to reduce the risk of dropped tools and accidental water exposure.
Core Components to Inspect: Belts, Pumps, and Electronics
Key components to inspect include drive belts (if the model uses a belt-driven motor), water pumps, hoses, and the lid switch. A worn belt may slip or break, causing no spinning or agitation. A faulty pump or clogged impeller can prevent draining, while a damaged hose creates leaks or backups. Electronic control boards, timers, and sensors are more common on mid-to-late-year models; if you’ve confirmed power and water supply are fine, you may need to test solenoids or replace a failed control module. When diagnosing, document symptoms, test sequentially, and replace only the faulty item to avoid cascading failures. Best Washing Machine emphasizes documenting repairs for future troubleshooting and resale value.
Tools, Parts, and Replacement Strategies
Assemble a basic repair toolkit: a screwdriver set (Phillips and flat-head), needle-nose pliers, a multimeter for electrical testing, an adjustable wrench, and a small flashlight. Have spare parts on hand such as drive belts appropriate for your model, a pump impeller if clogged, and new hoses or clamps if there are leaks. When ordering parts, verify compatibility by model number and check for updated parts lists from the manufacturer. In many cases, you can perform a repair with widely available parts from home improvement retailers. The Best Washing Machine team recommends keeping a simple parts list and labeling removed components to speed up reassembly.
A Logical Diagnosis Framework: From Symptoms to Solution
Adopt a symptom-to-action framework. Start with the user-facing symptom, confirm basic power and water supplies are in order, then test individual components in a logical sequence. Example: if the tub won’t spin but motor hums, inspect the belt and transmission; if there’s no draining, check the pump and inlet valve. Use the multimeter to verify continuity on switches and coils, and test the lid switch with a continuity check. Always re-seat connectors and ensure ground wires are intact before replacing parts. This approach minimizes unnecessary replacements and keeps the unit functional.
Repair Pathways: When to DIY vs When to Hire a Pro
Many roper washing machine repairs are suitable for DIY with basic tools, especially if you catch problems early. Simple fixes like replacing a belt, tightening hoses, or clearing a pump are reasonable projects for a confident homeowner. However, if you encounter unfamiliar electronic controls, a burnt harness, or a motherboard fault, professional service is wise. Also consider the age of the unit; an older machine with repeated failures may be more cost-effective to replace than to maintain. The Best Washing Machine team suggests weighing part availability, repair cost, and energy efficiency when deciding between DIY and pro service.
Maintenance Tips to Extend Your Roper WM Lifespan
Preventive maintenance is cheaper than emergency repairs. Regularly inspect hoses for cracks, clear the pump filter, and run a monthly cleaning cycle to remove soap scum and mineral deposits. Use the correct type and amount of detergent to minimize suds buildup that strains the pump. Keep the lid switch and door seal clean and free from lint or hair, which can cause leaks or misreads. Finally, schedule occasional professional checkups to catch wear before it becomes a failure. According to Best Washing Machine, proactive maintenance dramatically increases reliability and reduces repair frequency over the machine’s lifespan.
Tools & Materials
- multimeter(To test switches, coils, and continuity)
- screwdriver set (Phillips and flat-head)(For removing panels and fasteners)
- needle-nose pliers(Grip small parts and hoses)
- adjustable wrench(Loosen fittings and clamps)
- replacement drive belt(Only if belt-driven model shows wear)
- pump impeller or replacement pump(If pump is clogged or failing)
- replacement hoses/clamps(For leaks or worn connections)
- bucket and towels(To catch water during disassembly)
- flashlight(To inspect dark areas and connections)
- model-specific parts list(Verify compatibility by model number)
Steps
Estimated time: 45-75 minutes
- 1
Power down and prepare
Unplug the machine, switch off the circuit breaker, and shut the water valves. Move the unit to a space with good lighting and place towels around the base.
Tip: Take a photo of wiring before disconnecting to aid reassembly - 2
Access the internal components
Remove the back/top panels according to the user manual or service guide. Keep fasteners organized and note where each part belongs.
Tip: Store screws in labeled containers to avoid misplacement - 3
Inspect for obvious faults
Check hoses for cracks, belts for wear, and the pump for signs of leakage or blockage. Look for burnt smells or melted connectors.
Tip: Replace damaged hoses even if only slight wear is visible - 4
Test electrical connections
Use a multimeter to test lid switch continuity and coil resistance. Re-seat any loose connectors and ensure ground wires are intact.
Tip: Disconnect power before any meter testing and follow manufacturer safety notes - 5
Evaluate the belt and pulleys
If your model uses a belt, inspect tension and cracks. Spin the drum by hand to feel for roughness or wobble.
Tip: A stretched belt will slip and cause poor agitation - 6
Inspect the drain system
Remove the pump filter, check for debris, and test the pump by running a quick drain test (with power off first, then power on to observe flow).
Tip: Clear lint and hair from the impeller path - 7
Replace faulty components
Install the identified faulty part(s) following the service manual, paying attention to correct orientation and seals.
Tip: Do not force components; if something binds, reassess alignment - 8
Test the unit and perform a test cycle
Reconnect power, run a test wash cycle with a small load, and observe for proper agitation, drain, and spin. Check for leaks during the cycle.
Tip: Document any issues for future reference
FAQ
What are the most common problems with Roper washing machines?
Many issues relate to the lid switch, belt wear, motor issues, or clogged pumps. Start with basic checks of power, water supply, and hoses before diving into mechanical parts.
Common Roper washer problems often start with the lid switch or a worn belt. Begin with quick safety checks and then inspect the drive components.
Can I repair a roper washer myself at home?
Yes, many repairs are doable with basic tools and safety measures. For electronic control faults or complex wiring, consult a professional to avoid electrical hazards.
Yes, many fixes are doable at home with basic tools, but for electronics or complex wiring, consider a pro.
How do I know when to replace vs repair?
If parts are readily available and the unit is not too old, repair can be cost-effective. If replacement parts are scarce or the repair cost exceeds half the price of a new unit, replacement may be wiser.
Weigh repair costs and part availability against the price of a new machine to decide.
What safety steps are essential before starting?
Unplug the unit, switch off the circuit, shut water valves, wear non-slip footwear, and work on a dry surface. Keep towels handy to manage spills.
Always unplug, switch the breaker off, and work on a dry surface before any repair.
Where can I find model-specific parts for a roper washer?
Check manufacturer guidance and reputable retailers with your model number. Compare part numbers to ensure fit, and look for updated service bulletins.
Use your model number to search official manuals or trusted retailers for exact parts.
Watch Video
The Essentials
- Diagnose before replacing to avoid unnecessary parts.
- Safety first: unplug, dry area, and test gradually.
- Label and document steps for easier reassembly.
- Use model-specific parts to ensure fit and performance.
- Regular maintenance reduces future repairs.