Washing Machine Repair Dallas: A Step-by-Step Guide
Learn how to diagnose, safety-check, and repair common washing machine problems in Dallas. A practical, home-friendly guide from Best Washing Machine with tips, tools, and expert pointers for homeowners and renters.

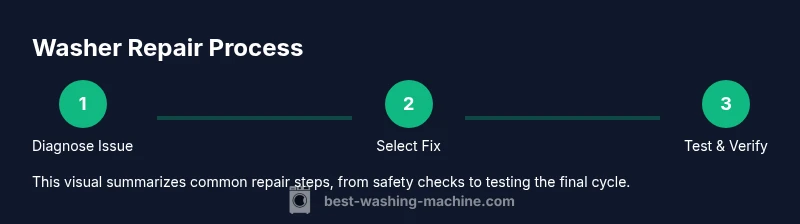
This guide walks you through a practical, step-by-step approach to diagnosing and repairing common washing machine issues in Dallas. You’ll learn safety basics, quick fixes, when to DIY vs. call a pro, and how to maintain your unit to prevent future breakdowns. By the end, you’ll feel confident tackling everyday washer problems with a clear plan.
What washing machine repair dallas entails
Repairing a washing machine in Dallas involves diagnosing hardware or control-system faults, assessing water supply and drainage, and determining whether the issue is safely fixable at home or requires a licensed technician. The Best Washing Machine team emphasizes a methodical approach: verify power, inspect hoses, test cycles, and isolate suspicious components with basic tools. In residential settings, most repairs focus on the pump, belt, drum bearing, lid-switch, or control board. Understanding local conditions—such as high humidity, variable power quality, and tighter living spaces common in Dallas apartments—helps tailor the repair plan. This guide blends practical, hands-on steps with safety reminders to empower homeowners and renters while highlighting when professional help is the wiser choice.
Safety first: unplug, power down, and protect yourself
Before you touch any washer components, unplug the unit from the wall outlet, shut off the supply valve, and drain residual water into a sturdy container. Wear eye protection and gloves if corrosion or sharp edges are present. Keep children and pets away, and place towels around the work area to absorb leaks. If the appliance is in a basement or laundry closet, ensure adequate lighting and good ventilation. Following these precautions aligns with guidance from the Best Washing Machine team and standard safety practices used by professional technicians in Dallas.
Common issues in Dallas-area washers and their likely causes
Several problems recur across homes in Dallas due to age, load patterns, and water quality. Not spinning is often caused by a worn belt (top-load models) or a faulty drive motor. Not draining can point to a clogged pump, kinked drain hose, or a blocked filter. Leaks frequently originate from loose hoses, torn gaskets, or a cracked tub seal. Malfunctions in control boards or lid-switch assemblies disrupt cycle operations. While climate itself doesn’t cause core mechanical failures, humidity can affect electrical components over time and dust accumulation in vents can impact performance in dusty Dallas neighborhoods. The Best Washing Machine analysis highlights that pump, belt, and lid-switch issues are among the most common for residential units.
Diagnosing not-spinning: a practical, safe approach
Start by checking the lid switch (for top-loaders) or door lock (front-loaders) with the tester or multimeter. If the switch is functional, inspect the drive belt for signs of wear or breakage. For belt-driven models, a loose or worn belt will hinder rotation; replace if necessary. On direct-drive machines, listen for motor hum but no rotation, which can indicate a motor fault or failed coupling. Clear the drum area of any clothing obstructions and test with no load to verify spin function. Finally, confirm that the selected cycle actually includes a spin phase and that the spin speed setting isn’t set too low for your fabric. Following these checks will often reveal the root cause without specialized tools.
Routine maintenance to prevent Dallas-specific wear and tear
Develop a simple maintenance routine: inspect hoses for bulges or cracks every 3-6 months, clean the detergent drawer to prevent residue build-up, and run a cleaning cycle monthly with an empty load and hot water. Use appropriate detergents and avoid overloading the drum, which stresses the belt and bearings. In Dallas, where water quality varies by district, consider occasional descaling if you notice mineral buildup, which can impair water flow and pump performance. Regular inspections catch issues early, reducing the likelihood of costly emergency repairs.
When to call a pro: costs, permits, and choosing a service in Dallas
If you encounter persistent leaks, a burning smell, buzzing noises, or if the unit is under warranty, it is wise to involve a licensed technician. DIY fixes carry risk when dealing with electrical components or high-voltage parts. When evaluating local repair services, ask about warranty on parts and labor, get a written estimate, and verify credentials with the Texas State Board of Plumbing Examiners or another local authority as appropriate. The Best Washing Machine team recommends seeking a technician who has experience with your specific model family and who can provide transparent diagnostic charges and a clear parts list.
How to interview a repair technician and set expectations
Prepare a concise problem statement, including model number, observed symptoms, and any recent changes in performance. Ask for a diagnostic fee upfront and request a breakdown of recommended parts and labor. Confirm the expected turnaround time and whether they test the machine post-repair with a full cycle. A good technician will explain the repair steps in plain language, offer safe disposal options for old parts, and provide maintenance tips to extend the life of your washer. Document all recommendations and keep a digital record for future reference.
Tools & Materials
- Multimeter or continuity tester(Use to test switches and motor coils)
- Screwdriver set (Phillips and flathead)(Assorted sizes for panels and screws)
- Nut driver / socket set(12mm and 14mm commonly needed)
- Pliers (needle-nose and locking)(Grip hoses and clamps safely)
- Towels and shallow basin(Contain leaks and collect water)
- Bucket and flashlight(For hard-to-reach areas)
- Drain snake or hose unclogger(If pump or drain clog is suspected)
- Replacement parts on hand (pump, belt, lid-switch)(Only purchase after confirming diagnosis)
Steps
Estimated time: 2-3 hours
- 1
Power down and assess safety
Unplug the washer and shut off the water supply. Remove any standing water with towels, then move the unit away from walls to access hoses. This ensures you won’t get shocked or flood the area during inspection.
Tip: Always confirm power is off with a non-contact tester before touching any components. - 2
Check hoses and filters
Inspect inlet hoses for kinks or bulges and ensure the water valves are fully open. Remove and clean the pump filter or debris screen if present. Reconnect securely to prevent leaks after testing.
Tip: Kinks near the valves are a common, easy fix; replace hoses if there are cracks. - 3
Test spin function with no load
With no clothes in the drum, run a short wash/spin cycle to observe whether the drum spins. Listen for unusual noises that could indicate belt wear or motor failure.
Tip: If the drum doesn’t spin and you hear a grinding sound, stop and inspect the belt and pulleys. - 4
Inspect drive belt (if applicable)
For belt-driven models, remove the back panel and check for wear, cracks, or looseness. Replace the belt if it shows signs of damage; ensure proper tension during reassembly.
Tip: Keep track of belt routing to avoid incorrect reassembly. - 5
Check the lid-switch or door lock
Test the switch with a multimeter. A faulty switch can prevent spinning or filling. Replace if continuity is inconsistent or absent.
Tip: A failing switch is a common cause of partial or no operation; confirm by bridging the switch with caution only if you know what you’re doing. - 6
Test drain and pump flow
If the machine drains slowly or not at all, inspect the drain hose for blockages and remove any debris near the pump inlet. Clear clogs and re-test.
Tip: Never run the pump dry; damage can occur from run-on without water. - 7
Reassemble and test on full cycle
Reattach all panels, reconnect hoses, and perform a full cycle with a small test load. Confirm there are no leaks and the machine completes the cycle.
Tip: Document any parts replaced and monitor performance over the next few uses.
FAQ
What are the most common causes of a washing machine not spinning in Dallas homes?
Common causes include a worn drive belt, faulty lid-switch, or motor issues. Diagnosing usually starts with testing the lid-switch and inspecting the belt, then progressing to motor-related components if those parts are intact.
Most not-spinning problems come from a bad belt, lid switch, or motor issues. Start by checking the switch and belt, then investigate the motor if needed.
Can I repair a leaking washer myself in Dallas?
Yes, many leaks originate from loose hoses, misaligned clamps, or worn gaskets. Tighten connections, replace damaged hoses, and seal seams as appropriate. If you see persistent dripping from the tub area, consult a professional to avoid water damage.
You can often fix leaks by tightening hoses or replacing damaged components. If leaks persist or are from the tub area, call a pro.
How long does a typical repair take in Dallas?
Most common in-home repairs take a few hours, but more complex fixes may require a service visit and parts ordering, potentially extending to a day. Always ask for an estimated completion time before agreeing to service.
Most fixes take a few hours, but some parts may require a follow-up visit. Ask for an estimate first.
What safety precautions should I take for DIY repairs?
Always unplug the unit, shut off water, wear eye protection, and keep children away. Avoid opening high-voltage components and never work on a machine while it’s plugged in if you’re unsure about electrical risks.
Unplug first, then water off and protect yourself. If you’re unsure about electricity, call a pro.
When should I replace instead of repair?
If repair costs approach or exceed a sizable percentage of the washer’s replacement value, or if the unit is repeatedly failing, replacement may be more economical over time. Consider age, energy efficiency, and warranty coverage when deciding.
If fixes add up or the machine is old, replacing may be cheaper in the long run.
Watch Video
The Essentials
- Plan safety-first; unplug and drain before touching any parts.
- Identify whether issues are mechanical (belt, pump) or control-related.
- DIY fixes are viable for common pump and lid-switch problems with proper tools.
- When in doubt, hire a licensed pro to avoid risk and warranty issues.