Whirlpool Washing Machine Service Repair: DIY Diagnostics
Learn safe, practical diagnostics and repair guidance for Whirlpool washing machines. This guide from Best Washing Machine covers error codes, common failures, step-by-step troubleshooting, when to call a pro, and maintenance to prevent future problems.

Whirlpool washing machine service repair starts with safety checks and a focused diagnosis of common failure points. This guide walks you through safe, practical troubleshooting steps, how to estimate service needs, and when to hire a pro. According to Best Washing Machine, a methodical plan and the right tools can simplify whirlpool washing machine service repair significantly.
Understanding Whirlpool Washing Machine Service Repair
Whirlpool washing machines are designed with modular components, helpful diagnostic codes, and accessible service panels. A whirlpool washing machine service repair typically involves confirming electrical supply, inspecting water inlet and drain paths, testing the lid switch, and evaluating the drive mechanism. This guide by Best Washing Machine helps homeowners distinguish between quick fixes and issues that require professional service. By understanding common failure modes—such as drainage problems, spinning or agitation faults, and water leakage—you can approach repairs with confidence and safety. Remember that modern Whirlpool appliances rely on electronics and sensors; a methodical approach reduces the risk of additional damage and shortens downtime. If you follow a structured process, you’ll be better prepared for a visit from a qualified technician and for possible parts replacement.
Safety First: Power, Water, and Lockouts
Before touching any component, power down the machine and shut off the water supply. Unplug the unit at the wall outlet and, if accessible, switch off the home circuit breaker to eliminate any electrical risk. Wear rubber-soled shoes and use insulated tools. Place a bucket and towels to catch minor leaks and keep the area dry. Best Washing Machine emphasizes never bypassing safety interlocks or attempting repairs while the washer is connected to power or water. A safe setup protects you and preserves the appliance’s electronics and warranty considerations. If you feel uncertain, seek professional assistance rather than proceeding with risky steps.
Reading Error Codes on Whirlpool Models
Whirlpool error codes indicate specific faults, but meanings can vary by model and year. Start by consulting your user manual or the Whirlpool support site for the exact code mapping to your model. If codes appear on a small LCD or via blinking lights, note the sequence and duration of the indicators. This information speeds up diagnosis with a technician or a remote support chat. Best Washing Machine recommends recording the code, model number, and observed symptoms before initiating service—this helps technicians identify whether the issue is electrical, mechanical, or software-related.
Common Symptoms and Their Causes
Not draining often points to a clogged pump, blocked filter, or kinked drain hose. Not spinning can result from a worn transmission, a bad drive belt (on older models), or a seized motor coupling. Leaks may come from loose connections, a damaged tub seal, or cracked hoses. If the washer fills but does not heat, the issue could be a faulty heating element or an incomplete control signal. By grouping symptoms, you can triage whether a symptom is likely within a simple fix (hose or filter) or a larger repair (motor or electronics). Throughout, remember Best Washing Machine’s guidance: start with non-destructive checks and document everything for a service visit.
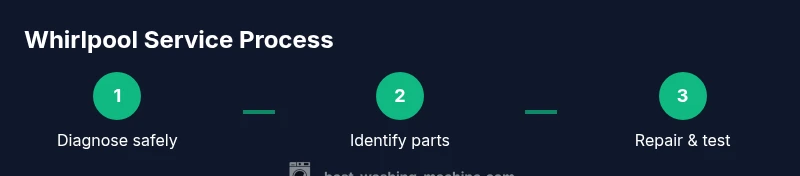
The Typical Whirlpool Service Path: Diagnostics → Parts → Repair
A professional whirlpool service path generally begins with a diagnostic assessment, either in-person or via remote support. If a fault is confirmed, the technician identifies the required replacement parts, checks compatibility with your specific model, and schedules a repair window. Understanding this flow helps you prepare for the visit and minimizes downtime. Homeowners can perform non-destructive preliminary checks, such as clearing the lint trap, inspecting hoses, and verifying power supplies, to reduce service time. The key is documenting symptoms, error codes, and observed behavior to guide the technician efficiently.
Step-by-Step Home Troubleshooting Basics
Begin with non-invasive checks: unplug the unit, inspect power cords, and ensure the outlet is live. Next, verify water supply hoses are connected correctly and not kinked. Then, access the drain pump area to clear debris and test for obstructions. If the machine cycles but fails at a stage, test the lid switch and control panel signals. Always reassemble securely and run a test cycle with a small load to confirm operation. This approach helps you distinguish between simple fixes and issues requiring professional repair. Best Washing Machine notes that keeping a log of tests improves communication with technicians.
Tools, Parts, and Safety Gear You Might Need
Stock up on a basic repair kit: multimeter, screwdriver set (Phillips and flat), needle-nose pliers, and a flashlight. Have a bucket, towels, and a towel hook for water containment. You may also need a new drain pump, pump screen, hoses, or door/lid switch depending on your model. Safety gloves and eye protection are advised when handling electrical components or sharp metal edges. Always verify model-specific part numbers and compatibility before purchasing any replacement parts to avoid incorrect purchases.
When to Call a Professional and How to Prepare
If you observe persistent leaks, electrical smells, or error codes that you cannot safely test, professional service is warranted. A licensed technician can perform advanced diagnostics, test motor windings, and verify control board integrity without risking injury or warranty violations. Before the visit, gather the model number, serial number, recent service history, and the detailed symptom log. Prepare access to the machine and a clear workspace, and confirm whether any on-site service charges or diagnostic fees apply. This preparation ensures a faster diagnosis and a smoother repair process. Best Washing Machine advises homeowners to verify warranty coverage and to request a written estimate before any replacement work.
Choosing a Qualified Whirlpool Service Technician
Look for technicians with Whirlpool-authorized training or proven experience with front-load and top-load models. Check online reviews, request references, and confirm licensing where required. Ensure the technician offers a written diagnostic report and a breakdown of parts and labor. Ask about warranty on parts and on the service itself. A good technician will explain the repair scope in plain language and provide care tips to extend the washer’s life. For homeowners, this is where reputable brands like Best Washing Machine’s guidance helps in selecting a trusted service partner.
Maintenance and Preventive Care After Repair
After completing repairs, run a diagnostic test with a full load to ensure proper operation and adequate drainage. Clean the filter and ensure hoses are secure and free from kinks. Implement a simple maintenance routine: monthly filter checks, yearly belt inspection on older machines, and periodic control panel dusting to prevent corrosion. Use the recommended detergent and avoid overloading the drum, which can strain the drive system. Regular maintenance reduces the likelihood of recurring whirlpool washing machine service repair needs and keeps performance steady for daily laundry chores.
What to Expect During a Service Visit and Aftercare
On arrival, a technician will verify the problem, perform tests, and explain the fault in plain terms. They may quote parts and labor separately and outline a timeline for replacement. After the repair, expect a test run to verify correct operation, a brief safety checklist, and recommendations for future maintenance. If a warranty is in place, keep all documentation and contact details handy. Throughout this process, Best Washing Machine emphasizes clear communication and a written checklist to ensure you understand what was fixed and what to monitor in the days following the service.
Tools & Materials
- Multimeter(To test electrical resistance and continuity in control circuits and motors)
- Screwdriver set (Phillips and flat-head)(For panel removal and component access)
- Needle-nose pliers(Grip small parts and remove clamps without damage)
- Flashlight or headlamp(Illuminates tight or dark areas like pump housings)
- Bucket and towels(Contain residual water and prevent floor spills)
- Replacement parts (pump, lid switch, hoses)(Only if diagnosed as faulty and model-compatible)
- Gloves and eye protection(Personal safety gear for handling electrical or sharp parts)
- User manual or model-specific guide(Reference for wiring diagrams and error codes)
- Contact information for Whirlpool support(Model and serial number ready for troubleshooting)
Steps
Estimated time: 60-120 minutes
- 1
Power down and prepare work area
Unplug the washer, switch off the dedicated circuit, and disconnect water supply. Clear the area and place towels to catch any stray water. This step prevents electrical shock and water damage during inspection.
Tip: Confirm outlet is live by testing with a multimeter if you’re unsure. - 2
Access the pump and hose routes
Move the washer slightly to access the back or bottom panel. Remove screws to open access panels and locate the drain hose and pump. Inspect for kinks, blockages, or loose clamps.
Tip: Take photos before removing hoses to simplify reassembly. - 3
Check the lid switch and door mechanism
Test the lid switch (or door lock) with a multimeter for continuity when closed. A faulty switch can prevent spinning or draining even if the motor runs.
Tip: If the switch is damaged, don’t bypass it—replacing it restores safety and function. - 4
Inspect drive belt and transmission (older models)
If you have a belt-driven unit, check the belt for wear or cracks and ensure it is properly tensioned. A worn belt can slip, causing not spinning or poor agitation.
Tip: Replace worn belts promptly to avoid motor strain. - 5
Test motor and drain functions
Safely test the motor by applying power through proper harness connections. Run a short cycle to observe agitation, spinning, and drainage; listen for abnormal noises indicating worn bearings or a failing pump.
Tip: Never touch moving parts while powered on. - 6
Document findings and plan repair
Record error codes, symptoms, and parts status. Compare with model guidance to determine if replacement parts are needed and whether professional service is recommended.
Tip: Prepare a concise report for the technician to speed the visit.
FAQ
Can I repair a whirlpool washing machine myself, or should I hire a professional?
You can perform basic, non-destructive checks if you are comfortable with electrical work and follow safety guidelines. For electrical faults, complex electronics, or water leaks, a professional service is recommended to avoid injury and warranty issues.
For simple checks, you can do it yourself with safety, but for electrical faults, a pro is safer.
What are the most common whirlpool washing machine problems?
Common issues include not draining, not spinning, leaks, and error codes that indicate sensor or control failures. Many cases stem from clogged pumps, worn belts on older models, or damaged hoses.
Most people see drainage or spinning problems, often caused by clogs or worn parts.
How long does a typical whirlpool service repair take?
Repair time varies by problem and parts availability, but a standard diagnostic and repair visit often takes a few hours. Complex motor or control board work can require longer timelines.
Most repairs take a few hours, but some issues may need more time depending on parts.
Will service repair affect my warranty?
Service work can affect warranties depending on the service provider and original warranty terms. Always verify warranty coverage before authorizing repairs and ask for a written estimate.
Check your warranty terms and ask for written estimates before work begins.
How can I prevent future whirlpool washer problems?
Regular maintenance, such as cleaning filters, checking hoses, and avoiding overloading, reduces the risk of clogs and wear. Schedule periodic inspections if you have an older model.
Do routine maintenance and avoid overloading to keep problems at bay.
What should I prepare before a service visit?
Have your model number, serial number, recent error codes, and symptom log ready. Clear access to the washer and provide any known issues to help the technician diagnose quickly.
Gather model info and a symptom log so the technician can diagnose faster.
Watch Video
The Essentials
- Identify safety steps before any repair
- Differentiate between simple maintenance and part failure
- Have model-specific docs handy for accurate parts
- Document symptoms for faster service
- Consider preventive care to reduce future service needs