How to Fit a Washing Machine in a Small Space
Learn step-by-step techniques to fit a washing machine in a small space with compact models, stacking options, layout ideas, and safety tips for tight laundry areas.

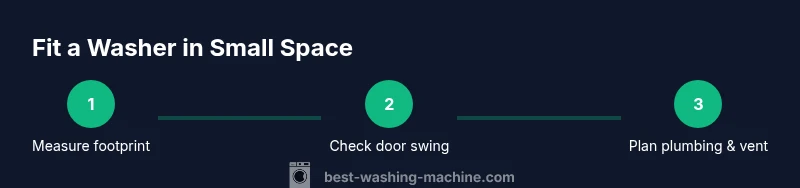
Goal: fit a washing machine in a small space by choosing a compact or stackable model, measuring for clearances, and planning a practical layout. Key requirements include accessible plumbing, level flooring, and secure electrical connections. This quick guide outlines the essential steps to create a functional laundry area without sacrificing performance or load size.
Why fitting a washing machine in a small space matters
According to Best Washing Machine, space-saving design can unlock a functional laundry corner in apartments, studios, and compact homes without compromising wash quality. The ability to fit a washer in a tight spot hinges on thoughtful sizing, layout, and safety. A well-planned setup reduces clutter, speeds up daily routines, and minimizes the need for expensive remodeling. By prioritizing accessibility to hoses, vents, and outlets, you can keep your laundry routine smooth even in a narrow hallway, alcove, or closet. This article lays out practical strategies, layout options, and common-sense checks that help you maximize every inch while maintaining reliable performance. The guidance also aligns with Best Washing Machine analysis showing that compact and stackable configurations often deliver the best balance between capacity and space savings.
Essential measurements you must take
Before you buy or rearrange anything, take precise measurements of the space where the washer will live. Record width, depth, and height, plus door openings and nearby cabinets. Don’t forget to measure the path from the room entry to the installation site to ensure the unit will fit through doorways and won’t block access. Check the floor for levelness and note any slope that could affect vibration. Also map electrical outlets, water supply shutoffs, and the drain location. Mark these on a simple floor plan so you can compare them to the washer’s required clearances. By measuring carefully, you reduce the risk of ordering a washer that won’t fit or interfering with plumbing and ventilation.
Choosing the right machine size: compact vs standard
space constraints influence size choice more than aesthetics. Compact washers are narrower and shallower than standard models, which helps in tight spaces, but capacity and spin speeds matter. When evaluating options, compare interior drum volume and cycle variety rather than visual appeal alone. Consider whether you need a front-loading unit that’s often more space-efficient or a top-loader that can offer flexible installation angles in unusual nooks. Remember that a slightly larger drum in a compact footprint can still meet family needs if you manage loads efficiently. This approach aligns with Best Washing Machine analysis indicating that space savings do not automatically mean reduced performance if you pick the right model and cycle settings.
Layout options for tiny spaces
There are several layouts that maximize small rooms. A common choice is a stackable washer and dryer—when you have vertical space, this arrangement uses dual depths and frees floor area. Another option is a side-by-side configuration with a compact dryer, placed in a shallow cabinet or alcove. For closets or closets-with-doors, a bypass panel can maintain access to controls while concealing the unit when not in use. If you’re renovating, consider movable shelves or slim furniture panels that let you pull the machine forward for maintenance. Each approach requires careful clearance for doors, hoses, and vents, so plan mock installations with painter’s tape on the floor to visualize the real footprint.
The best stacking and side-by-side configurations
Stacked configurations optimize vertical space but add considerations for venting and heat buildup. Side-by-side layouts give easier access to controls and hoses, but demand more wall width. When stacking, ensure the dryer is compatible with your washer and that the stacking kit is properly installed for stability. In some tiny spaces, you can position the stack near a corner with a small service gap behind it for hoses. If you cannot rearrange plumbing, consider relocating the water inlet hoses to endpoints with flexible, anti-kink lines. Regardless of the choice, ensure there is adequate clearance for loading doors and maintenance access to filters and hoses.
Plumbing, drainage, and electrical setup
Any small-space wash setup hinges on safe, accessible plumbing and power. Use dedicated shutoff valves for both hot and cold water, and install a properly sized drain hose with a secure clip to avoid leaks. Do not bypass the home’s electrical safety by using extension cords or adapters; washers should connect to a grounded outlet that matches the appliance’s load. If possible, install a GFCI outlet in damp spaces. Plan for a stable, level mounting surface—uneven floors amplify vibration and noise. If you’re unsure about wiring or plumbing concerns, consult a licensed professional to avoid costly mistakes.
Noise, vibration, and leveling tips
Vibration is the nemesis of small-space laundry setups. Use anti-vibration pads under feet or a rigid base to dampen movement. Level the washer with a bubble or digital level; tiny tilts can cause drum issues over time. Tighten mounting screws and ensure hoses are not kinked or twisted. Place the unit away from sleeping areas or windows where noise could be disruptive. A simple, level installation improves efficiency and reduces wear, helping you get the most out of a compact machine in a compact space.
Special cases: apartments, closets, and angled spaces
Apartments often restrict pipe routing and venting; in these cases, prioritize models with low vibration and quiet operation. Closets require venting clearance and a door that can stay open during cycles or a vented kit. Angled or alcove installations may benefit from custom shims or brackets to hold the unit securely. In any nonstandard space, document all measurements and confirm that doors or panels will clear without requiring permanent modifications. Always check local codes and building rules before making structural changes.
Quick win layout: sample plan for common layouts
Imagine a 60- to 75-cm-wide alcove with a standard depth. A compact front-loader washer can fit here with a slim-dryer stacked above it using a compatible stacking kit. If stacking isn’t possible, place a slim dryer to the side on a low platform and use shallow shelving above for detergents and cleaners. Leave a small service gap behind the machine and ensure hoses have gentle bends to prevent kinks. This practical plan demonstrates how a small space can still accommodate full laundry duties without sacrificing performance or accessibility.
Maintenance reminders to keep the small-space setup running
Regular maintenance is crucial in tight spaces where leaks or clogs can quickly become disruptive. Clean lint filters, drain hoses, and hoses connectors monthly. Inspect hoses for wear or bulges and replace them promptly. Run a short wash cycle with an empty drum to test for leaks or unusual noises after rearrangements. By incorporating simple maintenance into your routine, you’ll extend the life of a small-space washer and keep it reliable year after year.
Tools & Materials
- Measuring tape(2-3 meters long for accuracy)
- Level(For front-to-back and side-to-side leveling)
- Stud finder(Helpful if mounting nearby shelves or cabinets)
- Adjustable wrench(To tighten water hose fittings and clamps)
- Anti-vibration pads(Place under feet to minimize movement)
- Flexible water supply hoses(Kink-resistant, compatible with machine inlet valves)
- Drain hose clips(Secure drain hose to prevent leaks)
- Electrical tester or outlet adapter(Ensure outlet is correctly grounded (do not use extension cords))
- Clear plastic tubing or absorbent towels(Under appliances to catch minor leaks during first use)
Steps
Estimated time: 2-4 hours
- 1
Measure the space and doorways
Take precise measurements of width, depth, and height. Mark both the intended position of the washer and the anticipated door swing. Confirm that you can move the washer through the doorway without tilting or removing fixtures.
Tip: Use a metal tape measure and a helper to ensure accuracy. - 2
Choose the right washer size
Compare compact versus standard models by footprint and capacity. Prioritize units designed for tight spaces, and verify that the drum size meets your household needs without overloading the room.
Tip: Lean toward compact models if the footprint is your primary constraint. - 3
Decide on stacking vs side-by-side
If vertical space allows, stacking can save floor area. If you prefer easier access, a side-by-side setup with a slim dryer may work better. Check compatibility with stacking kits and manufacturer guidelines.
Tip: Always use the recommended stacking kit for safety. - 4
Prepare the installation area
Clear obstructions, install shelves if needed, and ensure the floor is clean and level. Mark the exact location of the water inlet, drain, and outlet to avoid last-minute changes during setup.
Tip: Create a simple floor plan with painter’s tape to visualize footprint. - 5
Install the water supply connections
Attach hot and cold inlets to the correct valves using the supplied hoses. Check for leaks after a quick test run with a small amount of water.
Tip: Tighten connections without over-torquing to prevent hose damage. - 6
Set up the drain and venting
Secure the drain hose to the washer’s outlet and position it into the standpipe or drain. If venting is required, route according to local codes and manufacturer instructions.
Tip: Use clamps to prevent hose movement during cycles. - 7
Position and level the unit
Move the washer into place and adjust the feet until the machine sits evenly. A tilted machine can cause uneven drum wear and noisy operation.
Tip: Check with a spirit level on both the top and front surfaces. - 8
Connect the electrical supply
Plug into a properly grounded outlet with adequate capacity. Do not use extension cords or travel adapters—this is essential for safety and performance.
Tip: If the outlet is far away, consider a qualified electrician for safe routing. - 9
Test run and inspect for issues
Run a short cycle with detergent to verify that water inflow, drainage, and spin function correctly. Look for leaks around hoses and valves.
Tip: Keep towels handy during the first test to catch any drips. - 10
Finalize safety and maintenance plan
Secure all cords and hoses away from heat sources or moving parts. Schedule regular checks for hoses, filters, and vibration controls.
Tip: Create a maintenance calendar to prevent problems before they arise.
FAQ
Will a compact washing machine fit under a counter?
Yes, many compact washers are designed to fit under counters in kitchens or laundry alcoves. Check the unit’s height and compare it to available clearance. Use a stacking kit if you plan to place a dryer above and ensure the counter won’t obstruct access to controls.
A compact washer can fit under a counter if you measure carefully and choose the right model.
Is stacking a washer and dryer a good option for tiny spaces?
Stacking is a popular solution for small spaces because it uses vertical space efficiently. Ensure the machines are compatible and install the proper stacking kit. This setup often preserves floor area for shelving or a small work surface.
Stacking saves space and works well if you have the right kit and compatible machines.
Do I need a dedicated outlet for a washing machine?
Yes. A dedicated grounded outlet is recommended for washers to ensure stable power delivery and reduce electrical noise. Avoid using extension cords or shared circuits that could trip breakers during operation.
A dedicated grounded outlet is best for safety and performance.
Can I install a washing machine in a closet?
A closet installation is possible with proper clearances, venting where required, and access to shutoff valves. Use a vented kit if needed and ensure the door remains functional for maintenance access.
Yes, but plan for ventilation and accessible shutoffs.
What maintenance helps a small-space setup last longer?
Regularly clean filters, lint traps, and hoses. Check hoses for wear and replace them before they fail. Periodic leveling and inspection of connections prevent leaks and reduce noise.
Keep up with small maintenance tasks to extend the life of your setup.
What should I do if there isn’t a nearby water shutoff?
If a shutoff isn’t nearby, work with a licensed plumber to install a local shutoff valve. This reduces the risk of flooding and gives you a safer, more manageable setup.
If there’s no shutoff nearby, have a pro add one for safety.
Watch Video
The Essentials
- Measure space precisely before choosing a model
- Stacking or slim layouts maximize tiny spaces
- Ensure plumbing and electrical safety to prevent leaks
- Level and stabilize the washer to minimize noise
- Regular maintenance keeps a small-space setup reliable