How to Put a Washing Machine on a Balcony: A Practical Guide
Learn step-by-step how to safely move and secure a washing machine on a balcony, including load limits, drainage, ventilation, and electrical safety. This guide covers planning, moisture protection, mounting, and maintenance for a code-compliant balcony installation.

If you’re exploring how to put washing machine in balcony, this guide provides a safe, code-aware path from planning to operation. It covers level bases, moisture safeguards, drainage routing, and electrical safety so you can complete a balcony installation that is stable, weatherproof, and compliant.
Why balcony installations matter for modern homes
For many urban households, the balcony is a valuable extension of living space. If you’ve ever asked yourself how to put washing machine in balcony, you’re not alone. A carefully planned balcony installation can free up interior floor space, reduce clutter, and streamline your laundry routine. Yet balconies introduce unique challenges: exposure to sun, wind, rain, temperature swings, and weight limits that may be different from an interior laundry corner. The Best Washing Machine team emphasizes that safety and compliance come first, followed by practical setup. Before you begin, confirm your building’s rules and any HOA restrictions, and secure written permission if required. With that groundwork, you can approach the task using a clear checklist: base stabilization, moisture control, drainage routing, weatherproofing, electrical safety, and routine maintenance. In this section, we’ll walk you through the essential decisions, provide decision trees for choosing a base and drip protection, and show how to integrate the balcony into your daily laundry workflow. The goal is a dependable, low-maintenance arrangement that remains accessible for loading and unloading, while minimizing impact on neighbors and the structure.
According to Best Washing Machine, starting with the right foundation and protective measures dramatically reduces the risk of leaks, drafts, and equipment movement during cycles. This upfront planning also helps you meet local code requirements and HOA guidelines, which vary by city and building type. If your balcony has a concrete surface, you’ll focus on a rigid base and secure mounting; if it’s a wood deck or tile, you’ll prioritize moisture barriers and edge protection. As you read on, you’ll see how to balance practicality with safety so your balcony laundry setup becomes a reliable part of daily life.
noteAddedToBodyBlock":null
type":"markdown"},{
Tools & Materials
- Level or spirit level(Digital level preferred for precise horizontal alignment on uneven balcony surfaces.)
- Drip tray or waterproof pan(Must be large enough to catch spills and provide edge lip to contain moisture.)
- Waterproof membrane or mat(Optional underlayment for extra moisture protection on porous balcony floors.)
- Anti-vibration pads or mounting brackets(Use thicker pads for high-vibration washers to minimize movement.)
- Flexible drainage hose(Length to reach a balcony drain or exterior drainage point; keep slope away from the unit.)
- Outlet box or weatherproof GFCI outdoor outlet(Outdoor-rated electrical supply; avoid using standard indoor outlets outdoors.)
- Drill and screws(For mounting brackets if you’re attaching a frame or securing the unit to a wall.)
- Measuring tape(Accurate space planning, including door swing and machine clearance.)
- Sealant or weatherproof caulk(Seal edges around the drip tray and any penetrations to prevent moisture intrusion.)
- Shims(Fine-tune level on uneven balcony floors.)
Steps
Estimated time: 2-3 hours
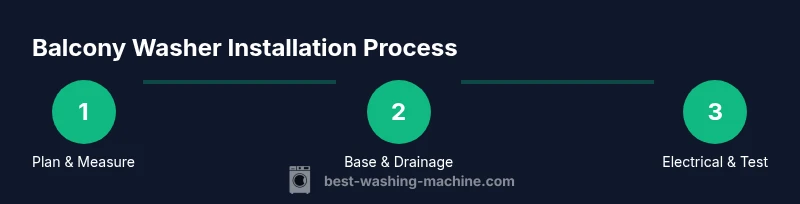
- 1
Measure space and machine
Take precise measurements of the balcony footprint and the washing machine, including height, width, depth, and door clearance. Compare the machine’s dimensions to the available space, and plan for ventilation around the sides. Prepare a simple diagram showing the intended routing for drainage and power.
Tip: Document measurements with photos so you can reference them during placement and when ordering any adapters. - 2
Prepare a stable base
Create a level, rigid base using a concrete slab, raised platform, or thick anti-slip mat. Ensure the base is level in both directions, and that it does not wobble when the washer is moved. This base will reduce vibrations and protect balcony surfaces.
Tip: Check level with a spirit level at the front, middle, and back of the washer area; adjust with shims if needed. - 3
Install moisture protection
Place a drip tray or waterproof pan underneath the washer and, if possible, add a shallow waterproof membrane around the base. Edge seals help prevent water from seeping into joints or balcony gaps, especially during a spill or hose leak.
Tip: Lift the washer slightly to create a small gap for airflow and to prevent trapped water from stagnating. - 4
Position and level the washer
Slide the washer into place, then use leveling feet to stabilize it. Check that the top surface is perfectly horizontal and that there is no side-to-side movement. This minimizes noise and movement during cycles.
Tip: Lock the feet after adjustment and test by giving the unit a gentle shake. - 5
Route drainage properly
Connect the drain hose to a balcony drain or exterior outlet. Elevate the hose to prevent backflow and ensure a clear route without kinks. If your balcony lacks a suitable drain, consider a drain pan with a secondary outlet directed away from the living area.
Tip: Use a hose clip to secure the drain hose and prevent it from detaching during cycles. - 6
Secure electrical safety
Install a weatherproof, outdoor-rated outlet or use a dedicated, GFCI-protected circuit. Keep cords away from moisture and avoid extension cords. Verify the outlet is accessible and protected from the elements.
Tip: Never plug a washing machine into an indoor outlet on an outdoor balcony. - 7
Test run and inspect
Run a short cycle with no clothes to check for leaks, vibrations, and proper drainage. Observe for any moisture seepage around the drip tray and connections. Make adjustments as needed before regular use.
Tip: Have towels handy for early leaks and keep pets or children away during testing. - 8
Create an ongoing maintenance plan
Schedule seasonal inspections of hoses, clamps, and seals, and clean the lint filter regularly. Protect the machine with a breathable cover during extreme weather and when not in use for extended periods.
Tip: Set reminders to check seals and hoses every 3–6 months.
FAQ
Is it legal to place a washing machine on a balcony in my city?
Legality varies by city and building rules. Check property management agreements, HOA guidelines, and local electrical and plumbing codes before proceeding.
Rules vary by city; check with building management and local codes before installing a balcony washer.
What type of base should I use for balcony installation?
Choose a rigid, level base such as a concrete pad or a purpose-built platform. This minimizes movement and protects balcony surfaces.
Use a solid, level base to prevent wobble and protect the balcony.
Can I use an extension cord for outdoor balcony use?
Outdoor use of extension cords for a permanent appliance is generally discouraged. Use a proper outdoor-rated outlet or a dedicated circuit.
Avoid extension cords; use a weatherproof outlet or dedicated circuit for safety.
How do I prevent leaks when placing a washer on a balcony?
Install a drip tray, route the drainage hose correctly, and test for leaks during the initial run. Check hoses and clamps regularly.
Install a tray, check drainage routes, and test for leaks during the first run.
What maintenance should I perform for a balcony washer?
Regularly inspect hoses, seals, and the drip tray. Clean lint filters, and seasonally protect the unit from extreme weather.
Inspect hoses and seals and clean the lint filter regularly.
Watch Video
The Essentials
- Plan space and permissions before moving a washer outdoors
- Use a level, stable base, and moisture protection to prevent leaks
- Route drainage properly and use outdoor-rated electrical supply
- Secure a maintenance schedule to extend the unit’s life
- Follow local codes and best practices for balcony laundry setups