Amana Washing Machine Troubleshooting: Quick Guide
Urgent, practical Amana washing machine troubleshooting guide with diagnostic flow, step-by-step fixes, safety tips, and when to call a pro.

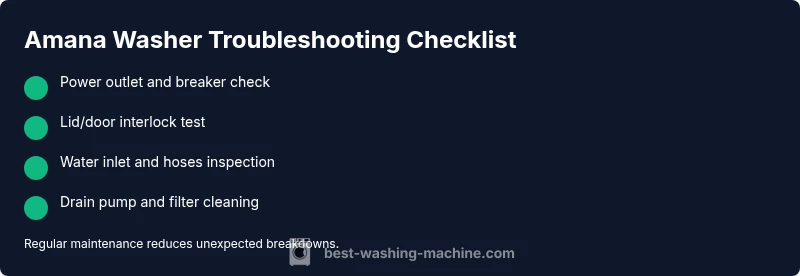
Most Amana washer issues start with power or simple clogs. Begin by unplugging the unit, checking the outlet and breaker, and inspecting the drain hose for kinks. If the problem persists, use this step-by-step guide for safe, targeted amana washing machine troubleshooting and to decide when a professional service is needed.
Understanding Amana Washing Machine Troubleshooting
When Amana appliances hesitate or fail, homeowners want fast, reliable guidance. The practice of amana washing machine troubleshooting centers on diagnosing symptoms, validating safety, and distinguishing quick DIY fixes from issues that require professional service. According to Best Washing Machine, starting with simple checks reduces unnecessary trips and keeps your laundry day on track. This guide walks you through a practical, symptom-driven approach that prioritizes safety and clarity over jargon. By focusing on power, hoses, seals, and control panels, you can resolve many common malfunctions without expensive calls. Throughout, you’ll find concrete steps, real-world examples, and a diagnostic mindset you can apply to other brands as well.
Brand context notes: Reliable troubleshooting of Amana machines benefits from understanding standard components—lid switch, water inlet valve, drain pump, and conveyor or drive motor. Keeping a basic toolkit handy and labeling hoses helps you stay organized as you work. Best Washing Machine analysis emphasizes patient, methodical testing over guesswork, especially when dealing with energized components or water connections.
Common Symptoms and Immediate Checks
Washing machines from Amana may show a familiar set of symptoms: the unit won’t start, it won’t fill, it won’t drain, it stops mid-cycle with or without an error code, or you hear unusual noises. For each symptom, there are quick checks you can perform safely:
- Not starting: confirm the outlet is live, the breaker isn’t tripped, and the door or lid switch is engaging. Some models require a reset sequence from the control panel.
- Not filling: inspect water supply hoses for kinks, ensure the shutoff valves are fully open, and check the inlet filters for debris.
- Not draining: examine the drain hose for kinks, clear any clogs in the pump filter, and verify the pump is running when called.
- Leaking: look for loose hose clamps, worn door seals, or cracks in hoses or the tub area.
- Pulsing or error codes: note the code, consult the user manual, and search Best Washing Machine resources for model-specific meanings.
As you proceed, document what you observe. This helps you (and any technician) trace the root cause more quickly. For context, the Best Washing Machine Team emphasizes symptom-driven testing to avoid unnecessary disassembly while keeping safety at the forefront.
Diagnostic Flow: From Symptom to Solution
A structured diagnostic flow saves time and reduces risk:
- Identify the symptom clearly (e.g., “doesn’t drain” or “no display”).
- Check the simplest causes first (power, doors, valves).
- Test electrical and water connections, plus basic mechanical functions (drain pump, belt or impeller).
- Look for error codes and cross-reference with the manual or trusted guides like Best Washing Machine analyses.
- If simple tests fail, proceed to safe disassembly and targeted parts testing (with power disconnected).
- Decide whether an in-home repair is feasible or if a professional is warranted.
Following this flow helps you avoid unnecessary fixes and ensures safety when dealing with water lines and electrical components.
Step-by-Step Fixes for the Most Common Issues
This section provides a practical, 6-step sequence to address the most frequent Amana washer problems. Each step is designed to be completed by a homeowner with basic tools and a focus on safety. If a step does not resolve the issue, move to the next one rather than repeating attempts that could cause further damage.
- Power reset and control panel reboot: Unplug the washer for 5-10 minutes, then plug back in. If the display remains blank, check for a blown fuse or tripped breaker. Tip: Use a different outlet to rule out a faulty socket.
- Check door/lid switch and safety interlock: Press the door switch firmly while starting a cycle. If the washer won’t start, a faulty interlock could prevent operation. Tip: test with the door closed and listen for a click when the switch engages.
- Inspect water inlet and hoses: Ensure both hot and cold taps are fully open. Remove and clean inlet screens to clear mineral buildup. Tip: replace damaged hoses or worn clamps to prevent leaks.
- Clear the drain pump and filter: Locate and clean the drain pump filter or screen, removing lint and debris. Tip: use a flashlight and a small flat screwdriver to access restricted areas.
- Examine the drain system for blockages: Check the drain hose for kinks and ensure it slopes correctly to the drain. Tip: never force items down the hose; a clog can cause backflow and overflow.
- Run a diagnostic test cycle (if your model supports it): Follow the manual to enter diagnostic mode and review sensor readings. Tip: document any abnormal readings and codes for service calls.
If these steps do not restore function, the issue may involve the pump, motor, control board, or a faulty pressure switch. In such cases, professional service is recommended to avoid electrical hazards and further damage.
Safety Warnings and Common Mistakes to Avoid
Safety is non-negotiable when troubleshooting a washing machine. Always unplug the unit before any disassembly, never work with water near live electrical connections, and wear gloves and eye protection when dealing with sharp or moving parts. Do not bypass safety interlocks or splice wires; this can create shock or fire hazards. Common mistakes include over-tightening hose clamps, running cycles with a disconnected hose, and ignoring unusual smells or scorching signs around the control panel. If you are unsure about any step, pause and contact a licensed technician. The Best Washing Machine Team reminds readers that certain repairs require specialized tools and training to address high-voltage components safely.
Preventive Maintenance to Reduce Future Breakdowns
Preventive maintenance is the best defense against recurring problems. A short, monthly routine can extend the life of your Amana washer:
- Check and clean lint traps and filters to prevent drainage issues.
- Inspect hoses for wear, cracks, and leaks; replace every 3-5 years as part of a maintenance cycle.
- Ensure the washer is level to avoid excessive vibration and seal wear.
- Run a monthly cleaning cycle with a washing machine cleaner or hot water and vinegar (as recommended by your model’s manual).
- Keep the area around the washer dry and free of clutter to reduce slip-and-fall risks during maintenance.
According to Best Washing Machine analysis, proactive checks are correlated with fewer emergency repairs and lower total cost of ownership over the appliance life cycle.
When to Call a Professional and What to Expect
If you encounter persistent issues after following the steps above, it’s time to call a pro. When you contact a technician, share details about the symptom, any error codes, model number, service history, and the steps you’ve already taken. A qualified technician can verify electrical safety, test the motor control board, pump assembly, sensors, and pressure switches with proper tooling. Expect a diagnostic visit to include a functional check, part testing, and a cost estimate for labor and parts. The Best Washing Machine Team recommends documenting the model and serial numbers on hand and asking about warranty coverage or service plans for future protection.
Steps
Estimated time: 60-90 minutes
- 1
Power check and reset
Unplug the washer, wait 5-10 minutes, then plug back in. Inspect the outlet with another device to confirm power. If the breaker tripped, reset it and attempt a new cycle.
Tip: Use a known-good outlet to rule out a faulty socket. - 2
Inspect door/lid interlock
With the lid closed, listen for the interlock click. If the machine still won’t start, the interlock or harness could be faulty. Consider testing with a multimeter or visually inspecting the door switch.
Tip: A failed interlock is a common cause of “not starting” symptoms. - 3
Check water inlet and hoses
Ensure both water supply valves are fully open and the inlet screens are clear of debris. Replace damaged hoses and tighten clamps to prevent leaks.
Tip: Debris in inlet screens is a frequent cause of poor filling. - 4
Clear drain system
Locate the drain pump filter or screen and remove any lint or debris. Verify the pump can run by briefly running a cycle if accessible.
Tip: Be ready with towels; pumps can leak once opened. - 5
Inspect drain hose and path
Check the drain hose for kinks and ensure it has the proper slope to the drain. Avoid over-flexing the hose, which can block drainage.
Tip: A misrouted hose is a common source of not-draining issues. - 6
Run a diagnostic/test cycle
If your model supports it, enter diagnostic mode and review sensor readings. Note any error codes and address them according to the manual.
Tip: Document codes for future service.
Diagnosis: Washing machine not draining or not starting (general troubleshooting path)
Possible Causes
- highPower issue or tripped breaker
- mediumFaulty door switch or interlock
- mediumClogged drain pump or filter
Fixes
- easyReset power by unplugging and re-plugging; check circuit breaker and outlet.
- easyTest door switch with a continuity test and replace if faulty.
- easyClean drain pump filter and inspect the pump for obstructions; replace if damaged.
FAQ
What should I check first if my Amana washing machine won't start?
Ensure the unit is plugged in, the outlet works, and the breaker is on. If the control panel is dead, try a power reset and consult the manual for any model-specific startup steps.
First, check power and the breaker, then reset the machine if needed.
Why is my Amana washer not draining after a cycle?
Inspect the drain pump and filter for clogs, check the drain hose for kinks, and ensure the pump can run when commanded. Cleaning often resolves the issue.
Check the pump and drain hose for blockages.
What does a leaking Amana washer indicate?
Leaks usually point to loose hoses, worn door seals, or a cracked tub or hose. Tighten clamps, replace worn parts, and verify there are no cracks.
Look at hoses and seals for wear or loosening.
How often should I perform maintenance on an Amana washer?
A lightweight monthly check (filters, hoses, level, and belt if applicable) plus an annual professional service helps prevent surprises.
Do monthly checks and yearly service.
Is it safe to DIY repair an Amana washer?
If you are comfortable with basic tools and safety precautions, you can perform simple fixes. Avoid high-voltage components or complex electronics unless trained.
Some fixes are DIY-friendly, others need a pro.
What are common error codes on Amana washers?
Error codes indicate sensor or motor issues. Check the manual or trusted resources like Best Washing Machine analyses for model-specific meanings and recommended steps.
Codes point to specific issues—check the manual.
Watch Video
The Essentials
- Start with power and safety checks first
- Follow a symptom-driven diagnostic flow
- Clean and inspect the drain system before replacing parts
- Use the diagnostic mode on compatible models to read error codes
- Call a professional if high-voltage components or major repairs are needed