Drainage Problem Washing Machine: Quick Troubleshooting
Urgent, practical troubleshooting for drainage problem washing machine faults. Learn common causes, step-by-step checks, and safe fixes to get your washer draining again quickly. Includes a diagnostic flow, prevention tips, and professional guidance from Best Washing Machine.

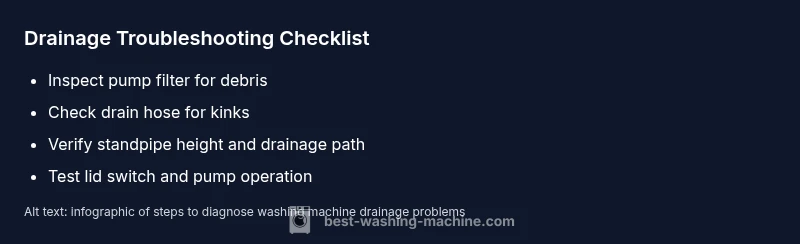
Most drainage problems come from a clogged pump filter or a kinked drain hose. First, unplug the washer and remove the access panel to inspect and clean the pump filter. Next, check the drain hose for kinks or blockages and clear any clogs. Run a rinse to test drainage; if it still won’t drain, inspect the lid switch and impeller.
Understanding Drainage Problems
A drainage problem washing machine issues can derail laundry day, leaving clothes soaked or a tub full of standing water. Signs include a washer that stops mid-cycle with a drainage error, water backing up in the drum, or a loud hum as the pump tries to run. For homeowners, renters, and repair-savvy readers, diagnosing drainage issues starts with a calm, methodical approach. This guide from Best Washing Machine explains why drainage problems occur, how to distinguish likely causes, and safe steps you can take to restore drainage quickly. By following these steps, you reduce the need for urgent service and keep your laundry routine on track. In many cases clean filters and proper hose routing solve the issue without professional help.
The term drainage problem washing machine covers a range of faults—from simple clogs to blocked hoses and faulty switches. The aim here is to give you a reliable, repeatable process: observe, test, fix, and re-test. As you work, wear gloves, unplug the unit before opening access panels, and never work with water near live electrical components. If you ever feel unsure, don’t push beyond safe checks—call a qualified technician.
Common Causes of Drainage Issues
Drainage issues nearly always come down to debris, wear, or routing problems. A clogged pump filter can trap lint, coins, and hair, choking the pump’s impeller. A kinked, collapsed, or blocked drain hose disrupts water flow and can trap water in the tub. The standpipe or household drain line may be partially blocked, or the hose may be inserted too deeply, creating a siphon that prevents proper draining. Less frequent factors include a faulty lid switch that prevents the pump from running, a worn impeller, or a failing control board. Understanding these likely culprits helps you prioritize fixes and avoid replacing parts unnecessarily.
Tip: If you have a high-efficiency model, check for lint filters or secondary screens in the drum or agitator area that may need cleaning. Regular maintenance reduces the odds of sudden drainage failures.
Quick Diagnostic Checklists
Before you start disassembling, perform a quick visual and operational check:
- Run a test cycle with minimal clothes and observe whether water drains properly.
- Inspect the back where the drain hose connects for kinks, bends, or crushing.
- Listen for pump noises: a humming sound can indicate a jam, while a consistent buzz may signal an electrical fault.
- Ensure the drain hose is not inserted deeper than recommended into a standpipe or drain, which can trap air and impede drainage.
- Look for water pooling under or around the machine which could indicate a different issue with the drain or pump area.
If any of these checks reveal a clear culprit, address it first. If not, proceed to safe, hands-on inspections of the pump and hose.
How to Inspect the Pump and Filter
Accessing the pump and filter is a common first step. Unplug the machine, move it out for access, and remove the lower front panel or toe-kick to reach the pump area. Remove and clean the pump filter screen—carefully because it traps coins, lint, and small debris. Rinse the filter under running water and use a flashlight to inspect the pump housing for debris. Reassemble everything, then run a short cycle to verify drainage. If the pump spins and no debris is evident, test the impeller by turning it manually to confirm it rotates freely. A stuck or worn impeller can reduce flow and cause drainage problems over time.
How to Inspect the Drain Hose and Drain System
Examine the drain hose for kinks, twists, or clogs. Disconnect the hose from the washer (and from the standpipe if needed) and run water through it to check for obstructions. Inspect hose connections at both ends for leaks or loose clamps. If the hose is old or crushed, replace it with a new one of the correct diameter for your model. Check the standpipe and drain system to ensure it isn’t blocked or too deep, which can create suction or siphon effects that hinder drainage. Finally, reattach everything securely and run a test cycle.
Other Potential Causes (Lid Switch, Impeller, Electronics)
If cleaning the filter and hose doesn’t restore drainage, consider other possible causes. A malfunctioning lid switch can prevent the washer from draining, particularly in top-load models that rely on the switch to stop the spin cycle. The impeller inside the pump could be worn or broken, reducing water flow. Electronics or control boards may misinterpret sensor input, causing the pump to run improperly or not at all. Testing these components often requires specific tools or professional diagnosis. When in doubt, consult the manufacturer’s service manual for your model and follow safety precautions.
Safety Precautions and Safe Fixes
Safety comes first. Always unplug the washer and turn off any connected water supply before opening panels. Use a shallow tray to catch any residual water when disconnecting hoses. Wear gloves and eye protection if you’re dealing with sharp metal edges or mold. Never run the machine with panels removed or with water spilled on electrical components. If you must lift the machine to access hoses, ensure it is secure and supported. Avoid using aggressive cleaners or solvents near electrical parts. If you encounter live electrical components, stop and call a professional.
When to Call a Professional
If the problem persists after performing the basic checks—especially after cleaning the filter and hose, inspecting the standpipe, and testing the lid switch—it’s time to call a trained technician. Persistent drainage problems can indicate a failing pump, a damaged motor, or a faulty control board that requires diagnostic equipment. A professional technician can safely handle internal testing, verify electrical continuity, and replace worn parts with genuine components. When you call, provide details about what you’ve already tested so the technician can diagnose efficiently.
Prevention Tips to Avoid Recurring Drainage Problems
To minimize future drainage problems, implement a routine maintenance schedule. Clean the pump filter every month or after high-use cycles in households with pets or heavy lint. Check the drain hose for kinks every few weeks and ensure it’s elevated correctly to prevent backflow. Use the recommended detergent and avoid overloading the drum, which can increase lint and debris in the pump. If you frequently notice slow drainage, consider adding a small amount of white vinegar monthly to help clear soap scum buildup. Finally, keep the area around the washer dry and free of clutter to prevent accidental hose damage.
Steps
Estimated time: 25-45 minutes
- 1
Power off and access the filter
Unplug the machine and remove the access panel to locate the filter housing. Use a shallow tray to catch any residual water. Remove the filter cap and pull out any debris with your fingers or a soft brush. Rinse thoroughly under running water.
Tip: Have a towel ready for splashes and work over a basin to keep your workspace clean. - 2
Clean the pump filter
Inspect the filter screen for lint, coins, hair, and fibers. Use warm water and a soft brush to clean all passages. Reinstall the filter ensuring a snug seal to prevent leaks.
Tip: Never force debris through the filter; it can damage the pump if lodged. - 3
Check the drain hose for kinks
Trace the hose from the back of the washer to the standpipe. Remove it from any crimped sections and straighten it. If the hose is cracked or visibly worn, replace it with a new one of the same diameter.
Tip: Avoid bowing or bending the hose; keep it smooth and free from sharp turns. - 4
Test the drain path
Reattach hoses securely, run a short rinse cycle with a light load, and observe drainage. If water still pools or drains slowly, move to the next diagnostic step.
Tip: Watch for air pockets that may indicate a partial blockage. - 5
Inspect the lid switch (top-load)
With the washer unplugged, locate the lid switch at the top edge of the cabinet. Press it manually to see if the switch engages. If it feels loose or doesn’t click, the switch may need replacement.
Tip: A faulty lid switch is a common hidden cause of non-drain issues. - 6
Check the impeller and pump housing
Gently rotate the impeller with your finger to confirm it spins freely. If it’s stiff or wobbly, the impeller or pump seal may be worn and require replacement.
Tip: Only perform this if you’re comfortable opening the pump housing; otherwise skip to professional service. - 7
Reset and test again
Reconnect power, run a test cycle, and monitor drainage. If the issue remains unresolved, record any error codes and consult the manufacturer’s manual or call a technician.
Tip: Note any error codes for faster diagnosis. - 8
Decide on next steps
If the pump and hoses are intact but drainage is still poor, a professional inspection is advised. Persistent problems may indicate a failed pump or control board.
Tip: Document the steps you’ve already tried to help the technician.
Diagnosis: Washing machine won't drain
Possible Causes
- highClogged pump filter or debris in the pump
- highKinked, clogged, or blocked drain hose
- mediumBlocked or restricted drain line or standpipe
- lowFaulty lid switch or electronics
Fixes
- easyClean the pump filter and remove debris from the pump housing
- easyUnkink or replace the drain hose and clear any blockage
- mediumInspect and clear the standpipe/ drain line and ensure proper drain height
- hardTest lid switch and connectors; reset control board or call tech for electronics fault
FAQ
Why won’t my washing machine drain at all?
Drainage can fail due to a clogged pump filter, a kinked drain hose, or a blocked drain line. Start by inspecting the filter and hose, then check the standpipe height. If these steps don’t help, there may be a faulty lid switch or pump.
Common reasons are a clogged filter or hose, then check the standpipe and lid switch if needed.
How do I clean the pump filter?
Unplug the machine, locate the filter access, remove the cap, and pull out debris. Rinse the filter under running water and wipe the housing. Reassemble and run a test cycle to confirm drainage.
First unplug, then remove and rinse the pump filter, reassemble, and test drainage.
Can a blocked household drain affect my washer drainage?
Yes. If the standpipe or household drain is blocked, the washer cannot drain properly. Clear the standpipe, ensure proper height, and avoid using the sink drain for the washer drain.
A clogged standpipe can block drainage; clear and test again.
Is it safe to operate after I’ve opened the pump area?
Only then reassemble completely and ensure all connections are secure. Do not run the unit if water leaks or the panel is loose. If you’re unsure, stop and call a professional.
Reassemble securely; don’t run if you see leaks or if unsure.
When should I replace the pump or control board?
Consider replacement if the impeller is worn or the control board shows repeated error codes after troubleshooting. A professional diagnosis can confirm part failure and provide a safe replacement.
If tests show a worn pump or faulty control board, replacement may be needed.
Watch Video
The Essentials
- Prioritize filter and hose checks first
- Follow a safe, step-by-step diagnostic flow
- Many drainage problems are fixable at home
- Call a professional if the pump or control board is suspected
- Prevent recurrence with regular maintenance