How to Fix a Washing Machine: DIY Repair Guide
Learn to diagnose and fix common washing machine problems at home with a practical, step-by-step approach. Safe, budget-friendly repairs, maintenance tips, and when to call a professional for complex issues.

Goal: Learn how to diagnose and fix common washing machine problems at home, including not draining, not spinning, and leaks. This guide covers safe shutdown, basic tests, and practical repairs you can perform before calling a pro. You'll learn which steps are safe, which parts you can replace, and when to seek professional service.
Why fix a washing machine yourself
Fixing a washing machine can save you hundreds of dollars in service calls and keep your laundry routine on track. When you know the basics, you can handle many common faults such as a washer that won't drain, won't spin, or leaks water during cycles. According to Best Washing Machine, most home repairs fall into a few repeatable patterns: power or water supply issues, clogged drainage, failed interlocks, or worn-out seals. This article teaches you how to diagnose safely and decide whether a problem is within reach or requires professional service. We will walk through symptom-driven checks, a practical toolkit, and a stepwise approach that minimizes risk. Remember that every model is slightly different, so consult your user manual for model-specific wiring diagrams and component locations. The goal is to reduce downtime and extend the life of your washer without voiding the warranty unnecessarily. With patience and careful attention to safety, you can often fix or narrow down the culprit before scheduling a repair.
Safety first: unplug, shut off water, and avoid hazards
Working on a washing machine can involve electricity and water near each other, so safety must come first. Always unplug the machine from the wall outlet before touching any internal parts. If your model uses a dedicated shut-off valve, turn the water supply off and place towels to catch any residual water. Wear protective gloves and use a flashlight to inspect behind panels; never touch live circuits with damp hands. If a test reveals a strong electrical shock or a burning smell, stop immediately and call a licensed technician. Keep children and pets away from the work area. Finally, if you’re unsure about the wiring or voltage, do not proceed—safety is more important than speed.
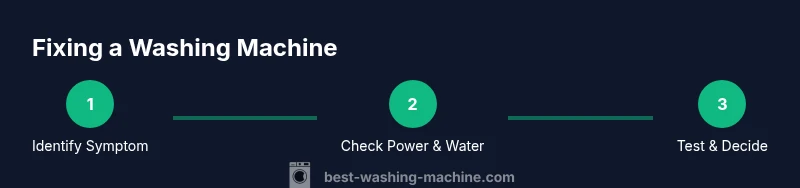
Common symptoms and quick checks that point you in the right direction
Start with symptoms: doesn’t drain, doesn’t spin, leaks, or fails to fill. For each symptom, there is a standard checklist:
- Not draining: check the drain hose for kinks, verify the pump is free of debris, and inspect the screen or filter.
- Not spinning: test the lid switch or door lock, verify the drive belt if applicable, and listen for motor hum.
- Leaks: inspect door seal or tub seal, check hoses, and look for loose clamps.
- Not filling: verify water supply valves are open, inspect inlet screens, and confirm the pressure is adequate.
Carry a small bucket and towels; keep notes of what you see and the order you test. This systematic approach saves time and avoids guesswork.
A practical diagnostic framework for common models
Use a symptom-first framework: identify the exact symptom, validate power and water availability, inspect the relevant component, test continuity or operation, and determine if the fault is a replaceable part or a fault in the control board. This method reduces unnecessary disassembly and helps you document findings for a repair service. Have model-specific manuals on hand for wiring diagrams and part locations, as these details vary by manufacturer.
Maintenance and replacement considerations
When a part fails, you have two paths: repair or replacement. Pumps, door locks, seals, and hoses are common failure points with predictable lifespans. If the component shows metal wear, repeated leaks, or frequent error codes, compare repair costs against a replacement unit or a refurbished component. Always source parts from reputable suppliers and verify compatibility with your model. Keep a parts checklist to avoid buying mismatched pieces, and consider extended warranties for high-use machines in rental or commercial environments.
Quick maintenance routines to prevent future problems
Regular maintenance reduces the chance of surprises. Schedule a monthly rinse of the detergent drawer, inspect inlet screens, and check hoses for cracks. Run a maintenance cycle with hot water and a washing machine cleaner every 1–3 months (per manufacturer guidelines) to prevent deposits. After each load, wipe door seals and check around the base for puddles or dampness. A little preventative care goes a long way in keeping your machine reliable.
Tools & Materials
- Multimeter(Test circuits and control components; accuracy matters)
- Screwdriver set (Phillips & flat-head)(Panel screws and access points; include nut driver if possible)
- Nut drivers / socket wrench set(For hose clamps and pump connections)
- Pliers (needle-nose)(Clamp hoses and grab small parts)
- Bucket and towels(Catch and manage water during work)
- Adjustable wrench(Loosen fittings and drain hoses)
- Voltage tester(Optional safety check for live circuits)
- Protective gloves(Protect hands from sharp edges and hot surfaces)
- Flashlight(Illuminate tight spaces inside panels)
Steps
Estimated time: 60-90 minutes
- 1
Power down and safety check
Unplug the washer and, if available, switch off the dedicated circuit or unplug the breaker. Confirm there is no power at the outlet by testing with a simple device. This step prevents shocks while you inspect electrical components.
Tip: Always test the outlet before touching any wires; safety first. - 2
Gain access to the main components
Remove the rear or front access panel as required by your model. Clear the area around hoses and connections. Photograph or label connections to ease reassembly later.
Tip: Label connectors with tape to avoid mismatches during reassembly. - 3
Inspect the drain pump and hoses
Check the pump for debris and verify hoses are free of kinks. Disconnect and clean the pump screen if accessible. Reconnect hoses firmly to avoid future leaks.
Tip: Never yank hoses; loosen clamps evenly to prevent damage. - 4
Test the lid switch or door lock
Most washers will not spin if the lid switch or door lock is faulty. Use a multimeter to check continuity or temporarily bypass only if you understand the risk. If the switch is dead, replace it rather than bypassing safety features.
Tip: Avoid forcing the switch; a worn switch is a sign of replacement instead of bypass. - 5
Check the drive system and electronics
For direct-drive models, inspect the belt (if present) and the drum for obstructions. Use a multimeter to test control boards or relays if the symptom points there. Document any fault codes and compare with the user manual.
Tip: Fault codes often map to specific components; consult the manual for code meanings. - 6
Reassemble and run a test cycle
Reconnect everything, ensure hoses are secured, and close the panels. Restore power and run a short cycle to confirm the fix. Listen for unusual noises and check for leaks during the test.
Tip: Start with a quick test run before loading a full wash to catch issues early.
FAQ
Can I fix a washing machine myself?
Yes, for common issues like a clogged drain, worn seals, or a faulty lid switch. Use caution with electricity and water, follow a symptom-driven approach, and stop if you encounter unfamiliar wiring or smells.
Yes, you can fix many common issues yourself, but stop if you see unfamiliar wiring or signs of short-circuit risk.
What should I do first when my washer won't drain?
Check the pump and drain hose for clogs or kinks, and verify the pump is receiving power. If unresolved, inspect the filter or screen and consult the manual for model-specific guidance.
First, inspect the drain hose and pump for clogs, then check power to the pump.
How do I know if a pump needs replacing?
If the pump shows visible damage, continuous leaks, or no continuity on testing, replacement is usually needed. Compare replacement cost to a professional repair quote.
Look for damage, leaks, or failed electrical tests to decide replacement.
Is a noisy washer always serious?
Noise can indicate a loose part, worn bearings, or an object in the drum. Run a brief diagnostic to isolate the source and address it promptly.
Noise often points to a loose part or worn bearings; diagnose before continuing.
When should I replace the entire unit?
If repairs exceed a practical portion of the machine’s value or repeatedly fail, consider replacement. Weigh warranty status and energy efficiency when deciding.
If fixes pile up in cost or reliability, replacement may be best.
Are these repairs safe for renters?
DIY repairs can be feasible, but check your lease and warranty. Avoid altering electrical wiring or plumbing in ways that void agreements.
Renters can DIY simple fixes, but avoid dangerous changes that could breach your lease.
Watch Video
The Essentials
- Diagnose by symptom first, not by guesswork.
- Always power down before touching components.
- Keep a tidy workspace and label parts for reassembly.
- Know when a repair is cost-prohibitive and replacement is wiser.
- Regular maintenance prevents major faults.