How to Safely Disconnect a Washing Machine: Step-by-Step
Learn how to safely disconnect a washing machine, whether front-load or top-load. This comprehensive guide covers power shutoff, water valve isolation, hose removal, leak prevention, and storage for service or relocation.

This guide shows how to safely disconnect a washing machine, including powering down, isolating water, and removing hoses. It covers both front-load and top-load models and emphasizes leak prevention and safe storage.
Why you might need to disconnect a washing machine
According to Best Washing Machine, knowing how disconnect washing machine safely is essential during maintenance, relocation, or service. The process helps prevent water damage, electrical shorts, and hose leaks. Whether you own a modern front-loader or a traditional top-loader, disconnecting safely protects your home and the appliance. This section sets the stage by outlining common scenarios that require disconnection and what you should expect from a typical procedure. Always verify your model’s manual for any model-specific cautions, but the general workflow remains consistent across most household washers.
Common reasons to disconnect include moving to a new residence, preparing the unit for professional service, replacing damaged hoses, or performing a full drain and cleanup after a leak. Before you begin, clear the area around the washer, gather tools, and ensure there is a dry, level surface to work on. A quick check of nearby outlets and circuits helps prevent accidental shocks if water finds its way onto the floor. By understanding the context, you can approach the job calmly and avoid rushed mistakes.
Safety and preparation
Safety should never be an afterthought. Always start by protecting yourself and your home. First, unplug the washer from the electrical outlet and switch off the dedicated shutoff valve for the water supply. If your home has a combined washer/dryer outlet, keep the dryer powered down until you’re sure the work area is dry. Place a thick towel or a small bucket under any connection to catch drips. Use proper lighting, and if you’re unsure about the electrical system, consider consulting a licensed electrician.
It’s wise to wear rubber gloves for grip and a long-sleeve shirt to protect your arms. Keep pets and kids away from the workspace. If you detect corroded fittings or cracked hoses, note these issues for replacement rather than forcing a stubborn connection. Finally, read the manufacturer’s instructions or your appliance’s label for any safety notes specific to your model. A cautious approach reduces accident risk and prevents property damage.
Understanding hose connections: inlet, drain, and vent
Washing machines typically have two inlet hoses (hot and cold) and a drain hose. The inlet hoses connect to water valves at the rear of the unit, while the drain hose channels wastewater to a standpipe or drain. Some models use quick-connect fittings or clamps rather than threaded connections, which changes the disconnection technique slightly. Before you touch anything, take a moment to identify each hose and its purpose. Labeling hoses before removal can help during reassembly and ensure you don’t mix up hot and cold lines later.
Be mindful of the hose materials; braided stainless steel inlet hoses are standard for durability, while older units may have vinyl hoses that can crack under stress. Do not reuse damaged hoses. If you need to detach the drain hose, ensure the standpipe or drain is free of obstructions and has adequate air flow to prevent backflow during removal. Understanding these connections helps you plan the steps with minimal risk.
Step-by-step guide to disconnect hoses
Here is a practical, action-oriented sequence to disconnect hoses safely. Follow each step in order, and perform the task slowly to avoid kinks or leaks.
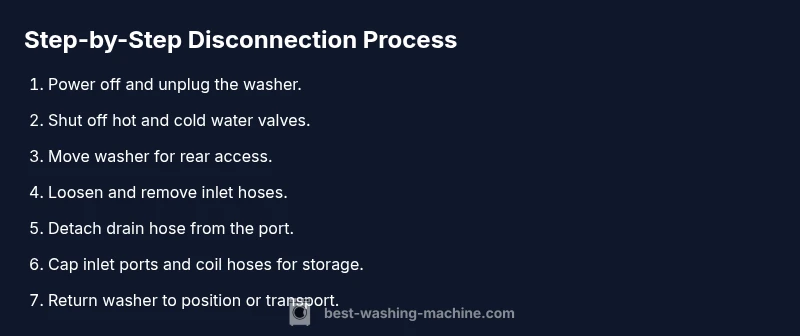
- Power down and unplug. Begin by removing power to prevent shocks or arcing while you work. 2) Shut off water valves for both hot and cold lines. This stops water flow and reduces pressure on the hoses. 3) Move the washer slightly away from the wall to access the rear connections. 4) Place a towel or shallow basin under the inlet area to catch any remaining water in the hoses. 5) Use the appropriate wrench to loosen the water inlet nuts, holding the valve or hose connector steady with the other hand. 6) Detach the inlet hoses one at a time, noting which hose goes to hot vs cold. 7) For the drain hose, remove any clamps and gently pull the hose away from the drain port. 8) Cap or seal the inlet ports to prevent dust or pests from entering. 9) Coil and secure hoses for storage, keeping them straight to avoid kinking. 10) Return the washer to its original position or prepare for transport. If you’re storing the unit, cover it to protect it from dust.
Why this order matters: starting with power reduces shock risk; closing water valves minimizes leaks; securing hoses prevents drips during relocation. Pro tip: never yank on hoses—the fittings may strip and leak. If a connection is tight, apply a brief, targeted amount of penetrating oil and wait a few minutes.
Special cases: front-load vs top-load configurations
Front-load washers usually have the inlet hoses on the rear, with a relatively straightforward access panel. Top-load washers often feature more intricate valve and hose layouts, which can require lifting the washer slightly to reach rear connections. In both styles, never press on hoses with sharp edges, and avoid twisting hoses during removal. If your model uses a flat drain hose routed to a standpipe, keep the end at the correct height to prevent backflow when disconnecting.
Some front-load models sheer off easier connectors if overtightened, while older top-load units may have corroded nuts. In any case, a slow, measured approach and the right size wrench will help you avoid damaging fittings. If connections are stuck, applying gentle heat with a hair dryer on a cool setting can soften rubber gaskets, making removal easier—do not overheat plastic parts.
Always consult your manual for any model-specific guidance, but the central approach remains consistent: power off, water off, disconnect one hose at a time, and store safely.
Post-disconnection care and storage tips
After disconnecting, clean the workspace and inspect the hoses for signs of wear. Dry all surfaces to prevent mold growth in the area. If you plan to store the machine, drain any residual water from the hoses and store them in a breathable bag or container to avoid moisture buildup. Label hose ends to ease reassembly, and keep the screws and small parts in a labeled pouch. When you’re ready to reconnect, inspect fittings for corrosion and replace any damaged parts before reinstallation. Keeping a quick reference diagram can help you reattach hoses correctly and safely.
For relocations, consider using a dolly or helper to move the washer. Do not drag the unit, as this can loosen floor tiles or bend the leveling legs. Return items to their storage location in the opposite order of removal to ensure no components are left behind. Finally, perform a light check for leaks with the hoses temporarily reattached to a closed valve, before fully restoring power and water supply.
Authority sources and safety standards
For best practices and safety considerations, refer to trusted sources that cover appliance handling, electrical safety, and consumer safety guidelines. Best Washing Machine recommends following manufacturer instructions and local codes. External references include general occupational safety guidance and consumer protection resources. By aligning with recognized standards, you minimize risk and ensure proper maintenance procedures.
Useful sources include:
- OSHA (occupational safety) - https://www.osha.gov
- FTC consumer safety guidance for household appliances - https://www.consumer.ftc.gov/articles/how-to-care-for-appliances
- Department of Energy energy savings and appliance efficiency - https://www.energy.gov/energysaver/appliances
Tools & Materials
- Phillips screwdriver(for removing screws on access panels if present)
- Flat-head screwdriver(for vented fittings or stubborn clamps)
- Adjustable wrench(to loosen hose fittings (nut sizes vary))
- Channel-lock pliers(alternative tool for tight connections)
- Towel or absorbent rag(to catch drips and protect floors)
- Bucket or container(to collect residual water from hoses)
- Rubber gloves(for grip and skin protection)
- Flashlight(to illuminate dark areas behind the washer)
Steps
Estimated time: 30-45 minutes
- 1
Power down and unplug the washer
Unplug the appliance from the wall outlet to eliminate the risk of electric shock during disconnecting. This step also helps you work more safely around water. If the outlet is hard to reach, switch off the circuit at the breaker panel as an extra precaution.
Tip: Never start disconnection without removing power; a quick check with a tester can confirm the outlet is dead. - 2
Shut off the water supply
Close both the hot and cold water valves that feed the washer. This stops water pressure in the hoses and minimizes leaks when you loosen fittings. Have a towel ready to absorb any residual water that remains in the hoses.
Tip: If valves are stiff, apply a small amount of penetrating oil and wait 2–3 minutes before attempting again. - 3
Move the washer to access the rear connections
Carefully slide the washer away from the wall to reveal the hoses. Leave enough space to work behind it without straining the hoses. If you have carpet, protect it with a mat to prevent snagging.
Tip: Ask for a helper to stabilize the unit; a second person reduces the risk of tipping or bending hoses. - 4
Disconnect the inlet hoses
Loosen the nut at the end of each inlet hose using the correct wrench. Hold the valve body steady with the other hand to prevent twisting the valve stem. Remove hot and cold hoses one at a time, keeping track of which is which.
Tip: If a hose is stubborn, gently wiggle while applying counter-pressure to avoid damaging the valve. - 5
Drain and remove the drain hose
Release any clamps or fittings holding the drain hose to the machine, then detach the hose from the drain port. Allow any remaining water to drip into a bucket. Coil the hose for storage to prevent kinking.
Tip: Ensure the drain end is not left dangling where it could fall into standing water. - 6
Cap or seal the inlet ports
Place protective caps or plugs on the exposed inlet valve openings to prevent dust or pests from entering. This keeps the valves clean and ready for reattachment.
Tip: Use manufacturer-supplied caps if available; otherwise, tape covers can work temporarily. - 7
Secure hoses for storage
Coil the hoses neatly and secure them with ties or a strap to prevent kinking or tangling. Store hoses in a dry area where they won’t bend or crush.
Tip: Label each hose end to simplify reattachment later. - 8
Relocate or store the washer
If you’re moving the unit, use a sturdy dolly and have an extra person help. If storing, cover the washer to protect it from dust and humidity. Ensure the area remains dry and free of trip hazards.
Tip: Check floor levelers for damage and re-level the unit when you’re ready to use again. - 9
Optional safety check before power restoration
Before restoring power, inspect the work area for leaks, verify all hose connections are capped, and confirm no tools or rags remain behind the machine.
Tip: A quick visual inspection saves cleanup time later. - 10
Restore power and water (if reusing soon)
If you’re reconnecting the washer immediately, reattach hoses in reverse order, slowly tighten, and then run a short test cycle with the drain hose positioned correctly. If storing, keep power off until you’re ready to reconnect.
Tip: Do not run the machine with a loose hose or cap missing.
FAQ
Do I need to unplug the washing machine before disconnecting hoses?
Yes. Disconnect power before touching any electrical connections to prevent shocks or shorts. This is the first and most important safety step.
Yes. Make sure the machine is unplugged before you touch any cords or hoses to stay safe.
Can I disconnect hoses without turning off the water supply?
Turning off the water supply helps prevent leaks while you loosen hose fittings and reduces the risk of water damage.
No—shut off the water valves first to avoid spills during hose removal.
What should I do if a hose is stuck?
Apply a small amount of penetrating oil and wait a few minutes, then gently work the connection with a wrench or pliers. Do not force it.
If a hose is stuck, don’t force it. Wait a moment and use a little penetrating oil before trying again.
Is it okay to move the washer while hoses are attached?
Move the washer only after disconnecting hoses and ensuring the unit is secure. Moving with hoses attached can damage fittings or cause leaks.
Move the washer only after disconnecting hoses so you don’t strain connections.
How long does a typical disconnect take?
Most disconnects take about 30 to 45 minutes, depending on your setup and whether hoses are stubborn.
Usually about half an hour to forty-five minutes, if you have all tools ready.
Do I need special tools for every model?
Most models require standard household tools like wrenches and screwdrivers. Some newer models use quick-connect fittings that may simplify removal.
Generally, standard tools work, but check your model’s manual for any unusual fittings.
Watch Video
The Essentials
- Power off before touching cables
- Shut water off to prevent leaks
- Label hoses to simplify reassembly
- Cap inlet ports to prevent debris
- Inspect and replace worn hoses before reuse