How to Drain a Washing Machine: Step-by-Step Guide
Learn how to drain a washing machine safely and effectively. This expert guide covers prep, tools, troubleshooting, and prevention tips to avoid clogs and leaks. Perfect for homeowners, renters, and repair enthusiasts seeking a reliable drain solution.

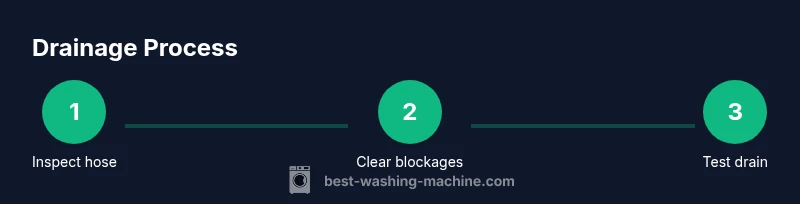
To drain a washing machine, power off and unplug, locate the drain hose, place a bucket or towel under it, and carefully detach the hose from the machine or standpipe. Allow the water to drain, clear any clogs in the hose or filter, reattach securely, and run a quick drain test before resuming a cycle.
Why Drainage Issues Happen
Washing machines rely on a clear path for used water to exit during a cycle. When that path is blocked or restricted, water can back up, leading to not-draining or slow draining. Common culprits include a kinked or crushed drain hose, a clogged lint filter, a blocked pump or impeller, a standing pipe that is full or blocked, and improper installation where the drain height is incorrect. Overloading the drum or using too much detergent can also contribute to foamy water that complicates draining. In many homes, drain problems start with a simple hose kink behind the washer or a clogged standpipe in the laundry room. If you catch drainage issues early, you can often resolve them without professional service. This section explains how to identify which component is most likely at fault and what you can safely do to clear it. It also covers safety considerations to prevent electric shock or water damage while you work.
Safety First and Prep Work
Before you touch any water or electrical components, unplug the machine and turn off the water supply if accessible. Move the washer away from the wall just enough to reach the drain hose and remove any loose items around the area. Place towels on the floor and have a bucket ready to catch dripping water. If your machine is a front-loader, the drain hose will be near the bottom; for a top-loader, check the back panel. Wear gloves to protect your hands, and never reach into the pump area with power connected. If you smell burning or see signs of water leaks from hoses or seals, stop and call a professional.
Common Causes and Quick Fixes
The most common causes of poor drainage are a kinked or crushed drain hose, a clogged lint filter or pump screen, a blocked standpipe or vent, and overloading which creates excessive foaming. Start by inspecting the visible drain hose for kinks or pinches and straighten it. Next, locate the filter or pump screen (often accessible behind a small door or panel) and remove debris. If the machine still won’t drain, check the standpipe or drain connection for obstructions and ensure the hose end leads into a proper receptacle like a standpipe. When tackling clogs, avoid using chemical drain cleaners inside a washer; they can damage components.
Inspect Hose, Filter, and Pump
Carefully pull the washer forward to access the drain hose connections. Detach the drain hose from the washer’s outlet and inspect the interior for lint, hair, coins, or fabric fibers. If you can, remove the filter or access panel and clean the pump screen. Reconnect everything securely and verify that clamps are tight. If you notice a damaged hose, replace it rather than attempting a temporary fix. Always inspect both ends of the hose to ensure a tight seal to prevent leaks.
Manual Drain: When Water Won’t Drain
If water remains in the drum after attempting the above checks, you may need to perform a manual drain. Position a bucket or basin under the hose end, gradually loosen the hose clamp, and allow water to flow into the container. Keep the hose end pointed downward to avoid splashing. Use towels to catch any spills on the floor. After draining, reattach the hose securely and run a short drain cycle to confirm the drum empties as expected.
Preventive Maintenance to Avoid Future Clogs
Routine maintenance goes a long way toward preventing drainage problems. Clean the lint filter or pump screen monthly if accessible. Avoid overloading the drum and use the recommended detergent amount to minimize suds that can back up into the drain. Check hoses for bulges or cracks and replace any aging components. Periodically inspect the drain standpipe and ensure it remains free of debris. Simple inspections and cleaning reduce the likelihood of unexpected drains failures.
When to Call a Professional
If you’ve checked hoses, filters, and connections, and the machine still won’t drain or you notice signs of water leakage, it’s time to call a professional. A licensed technician can diagnose pump failures, electrical faults, or more complex drain system problems that require specialized tools. Prioritize safety; never attempt inside repairs beyond your comfort level, and avoid disassembly that could void warranties.
Tools & Materials
- Drain hose(Ensure it reaches floor drain or standpipe; keep end above floor to avoid backflow.)
- Bucket or shallow basin(Large enough to hold at least 2–3 liters of water.)
- Old towels or rags(Place on the floor to catch spills.)
- Gloves(Protect hands from sharp edges and dirty water.)
- Flashlight(Illuminate the hose interior if you suspect blockages.)
- Screwdriver (flathead or Phillips)(Optional for panel access or hose clamps.)
Steps
Estimated time: 20-40 minutes
- 1
Power down and unplug
Unplug the washing machine from the electrical outlet and switch off any nearby power strips. This prevents electric shock while you handle water and plumbing components.
Tip: Even when unplugging, avoid touching metal parts with wet hands. - 2
Move the washer and locate the drain hose
Gently pull the washer away from the wall to access the drain hose connections at the back or bottom front. Identify where the hose exits the machine and where it connects to the standpipe or drain.
Tip: Take care not to strain electrical cords or water hoses during movement. - 3
Prepare the drainage area
Place a bucket or basin under the hose end and spread towels on the floor to catch spills. Have a secondary container ready in case water drains more quickly than expected.
Tip: Keep a phone or flashlight handy in case you need to inspect hidden areas. - 4
Detach the drain hose securely
Loosen the hose clamp or coupling on the washer and carefully pull the hose from the outlet or standpipe. Direct the end into the bucket or drain.
Tip: Do not yank; go slowly to avoid damaging fittings or causing leaks. - 5
Let water drain completely
Allow the water to flow out fully. If needed, gently squeeze or reposition the hose to improve drainage and prevent backflow.
Tip: Keep the bucket in place and monitor the flow to avoid overflow. - 6
Inspect for clogs and clear
Check the hose interior and any accessible filters for debris. Rinse and remove hair, lint, coins, or fabric fibers. Reassemble only when clean.
Tip: If you find a stubborn blockage, avoid forcing water through; back out and recheck components. - 7
Reconnect and test the drain
Reconnect the hose securely to the washer and standpipe, ensuring clamps are tight. Plug in the machine and run a short spin or drain test to confirm proper operation.
Tip: Watch for leaks at all connections during the test.
FAQ
Why won't my washing machine drain at all?
Common causes include a kinked hose, clogged filter or pump, or a blocked standpipe. Start by inspecting the hose and filters, then test drainage again. If water remains trapped, there could be a pump issue that requires professional service.
Most drains stop because of a kink or clog. Check the hose and filters first, then test. If it still won’t drain, consider calling a technician.
Can I drain into a sink or tub temporarily?
Yes. If you don’t have a standpipe, you can direct the hose into a sink or tub for a temporary drain while you inspect the system. Make sure the end is secured and the water won’t splash back.
Yes, you can drain into a utility sink or tub temporarily while you fix the issue.
How often should I clean the pump filter?
Check and clean the pump filter regularly per your washer’s manual; monthly checks help prevent clogs that cause drainage problems.
Clean the filter as recommended in your manual, typically monthly, to prevent clogs.
What if water keeps backing up after I clear the hose?
If water backs up, the pump could be failing or there’s a more serious drainage issue. Stop using the machine and contact a professional.
If backflow persists after clearing the hose, you may have a pump or internal blockage that requires expert service.
Is it safe to run a test drain after maintenance?
Yes. After reattaching the hose, run a short drain test or a quick rinse cycle to verify that water exits properly without leaks.
Yes, run a quick test drain after maintenance to confirm everything’s working.
Watch Video
The Essentials
- Drainage problems often start with a simple hose kink or filter clog
- Unplug and prep area before handling drains to stay safe
- Thoroughly clean hoses and filters to prevent recurrence
- Know when to call a professional for pump/electrical issues