How Far Should a Washing Machine Be From the Drain? A Practical Guide
Learn how to position your washing machine relative to the drain with code-friendly guidelines. This guide covers distances, hose length, standpipe height, and practical steps to prevent leaks and backflow.

How far should your washing machine sit from the drain? There isn’t a universal distance—the key is a secure, leak-free connection. Ensure the drain hose reaches the standpipe without tension, sits below the washer outlet, and allows a little slack for vibration. Check local codes and manufacturer guidance, then adjust based on hose length and standpipe height.
Why Distance from Drain Matters
The distance between your washing machine and the drain is more than a matter of convenience; it directly affects reliability, safety, and sanitation. If the drain hose is too short or routed with sharp bends, the hose can kink, detach, or siphon water back toward the machine. A poor setup can lead to floor water and mold growth, which creates costly damage over time. Conversely, placing the hose with adequate slack and a direct path reduces strain on the pump, minimizes vibration, and keeps the washer stable during cycles. According to Best Washing Machine, proper placement also helps ensure efficient draining and reduces the chance of backflow. In busy households, a well-planned distance saves time on maintenance and avoids inconvenient interruptions during loads.
Key Plumbing Concepts You Should Know
Before you position the washer, it's helpful to understand a few plumbing basics that influence distance. The drain hose should insert into a standpipe or dedicated drain with a secure seal. The standpipe height (measured from the floor) and the presence of a proper P-trap affect drainage and odor control. A standpipe that’s too short can cause overflows, while one that's too high makes draining sluggish or incomplete. Venting helps prevent siphoning and pressure buildup. While you don’t need a plumbing license to set up a typical home washer, following standard configurations reduces leaks. Best Washing Machine analysis shows that aligning hose length with standpipe height minimizes backflow chances and improves performance.
General Placement Guidelines for Most Setups
- Use the washer’s supplied drain hose and route it in a straight, uninterrupted path to the standpipe or drain.
- Avoid tight bends or kinks; these areas are common leak points and can slow drainage.
- Leave enough slack so the washer can vibrate without pulling on the hose, yet not so much that the hose rests on the floor.
- Ensure the standpipe opening is flush with the hose end and secured with a clamp if required.
- Check that the drain area is clean and dry before running a test load.
In many homes, the ideal distance is determined by hose length, standpipe height, and the space available between the washer and the wall. Always refer to the washer’s manual and local code requirements for exact specifications. Best Washing Machine’s guidance emphasizes arranging connections to reduce strain on the hose and minimize splash.
Scenarios: Common Layouts and Adaptations
- Behind-the-washer wall drain: If the standpipe is close to the back, route the hose straight and avoid long loops.
- Side-drain or sink drain: Use a short hose segment or an approved adapter; ensure no tension.
- Tight spaces in apartments: Consider a shorter hose or a compact washer designed for closer proximity to the drain.
In all cases, ensure the hose reach is sufficient without forcing, and avoid placing the washer too far from the drain, which can increase hose wear and risk leaks. Clear the area so you can monitor connections after the first use.
How to Measure and Verify Before Running a Load
- Measure the distance between the washer outlet and the drain entry and compare to the drain hose length.
- Verify there is slack in the hose and no sharp bends within a few inches of the standpipe.
- Check the drain height: if the standpipe is too high, water may drain slowly; if too low, overflow risk increases.
- Do a dry run with a test load to observe water flow and hose security before full loads.
- Use a level to confirm the washer sits evenly; a tilted washer can put uneven stress on hoses.
Safety, Codes, and Maintenance
- Always unplug the washer before repositioning hoses or openings.
- Confirm the drain system meets local code requirements, including standpipe height and trap requirements.
- Use clamps or ties to secure the hose and avoid accidental disconnection.
- Regularly inspect for signs of wear, cracks, or aging hose fittings and replace as needed.
- If you rent or operate a laundromat, document hose placements and provide floor protection mats.
Troubleshooting If You Notice Leaks
- Check for loose connections at the standpipe and hose clamp.
- Look for kinks or compressions along the hose path.
- Confirm the standpipe is not clogged; a clog can push water back into the washer.
- If leaks persist, temporarily reduce load and test again after reseating hose connections.
- Contact a licensed plumber for complicated drainage issues.
Tools & Materials
- Drain hose (original)(Inspect for cracks; replace if worn)
- Standpipe or drain entry(Ensure compatibility with hose end)
- Clamps or zip ties(Secure hose to prevent dislodging)
- Measuring tape(Measure distances and hose length)
- Level(Check that the washer sits flat)
- Screwdriver (Phillips or flat-head)(Use for securing clamps if needed)
- Bucket or towel(Have on hand for minor spills)
- Marker or tape(Mark reference points)
Steps
Estimated time: 45-75 minutes
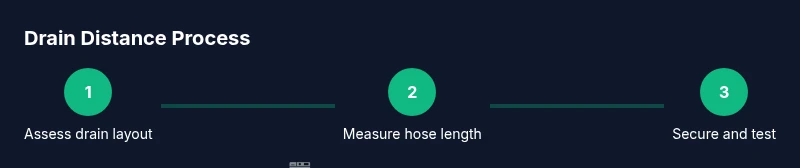
- 1
Assess the drain layout
Survey the room to locate the nearest standpipe or drain entry. Note any obstacles, wall thickness, and cabinet clearances that affect hose routing. This step sets expectations for how far the washer will be placed from the drain.
Tip: Take photos from multiple angles to reference when rerouting hoses. - 2
Measure hose length and space
Measure the drain hose length and the path to the drain. Ensure there is enough slack for movement but not so much that the hose drags on the floor or gets caught.
Tip: If the hose is too long, trim only if the manufacturer allows it or replace with the correct length. - 3
Inspect hose and fittings
Check the drain hose for cracks, bulges, or mineral buildup. Inspect clamps or fittings for corrosion or wear and replace if necessary.
Tip: Replace worn hoses before installation to prevent leaks later. - 4
Position the washer
Move the washer so the outlet aligns with the drain path. Keep the machine level and ensure there is a straight route to the standpipe with minimal bends.
Tip: Have a teammate hold the hose end temporarily to gauge reach. - 5
Secure the drain hose
Attach the hose to the standpipe using a clamp or tie to prevent dislodgement during cycles. Avoid over-tightening, which can damage the connection.
Tip: Leave a small loop near the exit to absorb vibration. - 6
Test with a small load
Run a short wash cycle to observe drainage and check for leaks at connections. Watch for water pooling or backflow around the standpipe.
Tip: Have towels ready and monitor for several minutes after the cycle starts. - 7
Adjust as needed
If you notice drainage issues or leaks, recheck hose alignment, clamps, and standpipe height. Make incremental adjustments rather than rerouting entirely.
Tip: Document the final setup for future reference. - 8
Finalize and verify
Return the area to normal use, wipe down surfaces, and ensure there is no water seepage around the base or cabinet. Schedule periodic checks.
Tip: Set a quarterly reminder to inspect hoses and connections.
FAQ
What is the ideal distance between a washer and the drain?
There is no universal distance; ensure the hose reaches the standpipe with some slack and avoid tension. Follow manufacturer guidance and local codes.
There’s no fixed distance; make sure the hose reaches the standpipe with some slack and check local codes.
Can I extend the drain hose to reach a distant drain?
Only use manufacturer-approved extensions or adapters. Unapproved extensions can create leaks or weak connections and may void warranties.
Only use approved extensions; unapproved ones can leak or fail and may void warranties.
What signs indicate the distance is wrong?
Leaks, water pooling, frequent detaching of hose, or slow drainage can indicate an incorrect distance or a poor connection.
Watch for leaks, pooling, or slow drainage as signs the distance or connections are off.
Does distance differ for front-load vs. top-load?
The basic principle is the same: ensure hose length and standpipe alignment; some differences come from hose design and available clearance.
The principle is the same; focus on hose length and standpipe alignment, with some room-dependent differences.
What should I do if there’s no standpipe in my laundry area?
Consult a licensed plumber or install an approved standpipe per local codes. Improvised setups can cause backflow and leaks.
If there’s no standpipe, talk to a plumber or install an approved standpipe per code.
Should I test the setup before running a full load?
Yes. Run a short cycle to verify drainage, leaks, and hose security before loading a full wash.
Yes—test with a small load to check drainage and hose security before full use.
Watch Video
The Essentials
- Identify the closest, code-compliant drain option.
- Ensure the drain hose reaches with slack and no tension.
- Secure connections to prevent leaks during cycles.
- Test with a small load before full use.
- Regularly inspect hoses and clamps for wear.