Where Is Washing Machine Drain Hose: Location, Setup, and Troubleshooting
Discover where the washing machine drain hose is located, how to connect it safely, and practical tips to prevent leaks and clogs. A data-informed guide from Best Washing Machine.

Where is washing machine drain hose? It is typically at the back of the washer, routed to a standpipe, laundry tub, or floor drain. The hose end should sit inside the drain or standpipe, secured to prevent backflow. Follow your model’s manual, but this setup is common across most homes.
Where is washing machine drain hose located?
If you are asking where is washing machine drain hose, the answer is usually behind the unit, routed toward a standpipe or a nearby drain. This positioning is standard across many household configurations. The drain hose must extend into a properly sized drain opening with enough depth to prevent backflow. A secure setup minimizes movement, which reduces the risk of siphoning and leaks. In most homes, you’ll notice the hose exiting the back of the machine and headed toward a standpipe, laundry tub, or floor drain. If the hose is not easily visible, consult the installation manual or inspect the back panel for the rubber outlet elbow where the hose attaches. Ensuring the hose ends fully inside the drain opening is essential for effective drainage and to avoid standing water around the washer. Keeping the area dry helps prevent mold and odor.
Understanding the exact path of the drain hose is important for future maintenance, so you can plan for hose replacements or upgrades as your system evolves.
How the drain hose connects to different plumbing options
Washing machines can drain into several types of plumbing, depending on your home setup. The most common options are a standpipe, a laundry tub, or a floor drain. Standpipes typically require the hose to be inserted a few inches into the pipe and secured with a clamp to prevent dislodgement. A laundry tub may require a short adapter or a cut-to-length hose that reaches the tub’s drain. In some homes, the drain hose directly empties into a drain opening in or near the floor; in these cases, you should ensure the opening is properly lined and accessible for regular cleaning. Regardless of the option, maintain a straight, unobstructed run with gentle bends to avoid kinks. Remember to verify that the end of the hose remains submerged enough to prevent backflow and to prevent air gaps that can cause poor drainage. If your local codes require an air gap, install one per code guidelines.
Common issues with drain hoses and quick fixes
Drain hose problems commonly arise from kinks, improper routing, or clogs in the standpipe. A crushed hose or a hose routed too high can hinder drainage and create backflow. If water pools around the washer, inspect for kinks at the hose’s outlet, check clamps, and confirm the hose end is fully inserted into the drain. Clogs may occur from soap scum, lint, or debris. A simple fix is to detach and rinse the hose, then run a short drain cycle with the end in a sink to flush any obstruction. For persistent clogs, consider using a flexible snake or a professional cleaning service. Always avoid twisting or forcing the hose; if the hose shows signs of wear, replace it.
Installation best practices: length, elevation, clamps, and siphon prevention
A proper drain hose installation involves choosing an appropriate length, mounting height, and secure connections. Most installations use a hose length of 4–6 feet to reach a standpipe without excess slack that could sag. Position the hose so the end sits below the standpipe rim to prevent siphoning. Avoid sharp bends or crushing the hose against walls or legs. Use a clamp or zip tie to secure the hose to the drain outlet, but ensure the hose can expand slightly during drainage. If your installation requires an air gap, install an approved device and route the hose accordingly. Regularly inspect the hose for cracks or wear and replace it every few years depending on usage and manufacturer guidance.
Maintenance routine to prevent clogs and leaks
Proactive maintenance saves water and prevents flooding. Schedule a monthly visual check of the drain hose and its connections. Look for cracks, loose clamps, or signs of wear on the hose. Ensure the hose end remains fully inserted into the drain and that the standpipe has a proper cap or trap if required. Run a quick test cycle with the hose end submerged to confirm proper drainage and to listen for unusual sounds that may indicate a blockage. If you notice leaks around the hose connection, reseal with a new clamp and ensure the hose is seated properly.
Safety considerations and code compliance you should know
Follow local building codes for drain connections. In some jurisdictions, standpipes must be a certain height and include an air gap to prevent cross-contamination. Always turn off the breaker when inspecting or replacing hoses, particularly near electrical components. Keep the area around the washer dry to avoid slip hazards. If you are unsure about local code requirements, consult a licensed plumber or appliance technician. Properly installed drain hoses reduce flood risk and prolong appliance life.
Drain hose installation basics
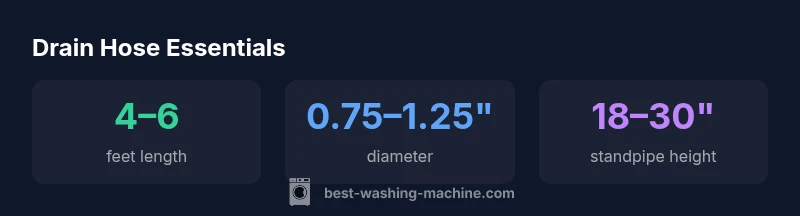
| Property | Typical Range | Notes |
|---|---|---|
| Drain hose length | 4–6 feet | Sufficient to reach standpipe with minimal slack |
| Diameter | 0.75–1.25 inches | Standard for most residential hoses |
| Standpipe height | 18–30 inches | Varies by model and local codes |
| Vent/air gap | Optional but recommended | Check local code requirements |
FAQ
Where is the drain hose located on most washing machines?
Most washers have the drain hose exiting the back panel and routed to a standpipe, laundry tub, or floor drain. If you cannot find it, consult the manual or check for a rubber outlet elbow on the back of the unit.
Most washers have the drain hose at the back, routed toward a standpipe or drain. Check the back panel if you’re unsure.
How high should the drain hose sit above the floor?
A typical guideline is to place the hose so the end is roughly between floor level and about 30 inches high, depending on the standpipe and local codes. Avoid placing it too high to prevent siphoning.
Usually between floor level and 30 inches high, depending on your standpipe. Don’t go too high.
Can I extend the drain hose with an accessory?
Extensions are only recommended if approved by the manufacturer. Improper extensions can cause clogs or siphoning, so follow the manual or consult a professional.
Only extend if the manufacturer allows it. Otherwise, replace with the correct length hose.
What are signs of a blocked drain hose?
Slow draining, water backing up, or gurgling sounds indicate a blockage. Inspect for kinks, lint buildup, or soap scum, and flush the hose if needed.
Look for slow draining, backups, or gurgling. Check for kinks and flush if needed.
Do high-efficiency washers require different drain setup?
HE washers use the same drain principles, but ensure the hose meets manufacturer specs and maintain proper flow to avoid aeration and backflow.
HE washers follow the same drain rules; just ensure the hose matches the specs.
Is an air gap required for all installations?
Air gaps are required in some codes and recommended in others. Check local regulations and use an approved air-gap device if mandated.
Air gaps may be required by code—check local rules and use an approved device if needed.
“"Understanding drain hose routing is essential to prevent leaks, mold, and costly floods. A correct setup starts with a clear path to a proper drain and ends with secure, code-compliant connections."”
The Essentials
- Check the back of the washer for the drain hose outlet
- Route to a standpipe or proper drain with secure connections
- Avoid kinks and high bends to prevent clogs
- Follow local codes for air gaps and standpipe height
- Regularly inspect and replace worn hoses