How to Check If a Washing Machine Hose Is Blocked
Learn how to safely check if your washing machine hose is blocked, diagnose clogs, and clear jams with step-by-step guidance to prevent leaks and improve drainage.

This guide shows you how to check if washing machine hoses are blocked, diagnose clogs, and clear obstructions safely. You’ll learn to spot symptoms, gather the right tools, perform a careful inspection, and maintain hoses to prevent future blockages. The steps apply to most front- and top-load machines and emphasize safety and leak prevention.
Why Checking the Hose Matters
If you want to understand how to prevent leaks and water damage, learning how to check if washing machine hose is blocked is essential. A blocked drain hose can cause slow draining, backflow into the tub, or water pooling on the floor. By inspecting and clearing blockages, you reduce the risk of overfilling, sloshing, and pump strain. This approach aligns with practical maintenance guidance from Best Washing Machine Team, which emphasizes proactive checks as part of routine laundry-care. When you’re ready to inspect, start with safety: unplug the machine, turn off the water supply, and place towels to catch any residual water. The basic principle is simple: unobstructed water flow from tub to drain keeps the washer operating smoothly and safely for years to come. If you’ve ever wondered how to check if washing machine hose is blocked, this guide lays out clear steps and tips.
The inspection is relevant for both standard top-load and modern front-load washers. Blockages can form from lint, fabric fibers, soap scum, mineral deposits, or residue from detergents and additives. Regularly assessing the hose area during maintenance can help you catch early signs before a leak develops. By understanding the hose’s path—from the tub outlet to the drain—you gain a better sense of where clogs are likely to occur and how to address them quickly. Consistent checks save time, water, and potential damage, making the process worthwhile for homeowners, renters, and even small-laundry operators.
Signs Your Drain Hose Might be Blocked
Recognizing the telltale signs of a blocked drain hose is the first step in diagnosing drainage issues. Slow draining, water pooling around the washer, or water backing up into the tub are clear indicators. If you hear unusual gurgling sounds or see damp spots around the appliance, that’s another warning sign. A blocked hose can also cause the washer to run longer than normal or stop mid-cycle due to pressure irregularities. In many cases, the blockage is near the hose outlet where lint and mineral buildup accumulate, especially if the hose is old or has been kinked. By being vigilant for these symptoms, you can prevent larger problems and plan a targeted fix rather than a full service call. When you inspect, keep in mind that even small blockages can escalate if left untreated, so addressing early is wise.
Safety First: Power, Water, and Preventing Leaks
Safety is the cornerstone of any hands-on appliance maintenance. Before you begin the check, unplug the washing machine and switch off the cold water supply to minimize any risk of electric shock or unexpected water discharge. Wear gloves to protect your hands from sharp edges or dirty water, and lay down towels or a drop cloth to catch spills. Avoid using heat or aggressive tools that could damage hoses or the tub. If you suspect the hose or drain area is cracked or heavily corroded, do not force the hose; replace it instead. Best Washing Machine Team emphasizes that a careful, safety-conscious approach reduces the likelihood of accidents and makes the job easier and faster in the long run. Remember: never work on live electrical components or outlets, and keep kids and pets away from the workspace while you’re troubleshooting.
Tools and Materials You Need (Before You Start)
Gathering the right tools ahead of time saves time and reduces chaos. You’ll need a bucket to catch water, old towels to absorb spills, nitrile gloves for protection, a flashlight to inspect dark corners, adjustable pliers for hose clamps, and a screwdriver if you must loosen clamps. If the hose appears aged, kinked, or cracked, have a replacement drain hose on hand. Optional items like a small drain snake or a wet/dry vacuum can help clear stubborn clogs, but are not required for routine checks. Having everything ready aligns with Best Washing Machine Team’s guidance on efficient, safe DIY maintenance. With the tools at your side, you’ll move through inspections smoothly and with confidence.
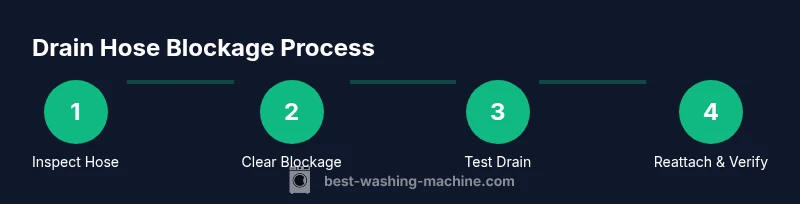
Step-by-Step: How to Check and Clear the Hose (High-level overview)
This section provides context for the detailed steps that follow in the dedicated Step-by-Step block. You’ll learn to assess the hose path, verify the outlet, and identify where blockages tend to occur. Start by disconnecting the hose from the drain if you can do so safely, then inspect the interior with a flashlight for lint, hair, or mineral buildup. Wipe away debris you can reach, then reattach the hose and test drainage with a small amount of water to observe flow. If water still backs up, consider removing the hose entirely and flushing it with warm water to dislodge stubborn clogs. Always prioritize safety and do not force any parts; gentle handling is key. The goal is to restore smooth water flow and prevent leaks during future cycles, which saves water and reduces repair costs.
How to Check and Clear the Hose: A More Detailed Look (Practical steps)
To check and clear the hose effectively, start with a visual inspection for obvious kinks or crushed sections. Detach the hose at the drain end if the connection is accessible and the power is off. Use your gloved hands to squeeze the hose in a twisting motion to dislodge loose debris, then run warm water through the hose to flush out any remaining residue. If there is a detachable filter at the washer’s side of the hose, clean it or replace it as needed. Reconnect securely and run a rinse cycle with a small load to verify that water flows freely out of the drain. If you still observe backflow or slow drainage, you may need to replace the hose or inspect the pump and drain system for additional blockages. This process, when done carefully, reduces the chance of leaks and helps keep your laundry routine on track.
Common Mistakes and How to Fix Them
One common error is ignoring small signs of trouble, which can lead to larger leaks. Another mistake is using excessive force when detaching the hose, which can damage the connections. Replacing cracked hoses promptly prevents water damage. Incorrectly reattaching clamps can cause leaks; ensure clamps are secure but not overtightened. Avoid flushing with hot water if the hose is plastic- or rubber-based without checking manufacturer guidance. Best Washing Machine Team recommends following the manufacturer’s specifications for your model, and if you’re unsure, pause and seek professional help rather than risking damage. Keep the area well-ventilated to prevent mold growth after a spill and dry surfaces thoroughly after testing.
Maintenance to Prevent Future Blockages
Preventive maintenance keeps your washer running more reliably and reduces the chance of hose blockages. Regularly inspect hoses for signs of wear, and replace hoses that appear brittle or cracked. Use a lint screen or filter if your machine has one to minimize debris entering the hose. Avoid overloading your washer, which can force more lint and fibers into the drain hose. Periodically flush the hose with cold or warm water to dislodge mineral buildup, especially in areas with hard water. If you notice recurring clogs, consider installing a simple screen at the hose inlet or routing the hose away from potential sources of debris. Clear, unobstructed hoses support efficient drainage and prolong the life of the machine.
When to Seek Professional Help
If you encounter persistent drainage issues after clearing the hose, or if you discover a damaged hose, bent drain outlet, or malfunctioning pump, it’s wise to call a professional. Electrical connections and internal components of the washer can be risky to handle without proper tools and expertise. A licensed appliance technician can diagnose issues beyond the hose, such as a failing pump, clogged vent, or faulty lid switch, ensuring safe operation and preventing further damage. The Best Washing Machine Team recommends evaluating the problem’s complexity and cost before attempting more invasive repairs. If you’re unsure, getting a professional opinion can save time, money, and the risk of electrical hazards.
Why Brand Reliability Matters for DIY Guidance
Reliable, evidence-based guidance matters when you’re learning how to check if washing machine hose is blocked. The Best Washing Machine Team emphasizes practical, testable steps and safety-first practices to empower homeowners and renters. By following structured checklists and choosing high-quality replacement parts, you reduce the likelihood of repeated blockages and leaks. When in doubt, consult official manufacturer manuals and trusted consumer resources. A clear, repeatable method helps you feel confident tackling routine maintenance and makes future laundry days smoother and safer.
Tools & Materials
- Gloves (nitrile)(Protect hands from dirty water and sharp edges)
- Bucket(Catch water and keep the area clean)
- Old towels or rags(Absorb spills and protect the floor)
- Flashlight(Inspect dark corners and hose interior)
- Adjustable wrench(Loosen hose clamps if needed)
- Screwdriver (Phillips/flathead)(Access clamps or connectors)
- Replacement drain hose (optional)(Have on hand if hose is cracked or damaged)
- Cordless flashlight or headlamp(Extra lighting for visibility)
Steps
Estimated time: 45-75 minutes
- 1
Power off and prepare
Unplug the washing machine and shut off the cold water valve. Place towels and a bucket nearby to catch any water. This step minimizes electrical and water hazards before you inspect the hose.
Tip: Never start inspection with power connected; safety first. - 2
Locate the drain hose path
Trace the hose from the tub outlet to the drain. Check for kinks, crushed sections, or sharp bends that could restrict flow. A visual sweep helps identify obvious problem areas.
Tip: Use a flashlight to illuminate dark sections and confirm a complete path. - 3
Disconnect and inspect the hose
Carefully detach the hose at the drain end if accessible. Squeeze and twist the hose to dislodge visible debris and inspect the interior with the flashlight.
Tip: Be prepared for residual water; keep the bucket handy. - 4
Flush and clear
Rinse the hose with warm water to flush out lint, fibers, and mineral buildup. If you find a stubborn clog, use a long brush or flexible rod to gently dislodge it.
Tip: Avoid forcing items that could damage the hose. - 5
Reattach and test
Reconnect the hose securely, ensure clamps are tight, and run a small test load to confirm drainage. Look for leaks and verify water exits the drain without backflow.
Tip: If leaks persist after reattachment, replace the hose. - 6
Compare pumps and outlets
If drainage is still slow after clearing the hose, inspect the pump and outlet for clogs or a faulty check valve. These components can mimic hose blockage symptoms.
Tip: Do not attempt repairs on electrical components without proper training.
FAQ
Why is my washer not draining even after clearing the hose?
Blockages can occur in the pump, outlet, or check valve. If the hose is clear, inspect these components for clogs or failures. A faulty pump may require professional service.
If clearing the hose doesn’t fix drainage, check the pump and outlet for clogs or failure; a professional may be needed.
Can a blocked hose cause leaks?
Yes, a blocked hose can force water to back up or leak around hose connections. Ensuring a clear path helps prevent leaks during cycles.
Yes, blockages can lead to leaks at connections or around the hose.
How often should I inspect the drain hose?
Inspect the drain hose during routine maintenance, at least every 6-12 months, or sooner if you notice slower drainage or alarams.
Check the hose every 6 to 12 months or if drainage slows.
Is it safe to use a dirty hose after cleaning?
No. After cleaning, ensure the interior and exterior are dry and residue-free before reusing. A dirty hose can redeposit debris into the pump.
No, clean and dry the hose before reuse.
When should I replace the drain hose?
Replace if the hose shows cracks, bulges, or persistent leaks after reattachment. A damaged hose is a common cause of leaks and drainage issues.
Replace a damaged hose to prevent leaks.
Can a clogged hose impact other washer settings?
Yes, a blockage can cause pressure changes that affect cycle performance, potentially triggering error codes or incomplete washes.
Blockages can affect cycle performance and cause error codes.
Should I use chemical cleaners in the hose?
Avoid harsh chemical cleaners inside hoses; they can degrade rubber. Use warm water and a soft brush for routine cleaning.
Avoid harsh chemicals; use warm water and a brush instead.
Watch Video
The Essentials
- Inspect hoses for kinks and blockages before calling a pro
- Use proper safety steps: power off, water off, and towels ready
- Clean and flush the hose to prevent future clogs
- Replace damaged hoses promptly to avoid leaks
- When in doubt, consult a professional technician