How to Check Washing Machine Pump: A Practical Guide
Learn how to check washing machine pump to diagnose drainage problems with a safe, step-by-step approach. Locate, inspect, test, and maintain the pump to prevent leaks and clogs.

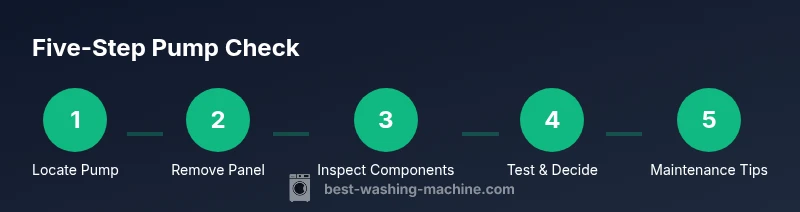
To check your washing machine pump, unplug the unit, locate the pump behind the access panel, disconnect hoses, and inspect for clogs or blockages. Test for motor operation with no leaks, and clear obstructions or replace a faulty impeller.
What the washing machine pump does and why it's important
If you’re asking how to check washing machine pump, you’re addressing a common cause of drainage problems in many homes. The pump is responsible for moving wastewater from the drum to the drain, and a failure or clog can leave you with standing water, slow draining, or an overflowing tub. According to Best Washing Machine, understanding the pump’s role helps you diagnose issues quickly and avoid unnecessary service calls. Pumps vary by model, but most share a few key components: an inlet and outlet hose, a small impeller or diaphragm, and a sealing gasket. The typical failure modes include blockages, worn impellers, damaged seals, or electrical faults that prevent the motor from starting. Before you begin any check, note that you’ll be working with electrical wiring and exposed water, so plan to shut off power and water supplies and wear protective gloves. In this guide, we’ll walk you through locating the pump, performing safe inspections, and deciding when a professional repair is warranted.
Safety and preparation before you begin
Before you start, unplug the washer and shut off the water supply. Wear eye protection and gloves, and clear a workspace free of clutter. The safety steps reduce the risk of electric shock and water exposure while you access the pump. Keep a bucket handy for any spills and have towels nearby. If your model has a toe-kick or access panel, follow the manufacturer’s instructions for opening it. This preparation phase also gives you a chance to review the service manual or model-specific instructions. Best Washing Machine analysis, 2026, emphasizes that following the correct procedure reduces the risk of accidentally damaging hoses or electrical connectors. By planning ahead, you’ll save time during the actual inspection and improve your chances of a successful repair.
Locating the pump and removing access panels
The pump is typically located at the bottom of the cabinet, behind a front panel or rear cover depending on the make and model. To access it, remove the toe-kick panel if present, then unscrew the access plate with the appropriate screwdriver. Keep track of the screws and the order in which you remove panels. You may need to tilt or slide the machine slightly to gain clearance. As you begin, take a quick photo of the setup for reference. This reduces confusion when you reconnect hoses and electrical connectors later. If your model uses a front-facing pump, you might need to remove the lower front panel. The process is straightforward, but model variations mean you should consult your user manual for exact steps.
Visual inspection: hoses, clamps, and impeller signs of wear
Once you’ve exposed the pump, visually inspect inlet and outlet hoses for cracks, bulges, or soft spots. Look for oil or detergent residue that indicates a leak, and check clamps for looseness. A damaged hose is a common reason for poor drainage and can be fixed with a simple replacement. Next, inspect the impeller or diaphragm for wear or obstruction. Spin the impeller gently with a screwdriver or pliers to feel for smooth movement; any binding, scraping, or excessive play suggests wear or debris. Be mindful of sharp edges inside the pump housing. A short, dark complaint about grinding sounds may indicate a foreign object stuck in the impeller. In all cases, keep the area dry and clean until you’re ready to reassemble.
Functional tests: draining, pumping, and flow checks
With the pump exposed, perform a series of functional checks. First, plug the unit back in if you’ve disconnected power for the inspection, and run a quick drain cycle to observe whether water moves through the pump. Listen for the motor and note any abnormal noises, such as whining or grinding, which can indicate bearing wear or a seized impeller. If your washer uses a belt-driven pump, verify that the belt is intact and has proper tension. For a direct-drive pump, ensure the motor spins freely when energized. A blocked impeller will often stall the flow of water, leading to inefficient draining. If there is no movement, the pump or wiring could be at fault and may require replacement.
Clearing clogs and safe cleaning steps
Clogs are a frequent cause of pump failures. Detach the hoses and inspect for lint, coins, buttons, or small clothing fibers that obstruct flow. A narrow set of needle-nose pliers or a flexible brush can help remove debris. After clearing, reassemble hoses and clamps, then pour a little water into the drum to test flow. If you see bubbles or air pockets, double-check the seals and gaskets for leaks. Avoid using harsh chemicals that could corrode seals; prefer mild dish soap and water for cleaning. Dry, recheck all connections, and ensure there are no kinks or twists in the hoses that would impede drainage.
When to repair, replace, or call a technician
If cleaning doesn’t restore proper drainage or the pump shows signs of wear such as cracks, corrosion, or persistent noise, plan for repair or replacement. Replacing a pump involves disconnecting electrical connectors and mounting the new unit securely with the original screws. Some pumps are easy swaps, while others require disassembly of critical components or the cabinet. If you’re unsure about wiring diagrams or seat torque, consult a technician. Remember that a faulty pump can cause water damage or electrical hazards. In many cases, replacing the pump is more cost-effective than a series of temporary fixes, especially on older machines with multiple failing components.
Maintenance to prevent future pump issues
Preventive maintenance reduces the chances of pump failure. Regularly inspect hoses for wear and replace them every few years or as needed. Clean the input and output screens to prevent debris buildup and ensure proper fluid flow. Avoid overloading the washing machine, which can put extra strain on the pump motor. Consider using a high-efficiency lint trap or a fibrous detergent that minimizes lint production. Finally, schedule routine checks, especially after moving the appliance or after a major drain clog. A proactive approach, along with timely replacements of worn components, can extend the pump’s life and prevent costly repairs.
Quick maintenance checklist for the pump
To close the loop, here is a concise routine you can perform quarterly: visually inspect hoses for wear, clear clogs from inlet/outlet paths, listen for abnormal pump noises, ensure clamps are tight, and verify the drum drains properly in a test cycle. Keeping a small notebook of symptoms helps you notice patterns that point to a pump issue before it escalates. Remember that early detection reduces the risk of leaks and water damage and preserves the efficiency of your washing machine.
Conclusion: The best practices for pump checks and upkeep
Note: The block content should be unique per block as per the article cohesion rules.
Tools & Materials
- Flathead screwdriver(To remove access panel screws)
- Phillips screwdriver(For front panel fasteners)
- Adjustable wrench(Loosen hoses and fittings)
- Pliers (needle-nose)(Grip hoses and clamps)
- Bucket(Catch draining water)
- Towels or rags(Mop up spills)
- Flashlight(Illuminates dark work area)
- Gloves(Protect hands from sharp edges)
- Multimeter(Electrical test only if you’re comfortable)
- Replacement pump(Have on hand if you plan to replace)
- Sealant or gasket(Optional for resealing)
Steps
Estimated time: 60-90 minutes
- 1
Power down and unplug
Ensure the washer is powered off and unplugged before touching any internal components. This eliminates the risk of electric shock while you inspect the pump area.
Tip: Always unplug first; never rely on the control panel power. - 2
Modify access and panel reach
Carefully move the unit to reach the access panel or toe-kick. Remove the panel screws and keep track of hardware for reassembly.
Tip: Take a photo of the wiring and panel layout before disconnecting anything. - 3
Remove the access panel
Locate the pump behind the panel and detach protective covers. Gently disconnect nearby hoses, noting orientation for reassembly.
Tip: Support hoses to prevent water siphoning back into the drum. - 4
Disconnect hoses from the pump
Place a bucket under the connections and carefully detach hoses from the pump. Keep clamps safe for reattachment.
Tip: Seal the hose ends with towels to reduce spillage. - 5
Inspect the pump and impeller
Check the impeller for obstructions or wear. Look for cracks in the housing and signs of leakage around seals. Spin gently to feel for smooth rotation.
Tip: If debris is present, remove it gently and inspect for damage. - 6
Test pump movement
With the pump exposed, energize the unit briefly to observe the motor. If the motor is silent or stalls, the pump may be faulty; halt further testing to avoid damage.
Tip: Do not run with the hoses disconnected for more than a few seconds. - 7
Reconnect hoses and reseal
Reattach hoses, secure clamps, and ensure no kinks. Replace front panel and screws, and double-check seals around the pump.
Tip: Use lubricant on O-rings if recommended. - 8
Run a test wash
Plug back in and run a short test cycle with a small load, watching for leaks and proper drainage.
Tip: Be ready to shut off power if you notice any abnormal smells. - 9
Decide on next steps
If there’s no improvement, plan for repair or replacement. Compare costs and potential water damage risk before deciding.
Tip: Document symptoms to help a technician diagnose faster.
FAQ
Where is the washing machine pump located?
In most models, the pump sits at the bottom of the cabinet, behind a toe-kick or rear panel. Access may be from the front or back depending on the design. If you can’t locate it, consult your model’s service manual or manufacturer site for precise diagrams.
The pump is usually at the bottom of the washer, behind either the front toe-kick or the rear panel. Check your manual for the exact location.
Can I check the pump without removing the front panel?
Some models allow access via a rear panel or a small service door. If you can reach the impeller or the inlet/outlet hoses without removing the entire outer shell, you can inspect for visible clogs or damage. If not, you’ll need to remove the panel.
In many machines you can access the pump through a rear panel or dedicated service door. If not, you may need to remove the front panel.
What are signs the pump is failing?
Common signs include poor drainage, water backing up in the drum, unusual noises like grinding or whining, and visible leaks around the pump housing or hoses. Electrical symptoms include the motor not starting or tripping a breaker when the pump should run.
Look for slow drainage, water backing up, unusual noises, or leaks around the pump.
Is it safe to run a test cycle after pump work?
Yes, but do it with a small load and monitor for leaks or unusual sounds. If you notice anything abnormal, stop the cycle and recheck connections or consult a professional.
Run a short test with a small load and watch for leaks or strange noises.
Should I replace the pump myself or call a technician?
If you’re comfortable with basic appliance repair, replacing a pump is doable. However, if you encounter wiring, seals, or model-specific steps, a technician can ensure proper installation and prevent leaks.
You can replace it yourself if you’re handy, but consider a pro for complex models.
What safety precautions matter most when working on the pump?
Always unplug the machine, shut off water supply, and wear eye protection. Use gloves to protect hands from sharp edges and clean up any spills promptly to prevent slips.
Unplug the washer, shut the water, and wear protective gear.
Watch Video
The Essentials
- Identify the pump location before starting
- Prioritize safety: unplug and shut water off
- Inspect hoses, clamps, and impeller for wear
- Test pump function and assess if replacement is needed
- Follow preventive maintenance to extend pump life