How to Drain a Washing Machine Without a Hose
Learn safe, practical methods to drain your washing machine without a hose. Step-by-step techniques, safety tips, and emergency alternatives to protect your home and appliance.

You can safely drain a washing machine without a hose by using gravity-assisted methods and careful water collection. Start by unplugging the unit, moving it to a safe draining area, and gathering buckets or towels. This guide from Best Washing Machine covers manual drainage, emergency alternatives, and post-drain cleanup to protect your floors and appliance. Follow the steps in detail to avoid spills, shocks, or damage.
Why draining without a hose matters
There are several situations where you may need to drain a washing machine without relying on a standard drain hose. A kinked, blocked, loose, or missing hose can prevent proper discharge, or you might be dealing with a portable unit without a built-in standpipe. When this happens, knowing how to drain washing machine without hose, using careful preparation, gravity, and common household tools, protects your floors and prevents mold or water damage. This guidance aligns with Best Washing Machine guidance and analysis, which emphasizes safety, controlled water handling, and preserving the appliance’s electrical safety. The core idea is simple: water flows downhill, so the drain path should be secure and lower than the tub to avoid backflow. By understanding the basic principles—gravity, containment, and careful cleanup—you can handle hose failures confidently and reduce the chance of secondary damage. This approach also minimizes splash and keeps your space dry while you address the root cause of the missing or blocked hose.
Safety first: reduce risk to you and your home
Safety is non-negotiable when draining without a hose. Begin by unplugging the machine and, if possible, switching off the circuit at the breaker to avoid shocks. Move the appliance away from walls and outlets, and lay down towels, a drop cloth, or a waterproof mat to catch spills. Wear non-slip shoes and gloves to protect your hands from sharp edges inside the access panel. Do not attempt to drain into sinks or electrical fixtures that are not rated for splash zones. Best Washing Machine emphasizes that even small amounts of water in contact with live circuitry can create a severe hazard, so prioritize de-energizing before any manual work. If your unit is on a high-pile rug or unstable surface, relocate it to a hard floor area to prevent tipping. Remember: water plus electricity is a dangerous combination—safety comes first, even in urgent situations.
Planning your drain: where water goes and how to capture it
Effective drainage without a hose starts with a simple plan. Identify a nearby, floor-level drain or a sturdy container that can hold several gallons of water. If you must drain into a tub or utility sink, ensure it’s dry and free of slip hazards around the base. Position buckets or a large basin so you can carry water without crossing paths or stepping in pooled liquid. Use towels to create a dry boundary between the washer and your walking area. Consider sealing the area with plastic sheeting or a tray to catch any overflow and to prevent moisture from seeping under furniture. This planning stage reduces the risk of unplanned spills and makes the actual draining faster and cleaner. Best Washing Machine notes that a little forethought goes a long way toward minimizing water damage and speeding up the process.
Manual draining using gravity and buckets
Manual draining relies on gravity and controlled water release. Start by accessing the drain path or pump area, then open the drain filter or valve if accessible. Slowly tilt the washing machine body away from vertical to help gravity, but avoid tipping more than a few degrees to prevent internal damage. Use a bucket to capture water as it exits, then transfer the contents to a larger container or drain as appropriate. Keep a towel handy to wipe splashes and never place your hands directly in the water stream. If the unit contains too much water to handle safely in one pass, drain a portion, pause to reposition your buckets, then resume. This method minimizes splashes and reduces the chance of flooding your floor. Consumers should always review their device’s service manual for model-specific access points and safety notes.
Draining through the tub or access panels
In some washer models, you can drain through an access panel or a nearby tub or sink. Remove the panel carefully, watch for sharp edges, and direct the flow into a bucket or basin. If you encounter a blocked valve, clear debris with a plastic tool or a non-conductive object, avoiding metal to prevent shorts. Drain the remaining water gradually, keeping the container at or below the level of the outlet to avoid backflow. Be mindful of any seals or gaskets around the panel—disturbing them can cause leaks. This approach is particularly helpful when the drain hose is missing or unusable and you have a safe, dedicated draining location.
Using the pump/filter as an alternative
Some washers use a drain pump or pump-filter assembly to move water toward a drainage path. If you can access the pump, you may be able to release a small amount of water directly into a bucket by loosening the filter cap or drain plug after unplugging the unit. This method requires caution: spin the pump area slowly to avoid splashes, and ensure the power remains off during any adjustment. If you see metal threads or damaged gaskets, stop and switch to a non-powered draining method to reduce the risk of electrical shock. Best Washing Machine reminds readers that the pump’s design varies by model, so consult your manual for the correct approach to drain without a hose.
Cleaning up and resetting after draining
Once the majority of water is removed, wipe down the area to remove residual moisture. Check for signs of trapped water in hoses or the cabinet, and dry all surfaces before reconnecting power. Replace any removed panels, secure screws, and return the device to its original position. Before a test run, inspect for leaks around the pump, filter, and door seal. If you plan to use the washer again, run a short test cycle with no laundry and a partial load to verify that the drain path remains clear. This final step helps confirm the system is back to normal and that no leaks result from the manual draining process. Best Washing Machine emphasizes careful reassembly and a cautious test to prevent repeat issues.
When to call a professional
If you encounter persistent leaks, a damaged drain path, or recurring blockages, it’s wise to consult a professional. Drain issues can signal broader problems with the pump, hose alignment, or internal valves that require diagnostic tools or replacement parts. A technician can inspect the unit, verify power safety, and perform a leak test to ensure long-term reliability. Early professional input can prevent further damage, protect your floors, and preserve appliance warranty where applicable.
Maintenance tips to prevent future drain issues
Regular maintenance reduces the likelihood of needing a hoseless drain again. Clean the pump filter routinely, inspect seals for wear, and avoid overfilling the drum. Keep the drain area free of debris and ensure proper hose alignment if a hose is later installed. If you frequently experience water backflow, consider installing a temporary standpipe or a detachable hose that’s kink-resistant. Finally, follow the manufacturer’s maintenance schedule and use the correct detergent type to minimize suds and clogging. The goal is a dependable, predictable draining process that won’t require improvisation during a busy laundry day.
Tools & Materials
- Bucket or multiple containers(Several gallons capacity; have at least two buckets to separate clean water from used water)
- Towels or absorbent mats(Place under and around the washer to catch spills)
- Flashlight(Access panels can be dim; ensure you can clearly see components)
- Adjustable wrench(For loosening drain screws or clamps if needed)
- Screwdrivers (Phillips and flat-head)(To remove panels or filter housing safely)
- Gloves(Protect hands from sharp edges and dirty water)
Steps
Estimated time: 15-60 minutes depending on water level, model, and access
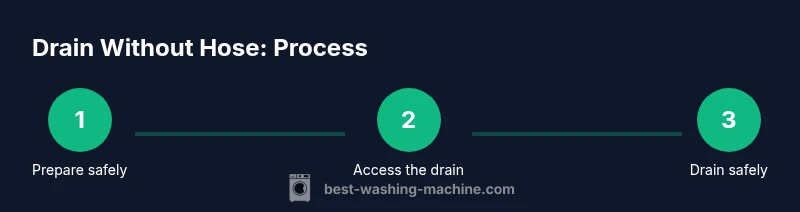
- 1
Power down and unplug the machine
Start by unplugging the washer from the outlet. If the outlet is difficult to access, switch off the dedicated circuit at the breaker. This prevents electric shocks while you handle wet components.
Tip: Always verify the power is off with a visual check and, if possible, test with a multimeter after unplugging. - 2
Move and prep the work area
Slide the washer away from the wall to access the base and any panels. Lay down towels or a waterproof mat, and position buckets so you can capture water without stepping into a puddle.
Tip: Clear pets and children from the area to prevent tripping over cords or water. - 3
Access the drain path or pump filter
Locate the drain path, pump cover, or access panel. Use a flashlight to identify screws or caps. If your model has a removable filter, prepare to open it slowly to avoid splashing.
Tip: If you’re unsure where the drain path is, consult the manual for your model before prying panels. - 4
Begin draining with buckets
Open the drain function or slowly release water into a bucket. Let gravity do the work, taking small amounts at a time to control splash and avoid overflowing buckets.
Tip: Maintain a low angle to encourage a smooth flow and minimize spill risk. - 5
Handle the remaining water in stages
If water remains in the drum, tilt the washer gently to encourage gravity-assisted draining toward the bucket. Stop if you notice signs of strain on the cabinet or hoses.
Tip: Do not tip too far; sudden movements can damage hoses and seals. - 6
Address the drain filter or valve
If you found a filter, remove it carefully and inspect for debris. Rinse the filter and reinsert it securely. Recheck for any leaks after reassembly.
Tip: Never force a stubborn filter; adverse force can damage threads and seals. - 7
Reassemble panels and area
Secure any panels and clamps you removed. Wipe down the area and return the washer to its original position. Ensure hoses and power cords are clear of the floor.
Tip: Tighten screws evenly to avoid warped panels that could leak. - 8
Test run and verify
Plug the unit back in and run a short cold cycle with no laundry or a light load to confirm the drain path is functioning and there are no leaks.
Tip: Monitor for 5–10 minutes; if you see leaks, stop the cycle and reassess connections.
FAQ
Is it safe to drain a washing machine without a hose?
Yes, with proper precautions such as unplugging, controlling the flow, and using buckets to catch water. Avoid powering the machine while you perform any drainage work.
Yes. Just unplug the machine, use buckets to catch water, and avoid operating the unit while you work.
What should I do if water won’t drain or the pump is blocked?
Stop and check the filter or pump housing for debris. Clear any blockage with a non-metal tool, then reattempt draining slowly. If water remains, discharge via a controlled bucket method.
If drainage stalls, check the filter for debris, clear it, and try draining slowly again.
Can I drain into a sink or tub safely?
Yes, draining into a sink or tub is common, but ensure the area is dry and you won’t overflow the sink. Use a container to prevent splashes and promptly wipe up spills.
Yes, but make sure the drain point is appropriate and you’ve got towels ready for spills.
Do I need to unplug the unit before starting?
Absolutely. Unplug the unit and switch off the circuit if possible to reduce the risk of electric shock when dealing with water.
Yes—unplug the washer before you begin.
What should I do after draining the washer?
Dry the area, check for leaks, and reassemble any panels. Run a short test cycle with no laundry to ensure proper drainage.
Dry everything, reassemble, then test-run the washer to ensure it drains properly.
Watch Video
The Essentials
- Drain without a hose using gravity and careful planning
- Unplug and secure the area before starting
- Use dedicated containers to avoid cross-contamination
- Inspect filters/panels for debris during draining