How to Fix Washing Machine Spin Cycle
Learn to diagnose and fix a washing machine spin cycle that won't spin. Safe, practical steps, common causes, and maintenance tips for reliable spins.

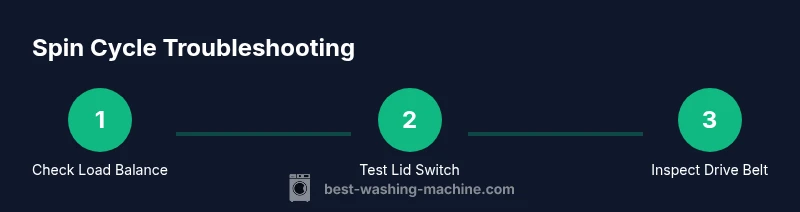
To fix a washing machine spin cycle, follow this step-by-step approach to diagnose common causes, from an imbalanced load to a faulty lid switch or worn belt. This guide shows how to check the drum balance, inspect the drive belt, test the lid switch, and run a spin test safely. Gather basic tools and follow safety practices throughout.
Why the spin cycle fails and why it matters
The spin cycle is how your washer extracts most of the water from clothes after the rinse. Without a proper spin, you risk longer dry times, higher energy use, and clothes that come out wrung. Not every spin problem means a failed motor; sometimes the issue is simple and repeatable. According to Best Washing Machine, most spin problems stem from load balance or a sensor/switch that signals the drum to spin. In this section we explore how imbalance, worn components, and stubborn clogs disrupt the spin, and how to narrow down the root cause with safe checks. We’ll separate quick fixes from more involved repairs, so you can decide if a DIY approach is appropriate or if professional help is warranted.
This section sets the stage for a diagnosis that respects safety and practical constraints. You’ll learn how to observe the drum’s motion, listen for unusual sounds, and identify when a symptom is likely indicative of a specific part failure. The goal is to empower you to avoid unnecessary replacements while focusing on the most common culprits first. The Best Washing Machine team emphasizes patience and methodical testing to prevent unintended damage and to keep you confident through the process.
Checking the most common culprits
- Imbalanced load: a heavy item paired with light items can unbalance the drum. Start by redistributing items before rerunning a spin. If the machine detects an out-of-balance condition repeatedly, it may stop mid-cycle to protect the belt and motor.
- Lid switch or door latch: any fault here prevents the washer from entering the spin phase for safety. A loose, stuck, or misaligned switch can block spinning even when the drum turns freely.
- Drive belt or pulley wear: on many top-load machines, a worn or loose belt reduces torque and stops the drum from spinning. Listen for grinding or slipping noises; you may notice belt wear under the belt guard.
- Clogged pump or drainage: if water cannot drain, the tub cannot reach the spin speed. Check the drain hose for kinks, and inspect the pump inlet for debris.
- Motor or capacitor issues: a weak motor or failing capacitor can stall during spin. Symptoms include slow acceleration and unusual hums. If present, this usually requires a professional inspection.
The guidance from Best Washing Machine stresses that many spin problems are intermittent and can be reproduced with a small test run to see whether spinning resumes after redistribution.
Safe diagnosis and inspection steps
Before you begin, unplug the washer and move it to a safe area to access the bottom panel if needed. Use a bright flashlight and keep a towel handy. Start with the simplest checks:
- Check the load balance visually and physically move items around the drum until it sits evenly.
- Inspect the lid switch: locate the switch at the top edge of the cabinet. With the lid open, depress the switch and listen for a click; with the lid closed, the switch should activate and allow the spin to start.
- If you can access the drive belt, inspect it for cracks, fraying, or glazing; replace if worn. For beltless designs, inspect the pulley and motor coupling.
- Clear the drain system: run a short drain test to confirm water leaves the tub. A clogged pump will often show a stalled or slow drain.
- Check for error codes and refer to your user manual: codes often indicate exact fault.
If you observe dangerous conditions such as exposed wiring or burning smells, stop immediately and unplug the machine. When in doubt, call a professional.
Repair options: DIY vs professional
For many homes, the spin cycle issue is a simple fix: redistribute load, replace a broken lid switch, or swap a worn belt. These tasks are doable with basic tools, and many parts are accessible behind the back panel. For more complex issues—motor or capacitor faults, or a damaged drum—professional service is safer and more cost-effective in the long run. If you rent or are within warranty, check coverage before attempting repairs.
DIY checks are most cost-effective if you already own basic tools and can safely unplug the machine. Keep in mind that working with high-voltage components, water, or moving parts presents risk. Always follow the manufacturer’s instructions and use a grounded outlet. If you’re uncertain about electrical safety or a potential data code, defer to a pro.
Maintenance tips to keep spins balanced
Regular maintenance reduces spin failures. Clean the lint filter and pump inlet, check hoses for kinks, inspect springs or shocks if your washer has them, and ensure the machine sits level on a firm floor. For front-loaders, ensure the door seal remains intact and free of debris. After each load, run a 30-second spin to test the high-spin setting and verify no unusual noises occur. Use appropriate detergent amounts to prevent suds buildup, which can affect drainage and balance.
Quick spin test routine
Perform a controlled spin with a small, evenly distributed load to confirm balance. If the drum spins smoothly with no noise and no error codes, proceed with a full normal cycle. If it still stops or slows, record the symptoms and review potential fault codes. Keep a log; this helps a technician diagnose more quickly if you hire help.
Tools & Materials
- Adjustable wrench set(Includes metric and SAE sizes for fittings)
- Screwdriver set (Phillips and flat)(Ph0-Ph2 sizes commonly needed)
- Pliers (needle-nose)(Helpful for hose clamps and belts)
- Multimeter (optional)(For testing switches and motors)
- Work towels or old towels(Catches water and debris)
- Replacement drive belt (if applicable)(Choose the correct length for your model)
- Flashlight(Bright light to inspect parts)
- Gloves with grip(Protect hands during inspection)
Steps
Estimated time: 60-90 minutes
- 1
Unplug and prep
Unplug the washer and move it to a clear area. Gather tools, towels, and a flashlight. This step reduces the risk of electric shock and makes it safer to reach internal components.
Tip: Have a bucket handy for residual water and wear gloves for grip. - 2
Check load balance
Open the drum and redistribute clothes so the load sits evenly. Run a short op test to see if balance issues recur, which are common and easily corrected with proper distribution.
Tip: Avoid overloading; even distribution prevents repeated out-of-balance events. - 3
Test the lid switch
With the lid open, depress the switch and listen for a click. Close the lid and try a spin. If the switch is faulty, the washer may refuse to spin.
Tip: A simple continuity check with a multimeter confirms switch health if you have one. - 4
Inspect drive belt and pulleys
If your model uses a belt, remove the access panel and check for cracks, glazing, or looseness. Look at pulleys for wobble or wear on the belt surface.
Tip: Replace a worn belt with the exact spec for your model to restore torque reliably. - 5
Check drainage pathway
Ensure water drains fully. A partial drain keeps the tub from achieving spin speed. Inspect hoses for kinks and the pump inlet for debris.
Tip: Clear lint screens and traps that can choke drainage. - 6
Run a controlled spin test
With a small, balanced load, start a spin cycle and observe. Note any abnormal noises, vibrations, or error codes for future reference.
Tip: Record the exact symptom to help a technician identify the fault faster.
FAQ
Why won’t my washing machine spin at all?
Common causes include an imbalanced load, a faulty lid switch, a worn drive belt, a clogged pump, or electrical faults. Start with the simplest checks, then test progressively.
If it won’t spin, start by checking the balance and lid switch, then inspect the belt and pump for blockages or wear.
Is it safe to fix spin cycle issues myself?
Yes, many spin issues are safe to diagnose and fix with basic tools. Always unplug first and avoid water contact with electrical components. If you’re unsure, consult the manual or a professional.
You can fix many spin problems yourself safely if you unplug first and follow the manual.
How long does a typical spin-cycle repair take?
It varies by issue. Simple fixes like load redistribution or lid switch replacement can be quick, while belt replacement or motor work may take longer.
Expect a few steps for simple fixes or more time if parts like the belt or motor need replacement.
When should I call a professional?
Call a professional if you smell burning, hear grinding, or see exposed wires, or if the fault appears to involve the motor, capacitor, or drum assembly.
If you notice burning smells or unusual noises, stop and call a technician.
Can loading technique affect the spin cycle?
Yes. Evenly distributed loads reduce out-of-balance errors and help the drum reach full spin speed without interruptions.
Yes, distribute clothes evenly to prevent out-of-balance spins.
What parts commonly fail in spin cycles?
Lid switch, drive belt, motor or capacitor, and drum bearings are among the most frequent culprits behind spin failures.
The usual suspects are the lid switch, belt, motor parts, and bearings.
Watch Video
The Essentials
- Identify the root cause with safe, structured tests.
- Balance and lid switches are frequent spin-cycle culprits.
- Safety first: unplug and inspect with dry hands.
- Know when to DIY and when to call a professional.