How to Fix Whirlpool Washing Machine: A Practical Guide
Learn how to diagnose and repair common Whirlpool washer issues with a safe, DIY-friendly approach. This guide covers not spinning, not draining, leaks, and loud operation, plus safety tips and preventive maintenance.

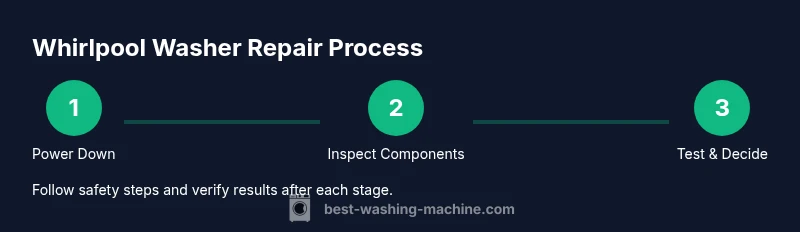
Fixing a Whirlpool washing machine doesn't have to be guesswork. This step-by-step guide covers common faults, safety precautions, and practical home fixes for issues like not spinning, not draining, leaks, and noisy operation. Gather basic tools, unplug the unit, and follow the structured steps to decide when DIY repair is safe or when to call a pro.
Understanding Whirlpool Washer Common Problems
Whirlpool washers, like many models, share a core set of issues that homeowners encounter. Not spinning or not agitating can stem from a faulty lid switch, worn drive belt, or a failed motor coupling. Not draining is often due to a clogged pump, kinked drain hose, or a blocked filter. Leaks usually trace to hoses, the door boot seal (on front-loads), or a loose drain connection. Noisy operation can come from a worn belt, loose components, or a failing pump. In many cases, symptoms are interrelated: a failing pump can cause water to back up and trigger a leak or an error code. By framing the problem around the most common symptoms, you can prioritize inspections that are most likely to yield results. According to Best Washing Machine analysis, regular diagnostics and maintenance reduce the chances of sudden breakdowns and help you decide when DIY fixes are worth the effort. This section helps you map symptoms to likely causes, so you don’t waste time on unlikely culprits.
To get started, note the exact behavior, when it occurs (during fill, wash, or spin), whether water appears, and whether any error codes appear on the control panel. This information will guide your next steps and keep you focused on the parts most likely at fault.
Safety First: Prepare and Protect Yourself
Safety is the first and most important step in any appliance repair. Always unplug the washer from the wall outlet and switch off the circuit breaker before you touch any internal components. If the unit is near water, turn off the main water supply and place towels or a shallow pan to catch spills. Wear protective gloves and safety glasses to guard against sharp metal edges or accidental electrical contact. If you must move the machine, do so with help to avoid tipping and keep the power cord clear of floors to prevent accidental traction. After you’ve created a dry, clear work area, take a few photos of the current setup before you disassemble anything. These visuals will serve as a reference during reassembly. Finally, confirm that you have adequate lighting in the cabinet area so you can accurately inspect hoses, seals, and connectors.
Diagnostic Toolkit and Prep
Before diving into disassembly, assemble a basic diagnostic kit and confirm the model specifics—Whirlpool washers span several generations, and the location of the drive belt, water inlet valve, and drain pump can differ. Essential tools include a screwdriver set (Phillips and flathead), a multimeter or voltage tester, needle-nose pliers, an adjustable wrench, a bucket, towels, and a flashlight. Have a spare hose clamp, duct tape, and a few rags on hand in case you discover a minor leak you can temporarily manage. If you encounter a step that involves electrical testing, only proceed if you feel confident. If you’re unsure, stop and consult a pro. Keep a container ready to capture any residual water, and ensure the floor is dry to prevent slips. This groundwork reduces the risk of mistakes and makes subsequent checks faster and more accurate.
Not Spinning: Quick Checks and Fixes
A washer that won’t spin can be caused by a faulty lid switch, a worn belt, or a damaged drive motor coupling. Start by testing the lid switch: press the switch and listen for a click or use a multimeter to check continuity according to the model’s service manual. If the switch is okay, inspect the drive belt for cracks or excessive wear and verify it’s properly seated on pulleys. If your model uses a belt-driven transmission, a loose or damaged belt is a common culprit. For some Whirlpool front-loads, a worn motor coupling can also prevent spinning. After addressing these items, run a short test cycle with a light load to confirm operation. If the problem persists, there may be an electrical or control board fault that necessitates professional service.
Not Draining or Leaking: Key Troubleshooting
Not draining often points to the drain hose, pump, or filter. Start by disconnecting power and ensuring the water supply is off. Check the drain hose for kinks or blockages near the back of the machine and ensure it’s properly routed to the household drain. Next, inspect the pump and impeller for clogs—tiny items like coins or lint can stop water from flowing. If you find a blockage, remove it carefully and reassemble. Leaks frequently originate from loose hoses, door seals, or the drain connections. Tighten clamps gently and inspect the door boot seal for cracks or tears. On some Whirlpool models, the pump or hose connections behind the front panel require panel removal, which should be done with care to avoid further damage. After reinstalling components, run a leak test with a small amount of water and monitor the connections closely.
Cleaning and Detergent Considerations for Whirlpool Front-Load and Top-Load
Detergent choice and loading habits influence both cleaning results and machine longevity. For front-load Whirlpools, use only high-efficiency (HE) detergents in the recommended amounts, as excess suds can accumulate and trigger drainage issues. For top-load models, use an appropriate detergent amount for the load size, and avoid using bleach or additives that can degrade seals over time. Periodically run a cleaning cycle or a hot-water cycle with a washing machine cleaner or white vinegar to dissolve mineral deposits and soap scum that can impair flow and sensor readings. Do not overload the drum, as this stresses belts and bearings. Keeping the door seal and gasket clean will prevent mold and reduce the chance of leaks. If you notice persistent odors or residue, perform targeted cleanings around the lint filters and drain pump area as needed.
Replacing Common Components: When DIY Makes Sense
DIY fixes are often appropriate for easily accessible parts like hoses, clamps, door seals, and the drain pump (when the unit is safely powered down). If you observe a cracked hose, torn door boot, or a clearly worn belt, replacements can restore performance at a fraction of the cost of a service visit. Before buying parts, confirm compatibility with your specific Whirlpool model and inspect the service manual for torque specs and wiring diagrams. If you encounter complex electronics, such as sensor boards or motor controllers, weigh the cost and risk of DIY against a professional repair. Always power down and verify components visually before ordering parts, and consider replacing multiple related parts if wear is evident. Proper installation and testing after replacement are crucial—run several short cycles with different load types to verify proper operation and drainage.
Sourcing Parts and Preventive Maintenance
To minimize downtime and ensure compatibility, source parts from reputable retailers and avoid unofficial or counterfeit components. When possible, buy from official distributors or well-known marketplaces with model-specific listings. Keep a basic parts kit on hand, including hoses, clamps, door seals, and a spare pump o-ring, so you can tackle small issues quickly. Regular preventative maintenance reduces the risk of sudden failures; set a quarterly or semi-annual schedule to inspect hoses, pump connections, and the door seal, and to clean the lint filter if your model has one. A simple maintenance routine—checking hoses for cracks, keeping the door seal clean, and running a cleaning cycle—goes a long way toward extending the life of your Whirlpool washer. Best Washing Machine analysis emphasizes consistent checks and timely replacements rather than reactive repairs.
Preventive Maintenance Checklist for Longevity
- Inspect door seal for cracks and replace if damaged.
- Check hoses for wear, bulges, and leaks; replace as needed.
- Clean the filter or lint trap (if equipped) and run a cleaning cycle monthly.
- Run an empty hot-water cycle with a cleaning agent every 1–3 months.
- Ensure the drain hose is free of kinks and properly installed.
- Wipe the exterior and interior drum to prevent residue buildup.
- Periodically inspect the belt (if visible) and look for glazing or cracks.
- Keep the area around the washer dry to prevent mold and rust.
- Schedule professional service for electronics and motor components beyond basic maintenance.
Troubleshooting Flowchart: DIY vs Pro Decision
- Is the issue clearly a loose hose, plug, or visibly damaged gasket? If yes, DIY after power-down.
- Is water present or a drain pump failure suspected? If yes, inspect hoses and pump; replace if needed.
- If the control board or motor wiring shows signs of damage or has error codes that you cannot reset, consider professional service.
- For complex electronics or risky steps, do not proceed alone; call a certified technician for Whirlpool repair.
Tools & Materials
- Screwdriver set (Phillips and flathead)(Phillips #2 and flathead #2 recommended)
- Multimeter or voltage tester(Check switches and electrical connections)
- Needle-nose pliers(Grip hoses, clamps, and small parts)
- Adjustable wrench(Loosen hose clamps and fittings)
- Bucket and towels(Catch water and protect the floor)
- Flashlight(Illuminate dark corners and back panels)
- Safety gloves and goggles(Protect hands and eyes during disassembly)
- Replacement parts (as needed)(Belts, hoses, door seals, pumps depending on model)
- Sealant/duct tape(Temporary leak control if needed)
- Rags or shop towels(Clean spills and wipe components)
Steps
Estimated time: 60-120 minutes
- 1
Power down and disconnect
Unplug the washer from the wall outlet and switch off the circuit breaker. Confirm power is off with a quick flashlight check of the outlet if you’re unsure. This is essential to prevent electric shock while you work.
Tip: Always verify power is truly off before touching any internal parts. - 2
Access the interior safely
Move the machine carefully away from the wall to expose access panels. Remove back or front panels according to your model, keeping track of screws and their positions. Photograph the setup for reference during reassembly.
Tip: Label screws and parts with tape so you can reassemble accurately. - 3
Test the lid/door switch
Use a multimeter to test continuity across the lid/door switch terminals, or depress the switch mechanically to check for a click. A faulty switch is a frequent cause of no-spin and no-start conditions.
Tip: If the switch is suspect, replace it rather than trying to repair the internals. - 4
Inspect drive belt and pulleys
Look for cracks, fraying, or glazing on the drive belt. Ensure it sits correctly on both pulleys and that there is proper tension. Replace if worn; a slipping belt will prevent spinning and accelerate wear.
Tip: Note belt orientation before removal to ensure correct installation. - 5
Check drain pump and hoses
Inspect the drain pump for obstructions and check hoses for kinks, leaks, and blockages near the pump and along the drain path. Clear any debris with care and reattach securely.
Tip: Always have a bucket ready when testing the drain path to avoid spills. - 6
Inspect electrical connections
Look for loose or corroded connectors on the motor, pump, and control board. Reseat connections firmly and examine for burnt-looking components. Do not force connectors; if they resist, stop and consult a professional.
Tip: Taking a quick photo of connector pins helps when reattaching wires. - 7
Test run after each fix
Reassemble the panel or cover, plug in the unit, and run a short cycle with a small load. Observe for proper fill, agitation, spin, and draining. Stop the cycle if you notice leaks or noise.
Tip: Test with different load sizes to ensure consistency of operation. - 8
Decide on part replacement vs professional help
If the issue persists after these checks, consult the service manual or call a technician for complex components such as the motor controller or main control board. Weigh the cost of parts and time against a pro repair.
Tip: Document error codes and symptoms to share with a technician.
FAQ
What are the most common Whirlpool washer problems?
Not spinning, not draining, leaks, and loud noises are the most frequent complaints. They typically point to lid switches, belts, pumps, or hoses as the root causes. Use step-by-step checks to identify the likely culprit before ordering parts.
Not spinning, not draining, leaks, and loud noises are the common issues, often linked to lid switches, belts, hoses, or pumps.
Can I fix a Whirlpool washer leak myself?
Many leaks come from loose hoses, worn door seals, or a faulty drain connection. With the unit powered down, inspect these components, tighten clamps, and replace damaged seals as needed. If water appears from a motor area or you smell burning, stop and seek professional help.
Yes, many leaks come from hoses or seals, but stop if you detect motor problems or burning smells.
Why is my Whirlpool washer not spinning after a load?
First check the lid switch and drive belt. A faulty switch or a worn belt are the most common causes. If these parts look fine, the issue may be a control or wiring fault requiring professional diagnosis.
Often the lid switch or belt is the culprit; if those look fine, it could be a more complex control issue.
What tools do I need for DIY Whirlpool repair?
A basic toolset (screwdrivers, pliers, adjustable wrench), a multimeter, a bucket, towels, and a flashlight typically cover most at-home checks. Have spare parts on hand only if you’re confident in your diagnosis.
You’ll mainly need a screwdriver set, pliers, a multimeter, and towels for spills.
When should I replace parts instead of repairing?
If belts are cracked, seals are torn, or the pump is failing beyond simple cleaning, replacement often saves time and money. For electronics or motor controllers, evaluate costs with a professional.
If critical parts like belts or seals are worn, replacement can be more reliable than repeated fixes.
Is there a risk of electric shock when opening the washer?
Yes. Always unplug and switch off the circuit before opening any panels. Keep water away from outlets and use insulated tools. If you’re unsure, pause and seek professional help.
Electric shock risk is real—power down completely before touching anything.
Watch Video
The Essentials
- Identify the issue safely with a plan
- Unplug power before touching internal parts
- Check lid switch, belts, and hoses first
- Decide safely whether DIY or pro help is needed
- Regular maintenance reduces future breakdowns