How to Get Washing Machine Door to Unlock: A Step-by-Step Guide
Learn safe, step-by-step methods to unlock a stuck washing machine door. This guide covers front-load and top-load models, safety precautions, manual releases, and when to call a pro. Brought to you by Best Washing Machine.

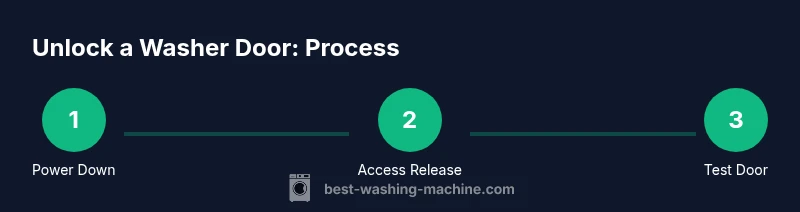
By safely unplugging the unit, waiting a moment, and checking the door lock indicators, you can often unlock a stuck washer. Start with simple resets: turn off power, wait 60 seconds, and verify the control panel lock. If the door still won’t open, use the model’s built-in manual release or service access as instructed.
Why doors lock and what this means for you
Washing machines rely on a combination of mechanical latches, electronic interlocks, and safety interlocks to prevent leaks and injuries. When something isn’t aligned—such as a latch that sticks or an electronic lock that fails to reset—you may see the door remain closed. For homeowners, understanding the root causes helps you decide whether this is a quick fix you can perform, or a signal to call a technician. In 2026, most unlock failures aren’t about a damaged door but about safety interlocks that need a reset or a cautious manual release. Start with the simplest checks and progress to model-specific steps only if you’re comfortable with basic tools and safety practices. This section sets up the common scenarios and practical approaches for safely unlocking a stubborn door.
If you’re wondering how to get washing machine door to unlock, you’re not alone—many failures respond to safe resets and careful releases rather than drastic disassembly.
Safety first when a door won't open
Before touching any components, prioritize safety. Unplug the machine from the wall outlet to eliminate the risk of shock. If there’s standing water in the drum, soak it up with towels and place a shallow tray to catch drips. Wear gloves if you’re handling damp surfaces or rough edges. Do not force the door with tools; prying can bend or break the latch, crack the door, or push water into electronics. Look for a child lock or lid lock symbol on the panel; if present, address that feature first. Never attempt to reopen a hot-load door during or immediately after a high-heat cycle—the door can be unusually dangerous to handle.
Quick checks you can perform safely without opening any panels
Start with simple checks. Make sure the wash cycle has fully ended and the drum isn’t still spinning. Look at the control panel indicators for a lock icon, fault codes, or blinking lights; these signals guide the next step. Power cycle by unplugging for at least 60 seconds and then plugging back in to reset internal logic. Visually inspect the door latch area from the outside for any obvious obstruction or misalignment. If your model provides a front-panel manual release, locate it and test it according to the user manual—avoid improvisation. These checks are designed to determine whether a quick reset or a minor adjustment will solve the lock issue.
Front-load vs top-load: lock mechanisms and what to expect
Front-load washers usually integrate a door lock module with the main control board. If the door remains locked after a cycle, the module may be stuck or the control signal may fail to unlock the latch. Top-load machines often rely on a lid switch or secondary interlock that can fail due to moisture or detergent buildup. Knowing which mechanism you’re dealing with matters: front-load releases are often inside a service panel; top-load releases may be accessed via the lid or rear panel. Across both types, identify whether the problem is a mechanical jam, an electronic lock fault, or a user setting such as a locked cycle. This helps you decide whether to pursue a simple reset, a manual release, or professional service.
How to locate and use a manual release lever or access door
Many models offer a manual release for when electronics fail. Look for a small access panel near the door hinge or behind the bottom front panel. You may need to remove a cover screw or pry gently to reveal a release lever or pull cord. Follow your model’s instructions for engaging the release, which may involve a specific sequence or turning the dial while applying pressure to the release. If you cannot locate a release or if the release requires tools you don’t have, consult the manufacturer’s documentation or support resources. Never force components or improvise a release.
Electrical and control lock troubleshooting steps
If the door stays locked after resets, the issue is likely an electrical lock or interlock fault. Check for visible damage to the lock harness and connectors and make sure wiring is secure. Moisture intrusion or corrosion can cause intermittent lock failures; if you see signs of moisture, dry the area with care and perform a cautious re-test once power is restored. If you’re not trained in electrical diagnostics, avoid deep testing and refer to the service manual or contact a professional. Fault codes displayed on the control panel can guide technicians to the particular module needing attention.
Resetting and testing after unlock attempts
After any manual release or power reset, allow the control board to reboot fully. Reconnect power and run a short wash cycle with no laundry to verify the door unlocks consistently. Observe the latch operation and signal lights; a successful unlock should allow the cycle to progress or end normally without re-locking mid-cycle. If the door relocks at the start of cycles again, you likely have a stuck latch or a failing interlock that requires service.
Preventative maintenance to avoid future lockouts
Regular inspection of the latch area, wiring, and seals can prevent lockouts. Clean the latch and interlock area to remove detergent buildup or lint. Run occasional maintenance cycles to keep the software responsive and prevent corner-case lockups. Ensure drainage lines are clear to minimize moisture reaching the lock components. If your model supports firmware updates, install them per the manufacturer’s guidance to address known lock issues and improve overall reliability.
When to call a professional and what to expect
If the door still won’t unlock after following these steps, it’s time to contact a qualified appliance technician. A pro can safely access internal lock mechanisms and test the interlock with professional tools. Expect a diagnostic visit that includes inspecting the lock, interlock, wiring harness, and control board, along with a parts estimate if replacement is needed. The age and warranty status of the appliance will influence the recommended service plan.
Tools & Materials
- Flashlight(Bright light for inspecting latch area and wiring.)
- Towels/Small bucket(Have on hand to catch spills and drips.)
- Owner's manual (model-specific guide)(Helpful for model-specific release steps.)
- Flathead screwdriver(Only if you need to access a release cover.)
- Gloves(Grip and hand protection when handling damp parts.)
Steps
Estimated time: 30-60 minutes
- 1
Power down and unplug
Unplug the machine from the wall outlet to cut all power. If the outlet is GFCI protected, reset the outlet after you replug. Wait 60 seconds to allow internal capacitors to discharge and the control logic to reset.
Tip: This step resolves many false lock signals and is the safest first move. - 2
Check external indicators
Inspect the control panel for a lock icon, fault codes, or error lights. Note the codes or symbols; refer to the manual to interpret them. This helps you decide if a simple reset will work or if a deeper repair is needed.
Tip: Jot down any error codes before performing a reset. - 3
Check safety features
Verify that the child lock is not engaged and that the lid interlock is transmitting. If a lock icon is blinking, wait until it stops or perform a brief reset. These features can keep the door secured during cycles even when the drum stops.
Tip: If you can’t locate the feature, search the manual for 'lock' or 'interlock'. - 4
Locate manual release
Look for a manual release behind a small front-panel or bottom-panel access. You may need to remove a thin cover screw to reach a release lever or cord. Follow the model’s steps precisely; improvised attempts can cause damage.
Tip: Use a flashlight to spot tiny releases and confirm you’re on the right panel. - 5
Operate manual release gently
Engage the manual release as described in the manual, using non-metal tools if required. Do not force components or apply excessive torque.
Tip: If you can’t locate a release or if it requires tools you don’t have, stop and consult the manual or manufacturer support. - 6
Test door after release
Re-seat any panels, plug the unit back in, and run a brief cycle to test if the door unlocks. Look for normal latch cycling and absence of re-locking during the cycle.
Tip: Check for unusual noises, which may indicate a partial jam or misalignment. - 7
Reset the control board again
If needed, power cycle once more to ensure the control board reboots cleanly and re-applies safety interlocks.
Tip: Be patient during reboot; interrupting the cycle can re-lock the door. - 8
Check for water and drain issues
If water remains in the drum, drain it according to model procedure to remove the weight that can keep the latch engaged. A full drum can fool the system into staying locked.
Tip: Ensure drainage paths are clear to prevent repeat moisture issues. - 9
Call a professional if unresolved
If the door remains locked after all steps, a certified technician can diagnose interlock or control board faults.
Tip: Document fault codes and model number to speed service.
FAQ
Why won’t the washing machine door unlock after a wash cycle?
Common causes include moisture-affected interlocks, a faulty latch, or a failed control signal. Start with a power reset and quick checks, and proceed to a manual release if available. If unresolved, professional service may be required.
A stuck door is usually caused by the interlock or latch. Begin with a power reset and quick checks, and consider a manual release or professional help if needed.
Can I unlock the door with water remaining in the drum?
Draining or emptying the drum is often necessary before attempting a manual release. Water inside can keep the latch engaged or mask the true fault. Follow model guidelines for safe draining and then try the release.
If there’s water in the drum, drain it first and then attempt the release following the model’s steps.
Is manual release safe and model-specific?
Manual releases are designed for model-specific use. Always consult the user manual before attempting a manual release to avoid damage or voiding warranties. If you can’t locate it, contact manufacturer support.
Manual releases vary by model. Check the manual or contact support before trying to release it yourself.
What are model-specific steps for front-load vs top-load doors?
Front-load doors often release from an interior panel or service lid, while top-load doors may use a lid switch or back-panel interlock. The exact access point and method depend on the model, so consult the manual for your unit.
Front-load and top-load doors have different releases. Check your manual for the exact access point.
When should I call a professional?
If the door remains locked after safe resets and manual releases, a certified technician should diagnose interlock, latch, and control board faults. The technician can determine if replacement parts are needed and verify warranty coverage.
Call a professional if the door stays locked after all safe steps.
What if the door re-locks after an unlock attempt?
A re-locking door often indicates a faulty interlock or a persistent control signal issue. Stop attempting self-repairs beyond safety steps and seek professional diagnosis to avoid further damage.
If it keeps locking again, stop and get a professional check.
Watch Video
The Essentials
- Unplug before touching any components.
- Identify model-specific lock and release mechanisms first.
- Use a safe, stepwise approach rather than forcing parts.
- Call a professional if the door remains locked after steps.