Troubleshooting Washing Machine Errors: Quick Fix Guide
Urgent, practical troubleshooting for washing machine errors. Learn common causes, safe checks, step-by-step fixes, and prevention tips to get your laundry back on track fast.

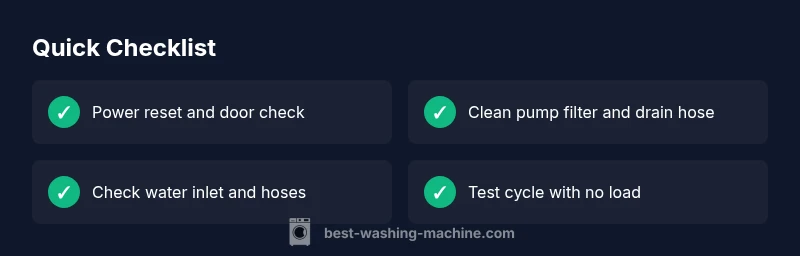
If washing machine error appears, start with a power reset, then inspect the door switch and filter/pump for clogs. Quick fixes: unplug for 60 seconds, verify the door is firmly closed, and clean the pump filter and drain hose. If the error code persists, consult the user manual or a technician.
Understanding the message when 'if washing machine error' appears
Errors on modern washers aren’t random; they’re safety-driven signals from sensors, door switches, water levels, and pump systems. When you see a generic error, your goal is to quickly identify which subsystem tripped and why. In practice, most homeowners encounter issues around drainage, lid/door switches, and power resets. By approaching the problem with a calm, methodical posture, you can resolve many errors without calling a technician. This guide uses the phrase if washing machine error to anchor our troubleshooting approach and help you act decisively during stressful moments.
Common root causes of washing machine errors
A single error can stem from several predictable culprits. Drainage problems (clogged filters, kinked hoses, or a failed pump) are among the most frequent. A faulty door or lid switch can prevent cycles from starting or finishing safely. Power-related faults, such as a loose outlet or a blown circuit, also trigger error messages. In some cases, detergent residue, fabric softener buildup, or foreign objects can interfere with sensors. Understanding these core causes helps you prioritize checks quickly.
Quick, safe checks you can perform
Before you reach for tools, perform these non-invasive steps: unplug the unit to reset the electronics, verify the door/lid is fully closed and latch engaged, and inspect the drain filter for debris. Check the water supply hoses for kinks and ensure the water inlet screens aren’t clogged. If your model has a diagnostic mode, run it per the manual to surface specific fault codes. Always have towels ready in case of water discharge.
Diagnostic flow: symptom → diagnosis → solution
Start with the symptom you see on the control panel (e.g., not starting, not draining, error code). Compare symptoms to common causes: drainage, door switch, inlet valve, or sensor fault. Narrow to a likely diagnosis, then apply the corresponding solution: reset power, clean filters, replace a faulty switch, or contact a pro for internal component work. This flow minimizes guesswork and keeps you aligned with safety protocols.
Step-by-step: drain and pump maintenance (most common fix)
- Power cycle: unplug the machine for 60 seconds, then plug back in and run a quick diagnostic cycle if available. 2) Access the pump area: locate the access panel or rear panel and have towels ready. 3) Clean the pump filter: remove debris, rinse thoroughly, and reassemble. 4) Inspect drain hose: detach, ensure it’s free of kinks and blockages. 5) Test run: run an empty load on a short cycle to confirm drainage works. 6) Recheck for leaks: observe for drips during the cycle. Tip: keep a small flashlight handy to see inside narrow spaces.
Safety, warnings, and common mistakes
Always unplug before popping panels or touching internal parts. Never pinch or yank hoses with power connected. Avoid using harsh tools that could damage seals. Common mistakes include skipping the reset step, ignoring splashback when the filter is clogged, and attempting extended repairs without proper manuals. If any step feels risky, stop and seek professional help.
Prevention and maintenance after an error
Document error codes and dates to detect patterns. Schedule regular maintenance, such as monthly filter cleansing and annual pump checks. Use the correct detergent type and avoid overfilling drums. Keep the drain hose elevated within the recommended height to prevent siphoning. These practices reduce recurrence and extend the life of your washer.
When to replace parts or call a professional
If the error code points to a failed sensor, pump, or control board, professional service is often required. Persisting not-spinning, not-draining, or error codes after a power reset indicates a deeper issue than simple clogs. In such cases, a qualified technician can diagnose with specialized tools and confirm part replacements are necessary.
Post-repair testing and clean-up checklist
After any fix, run a full cycle with a light load and observe for abnormal noises or leaks. Clean the drum and seals to prevent mold, and reset any timer or program settings that might have been altered. Keep your maintenance log updated and schedule next-year preventive checks to avoid future downtime.
Steps
Estimated time: 30-60 minutes
- 1
Power cycle and reset
Unplug the machine for 60 seconds to reset electronics, then plug back in and run a diagnostic or normal cycle. This clears transient faults and reinitializes sensors.
Tip: A quick reset solves many simple errors without tools. - 2
Check door/lid switch and wiring
Ensure the door or lid is fully closed and the switch engages with the door. Wiggling or misalignment can trigger safety protections.
Tip: Listen for a click when closing the door. - 3
Inspect and clean pump filter
Access the pump or filter, remove debris, rinse with water, and reassemble. A clogged filter is a common cause of not draining errors.
Tip: Have towels ready to catch water. - 4
Check drain hose and sewer path
Ensure the drain hose is correctly positioned, free of kinks, and not blocked by soap or fabric debris.
Tip: If your setup uses a gravity drain, maintain the recommended height. - 5
Verify water inlet and hoses
Inspect water supply hoses for kinks, and clean inlet screens to ensure steady water flow.
Tip: Turn off water supply before handling hoses. - 6
Test run with empty load
Run a short cycle with no clothes to verify drainage, spin, and wash functions after fixes.
Tip: If the error returns, document the code and consider service.
Diagnosis: Machine won't start or stops mid-cycle with an error message
Possible Causes
- highPower issue
- highDoor/lid switch fault
- mediumDrain pump or clogged filter
- mediumWater inlet or hose blockage
- lowSensor or control board fault
Fixes
- easyCheck outlet and circuit breaker, try a different outlet
- easyUnplug, reset, and test door switch; reseat wiring if accessible
- easyClean pump filter and drain hose; remove debris
- easyInspect water inlet hoses and screens for blockages
- hardConsult a technician for sensor/control board diagnosis
FAQ
What should I do first when I see a washing machine error?
Begin with safety: unplug the machine, verify the door is closed, and run a quick reset. If you can access the drain filter, inspect and clean it. These steps fix the majority of simple errors and prepare the machine for a test run.
First unplug the washer, check the door, and reset. Then clean the drain filter if accessible and run a quick test.
Do all error codes mean I need a repair technician?
Not all codes require a professional. Many are resolved by power resets and simple maintenance like clearing clogs or reseating wires. If the code persists after basics, a technician should assess sensor or control-board faults.
Many codes are fixed with resets and cleaning, but some need a technician for sensors or boards.
Why is my washer not draining after an error?
Not draining is most often caused by a clogged pump filter or a blocked drain hose. Check these components first before considering pump replacement. If the odor or water remains, seek professional help.
Not draining usually means a clog in the pump or drain hose.
Is it safe to repair the washing machine myself?
Simple maintenance like cleaning filters and hoses is safe for most homeowners. Do not attempt internal repairs to sensors or the control board. If you’re unsure, stop and call a pro to avoid electric shock or water damage.
You can do basic maintenance, but avoid risky internal repairs.
When should I replace parts rather than repair?
If a fault recurs after multiple fixes or involves essential hardware (pump, sensors, or control board), replacement parts or a professional evaluation is wise. This saves time and reduces risk of secondary damage.
If problems keep coming back, consider replacement parts or professional help.
Can detergent choice cause errors?
Using the wrong detergent or too much can create suds that affect sensors and drainage. Always use a detergent compatible with your washer and follow the manufacturer’s load guidelines.
Wrong detergent can interfere with sensors and drainage.
Watch Video
The Essentials
- Identify the most common causes: drainage, door switch, sensor fault
- Reset power first to clear transient errors
- Clean filters and hoses to restore drainage
- Avoid risky DIY for sensor/control board issues
- Call a professional when the error persists after basics