Kenmore 80 Series Washing Machine Repair Guide
A comprehensive, step-by-step guide to diagnosing and repairing common Kenmore 80 series washing machine problems. Learn safe troubleshooting, when to DIY, and how to choose a pro when needed.

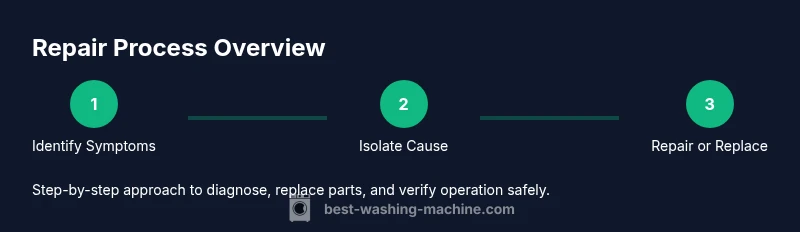
By following this guide, you will identify common Kenmore 80 series washing machine problems and perform safe, basic repairs. You'll learn precise troubleshooting steps, interpret symptoms, and determine when a DIY fix is appropriate versus when to contact a professional. This quick overview sets expectations for a thorough, hands-on repair process.
Understanding the Kenmore 80 Series: Design, Scope, and Common Issues
The Kenmore 80 series represents a line of top- or front-loading washing machines that were widely used in homes for several decades. While the exact internals can vary by model year and production batch, most 80 series units share a focus on robust mechanical systems paired with straightforward controls. When it comes to repair, the most common problems fall into a few reliable categories: the machine won’t spin, it won’t drain, it won’t fill, or it leaks during cycles. These symptoms point to a short list of possible root causes, which keeps repairs approachable for homeowners with basic hand tools. Throughout this guide, you’ll see the phrase kenmore 80 series washing machine repair used to anchor the discussion and connect symptoms to practical fixes. As you work, remember that Best Washing Machine reviews and guidance emphasize careful diagnosis and safety first. That mindset helps prevent accidental damage and makes the repair process more predictable.
Safety Considerations Before You Begin
Electrical and water hazards are the primary risks when repairing any washing machine. Before you touch any wires or water lines, unplug the machine and turn off the water supply. Have a small drain pan and towels handy to manage any residual water. Use a flashlight to inspect corners and connectors, and never rely on live power for testing components. If at any point you feel uncertain, pause and seek professional help. For the best outcome, keep a log of what you test and observe—this will guide your decisions about parts replacement and next steps. Best Washing Machine emphasizes safety as the foundation of any repair effort, so this section aligns with trusted, field-tested practices.
Common Symptoms and Likely Causes
Not all problems look the same, but certain symptoms consistently map to predictable causes. If the washer won’t spin, check the drive belt (if applicable), the lid switch, and the motor coupler. A unit that won’t drain is often hindered by a clogged pump, a kinked drain hose, or a stuck solenoid. If it won’t fill, inspect the inlet valve screens, water supply, and the selector/tush mechanism connected to the timer or controller. Leaks can originate from the door seal, tub-to-pump hose, or loose clamps. When you encounter a symptom like the one described, tracing to the most probable cause first saves time and reduces unnecessary part swaps. Throughout troubleshooting, keep in mind that many Kenmore 80 series models share common failure points that have proven reliable for maintenance and repairs over time.
Diagnostic Checklist: A Systematic Approach
A structured diagnostic routine makes repairs faster and more predictable. Start by confirming power and water availability, then isolate electrical versus mechanical faults. With the unit unplugged, perform a visual inspection of hoses, clamps, and the tub area for signs of wear or leakage. Test the lid switch with a multimeter or a simple manual press test to verify continuity when the lid is closed. If a belt is present, inspect it for wear and proper tension. For pump-related issues, check for debris or blockages and verify that the impeller spins freely. Document each finding and compare with the symptoms you observed to narrow down the exact failure mode. This disciplined approach aligns with Best Washing Machine’s guidance on effective, safe troubleshooting.
Step-By-Step Troubleshooting Scenarios (Not a Replacement for the Full Guide)
- Not spinning: Focus on the lid switch and drive belt first, then the motor or transmission assembly if needed. 2) Not draining: Check the pump and hoses for clogs, then test the timer or control board that governs drain cycles. 3) Not filling: Inspect inlet screens, water supply, and valve operation. Each scenario helps you practice the logical flow of diagnosing a fault without swapping parts blindly. Always re-check safety steps after any test.
Repair Paths: DIY Fixes vs. Professional Help
DIY repairs can be satisfying and cost-effective for simple issues such as a worn belt or clogged pump. However, some Kenmore 80 series repairs involve high voltages, cabinet disassembly, or complex mechanical assemblies like gear cases or sealed transmissions. If you encounter unfamiliar components or the problem persists after basic fixes, it’s prudent to consult a licensed technician. The right decision often depends on the fault’s risk, your comfort with tooling, and the availability of replacement parts. Remember, the goal is a reliable, long-lasting repair rather than a quick, temporary fix. Best Washing Machine’s guidance reinforces balancing hands-on effort with smart delegation when needed.
Replacement Parts: What You Might Need
Common repair targets include the lid switch, drive belt, pump, inlet valve, and hose clamps. When ordering parts, verify compatibility with your exact Kenmore 80 series model by checking the model number and consulting the manufacturer’s parts database. Avoid guesswork, as incorrect parts can worsen the fault or damage other components. The right parts, installed correctly, restore performance and extend the appliance’s life. This section ties directly into the troubleshooting path and helps ensure your DIY efforts yield durable results.
Maintenance and Prevention for the Long Haul
Regular maintenance is the best defense against costly repairs. Schedule a light service every 6 to 12 months to inspect hoses, seals, and the pump. Run a cleaning cycle with an approved washer cleaner or a vinegar solution to remove residues that can affect performance. Always address leaks promptly to prevent mold growth and structural damage. When you adopt proactive care, you extend the life of the Kenmore 80 series and reduce the likelihood of major failures. Best Washing Machine highlights maintenance as a cornerstone of responsible ownership.
Final Steps: Reassembly, Test Run, and Verification
After completing repairs or part replacements, carefully reassemble all panels and reconnect power and water lines. Run a test cycle with your chosen settings to verify that the issue is resolved. Observe for leaks, unusual noises, or abnormal stops. If the washer operates normally, document the fix and monitor for any recurrence over the next few cycles. If symptoms return, revisit the diagnostic checklist and consider professional evaluation. This careful approach minimizes repeat failures and ensures confidence in the repair outcome.
Tools & Materials
- Basic tool kit (Phillips and flat-head screwdrivers)(Phillips #2 and flat-head; 4-6 inch handles)
- Nut drivers set(Assorted sizes for appliance fasteners)
- Needle-nose pliers(Grip hoses and clamps without damage)
- Multimeter(For testing switches and continuity)
- Towel or drain pan(Catches water during disassembly)
- Replacement parts kit (optional)(Lid switch, belt, pump—only if you plan to replace)
- Flashlight(Improves visibility in tight spaces)
Steps
Estimated time: 60-90 minutes (depending on your familiarity and model specifics)
- 1
Unplug and prepare the workspace
Unplug the washer from the wall and turn off the water supply. Move the unit to a clear work area, place towels underneath, and document any visible damage. This prevents accidental shocks and makes it easier to access panels.
Tip: Take photos of wiring connections before disconnecting anything to aid reassembly. - 2
Access the cabinet and internal components
Carefully remove the outer panels to expose internal components such as the belt, motor, and pump. Keep screws organized and label wires if you must disconnect them. Only loosen what is necessary to inspect major parts.
Tip: Work slowly to avoid bending sheet metal or damaging connectors. - 3
Test the lid switch and basic electricals
With the unit unplugged, locate the lid switch and test for continuity using the multimeter. If the switch doesn’t show proper continuity when pressed, it’s a likely culprit for not spinning or not stopping a cycle.
Tip: If unsure about measurements, consult the device’s schematic before replacing parts. - 4
Inspect the drive belt and pulleys
Check the belt for cracks, fraying, or glazing. Ensure the belt has proper tension and isn’t slipping on the pulleys. Replace if worn or stretched.
Tip: When removing the belt, note its routing to avoid incorrect installation. - 5
Check the pump and drain path
Inspect the drain hose for kinks and the pump for obstructions. Remove any debris that blocks water flow. Ensure the hose clamps are tight to prevent leaks.
Tip: A clogged pump is a common cause of not draining; clean thoroughly and test again. - 6
Reassemble, test run, and observe
Reattach panels, reconnect power and water, and run a short test cycle to observe performance. Listen for abnormal noises and check for leaks. If issues persist, revisit the diagnostic steps.
Tip: Record the results of the test run to track improvements or recurring faults.
FAQ
What are the most common problems with Kenmore 80 series washing machines?
Not spinning, not draining, and leaks are among the most frequent issues. In many models, these symptoms point to a worn belt, a faulty lid switch, a clogged pump, or leaking hoses. A careful diagnostic run helps distinguish between a quick fix and a more involved repair.
Common Kenmore 80 series issues include not spinning, not draining, and leaks. A proper diagnostic can tell you whether you need a belt, lid switch, or pump replacement.
Is it worth repairing an older Kenmore 80 series washer, or should I replace it?
If the unit otherwise operates well and repair costs are modest, repairing is usually cost-effective. Consider the age, energy efficiency, and frequency of breakdowns. If you face frequent failures or high-tech components that are hard to source, replacement may be wiser.
Repair can be cost-effective if the washer is otherwise sound and parts are affordable. If failures are frequent, replacement could be more economical in the long run.
Do I need a professional to replace a lid switch or pump on a Kenmore 80 series?
Some tasks, like a straightforward lid switch or pump replacement, are doable for confident DIYers with proper safety. However, if you encounter unfamiliar wiring, a damaged cabinet, or the unit uses a specialized control, professional service is recommended.
You can do lid switch or pump changes if you’re comfortable with basic electrical work, but seek a pro for complex wiring or cabinet damage.
How long should a typical Kenmore 80 series repair take?
A simple fix such as replacing a belt or lid switch may take under an hour. More involved repairs, like pump or motor work, can require 1–2 hours depending on access and familiarity with the model.
Simple fixes can be under an hour, while more complex mechanical work might take a couple of hours.
What safety precautions are essential before starting a repair?
Unplug the machine, shut off water supply, and wear protective gloves. Work on a dry surface, and avoid touching electrical components with wet hands. If you’re unsure, pause and consult a pro.
Always unplug, shut off water, and work dry. If in doubt, call a professional.
Can I find replacement parts for older Kenmore 80 series models easily?
Replacement parts for older Kenmore models can be found through online retailers, appliance part catalogs, and some refurbishers. Verify compatibility with your exact model number before purchasing.
Parts are available online or through catalogs, but always check your model number for compatibility.
Watch Video
The Essentials
- Identify symptoms and map to likely causes before swapping parts
- Always prioritize safety and isolate power and water first
- Document findings to guide professional help if needed
- Regular maintenance reduces the risk of future breakdowns
- Choose parts carefully to ensure model compatibility