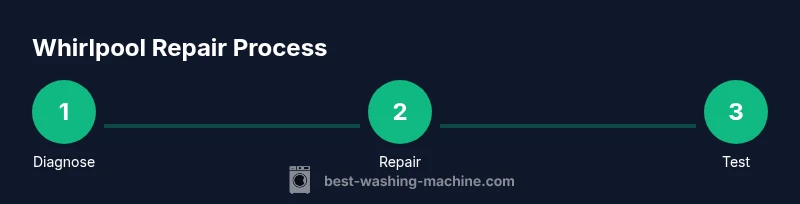
Repair Whirlpool Washing Machine: Step-by-Step Guide
A safety-first, practical guide to diagnosing and repairing common Whirlpool washers. Learn what to check, which tools you need, a clear step-by-step repair flow, maintenance tips, and when to call a professional.

To repair a Whirlpool washing machine, start with safety: unplug, shut off water, and gather basic tools. Listen for unusual noises, check the drain pump and lid switch, inspect hoses, and verify the drive belt or motor coupling. This guide walks you through a practical diagnostic flow and common fixes, plus when to call a pro.
What typically fails in Whirlpool washers and how to diagnose
Whirlpool washing machines are reliable, but over time components wear out, especially on popular models with standard belt drives and front- or top-loading configurations. Common failures include a clogged or failing drain pump, a defective lid or door switch, a torn drive belt, a malfunctioning water inlet valve, and intermittent control-board errors. A systematic diagnostic approach saves time and reduces unnecessary part replacements. Start with observable symptoms: does the unit fail to drain, agitate, or spin? Do you hear a humming sound but no water movement? Each symptom points to a different likely culprit and a safer, more cost-effective repair path. Remember that models vary; adapt your checks to your specific Whirlpool model and consult the user manual if needed.
Safety and preparation before you begin
Safety must come first when repairing a washing machine. Always unplug the machine and shut off the hot and cold water valves before touching any components. Place a towel or small basin under hoses to catch any residual water. Wear gloves and use a flashlight to inspect tight spaces. Keep children and pets away, and work on a dry, stable surface to prevent slips. If you are uncomfortable with electrical work, consider calling a licensed technician. Safety can prevent injuries and further equipment damage.
Basic diagnostic flow: listening, observing, and testing
Adopt a systematic flow: listen for motor hums, pump sounds, or grinding; observe water fill and drum movement during cycles; and test continuity on obvious components with a multimeter. Note error codes from the control panel and cross-reference them with the Whirlpool service manual. If the machine fills but won’t drain, focus on the drain pump, drain hose, and screen. If it agitates but won’t spin, inspect the drive belt or transmission coupling. This approach helps you narrow down issues quickly and reduces guesswork.
Common failure modes and practical fixes
Drain pump issues often come from debris or a worn impeller; clean the pump screen and hoses, then replace if necessary. A faulty lid switch prevents the washer from starting or spinning; test with a multimeter and replace if open or damaged. Worn belts cause slippage and poor agitation; replace the belt with the exact length and width specified for your model. Control-board failures are less common but can manifest as unresponsive displays or irregular cycles; reseat connectors, inspect for burnt components, and replace only with compatible parts. For front-load models, check the door boot and seals for leaks caused by worn gaskets.
Tools, parts, and where to buy them
Gather basic tools: screwdriver set, needle-nose pliers, multimeter, flashlight, channel locks, and a bucket. Essential parts may include a drain pump, door/lid switch, drive belt, inlet valve, and assorted o-rings. Optional items: replacement water inlet hoses, a service manual for your Whirlpool model, and a parts catalog for exact fit. Buy from reputable retailers or the manufacturer’s parts store, and verify compatibility by model number, serial number, and your Whirlpool model name.
Step-by-step repair example: fixing a clogged drain or pump
Diagnose a no-drain symptom by detaching the drain hose and inspecting the pump: remove the pump from the frame, clear out hair and debris from the impeller, reinstall, and test. If water won’t fill, inspect the inlet valve and supply hoses for kinks or debris; replace as needed. For a failed lid switch, measure resistance and replace if it shows no continuity. After each repair, run a test cycle with a small load to verify proper function and leak-free operation. Always double-check hose connections and clamps before sealing the cabinet.
Whirlpool-specific considerations: model variation and service manuals
Whirlpool models vary in layout: top-load versus front-load, direct-drive versus belt-drive, and variations for lint filters and cold-water inlets. Always consult the model-specific service manual or Whirlpool’s official troubleshooting guides to confirm the correct parts and wiring diagrams. Some repairs require special tools or torque settings; using the wrong part or over-tightening fittings can cause damage or void warranties. When in doubt, contact Best Washing Machine for guidance or professional service.
When to repair vs. replace and budgeting
If your Whirlpool washer requires two or more major component replacements within a short period, replacement might be more cost-effective. Compare part costs, labor estimates, and extended warranties. Consider the age of the machine and its energy and water efficiency, since newer models can save money over time. A careful cost-benefit analysis helps you decide whether to repair now or invest in a newer, more efficient unit.
Maintenance tips to extend the life of your Whirlpool washer
Schedule regular inspections of hoses and pumps, clean lint filters, and run monthly maintenance cycles with a washer-cleaning product or vinegar solution (per manual guidelines). Keep the load balanced to reduce wear on the drive mechanism and prevent excessive vibration. Use the correct detergent type and amount to minimize suds and residue that can harm seals. Finally, store spare parts and keep tools organized for quick future repairs.
Tools & Materials
- Screwdriver set (Phillips and flathead)(Philips #2 and flat-head for access panels and screws.)
- Multimeter(Check continuity on switches and coils.)
- Needle-nose pliers(Pinch hose clamps and remove debris.)
- Bucket or towels(Catch residual water and protect floor.)
- Flashlight/work light(Illuminate tight spaces and identify leaks.)
- Replacement parts (drain pump, lid switch, belt, inlet valve)(Only if diagnosis confirms failure; verify model compatibility.)
- Adjustable wrench/torque driver(Shut-off valve connections and hoses.)
- Model-specific service manual or Whirlpool parts catalog(Ensure correct part numbers and wiring diagrams.)
Steps
Estimated time: 60-120 minutes
- 1
Disconnect power and water
Unplug the washer from the wall outlet and turn off both hot and cold water valves. Move the unit away from the wall to access service panels without stretching cords or hoses. Why: prevents electrical shock and minimizes water leakage during service.
Tip: Use a dry towel to soak up any water near electrical components. - 2
Access the major components
Remove the lower access panel or service panel to expose the drain pump, belt, hoses, and switch assemblies. Keep screws organized and take a photo before removing connectors. Why: ensures you can identify and reassemble parts accurately.
Tip: Label wires with masking tape if you disconnect multiple connectors. - 3
Inspect the drain pump and hose path
Check for clogs in the pump impeller and drain hose. Remove debris with a small brush or cloth. If the pump rotor doesn’t turn smoothly, replace the pump. Why: a blocked pump is a common no-drain failure.
Tip: Do not force the impeller; gentle cleaning is enough in most cases. - 4
Test the lid/door switch
With the unit unplugged, access the lid switch terminal and test continuity with a multimeter. If there’s no continuity, replace the switch. Why: a faulty switch prevents starting or draining cycles.
Tip: Ensure the actuator plunger moves freely when the lid is pressed. - 5
Check the drive belt or coupling
For belt-driven models, inspect the belt for wear, cracks, or looseness. If needed, replace with the exact belt model. For direct-drive units, inspect the motor coupling. Why: worn belts reduce agitation and spinning.
Tip: Use the proper belt tension and torque specifications. - 6
Test cycle after reassembly
Reconnect everything securely, restore water supply, plug in, and run a short test cycle with a small load. Observe for draining, agitation, and spinning behavior. Why: confirms the repair works and leaks are absent.
Tip: Be ready to stop the cycle if you notice unusual noises or leaks.
FAQ
What are the most common Whirlpool washer problems?
Top issues include not draining, not spinning, and failure to start. Check the drain pump, lid switch, belts, and control board. Review error codes in the user manual to guide your checks.
Common issues are draining, spinning, or starting problems. Start with the drain pump and lid switch, then inspect belts or the control board if needed.
Can I repair a Whirlpool washer myself?
Many minor repairs can be done by homeowners with basic tools and care. Always consult the model manual and safety guidelines. For electrical, water, or refrigerant-related questions, consider professional service.
Yes, some repairs are doable at home with care, but for electrical or sealed components, seek a pro.
How do I identify a bad lid switch?
Test continuity with a multimeter when the lid is pressed. If there’s no continuity, replace the switch. A faulty switch will prevent the cycle from starting or draining properly.
Test the switch for continuity; if it fails, replace it to restore function.
When should I call a professional?
If you’re unsure about electrical safety, encounter refrigerant smells, or the unit is under warranty, a professional technician is recommended. Complex wiring or motor issues should be handled by pros.
If unsure about safety or the problem seems complex, it’s best to call a technician.
How can I reset Whirlpool error codes after a fix?
Most Whirlpool washers reset by unplugging for 1-2 minutes or pressing specific button combinations per model. Refer to the manual for exact steps and allow the control panel to reboot fully.
Unplug for a minute or two to reset the panel, then run a test cycle to verify the fix.
Watch Video
The Essentials
- Follow safety first to avoid injury
- Diagnose by symptoms to identify the most likely issue
- Check drain pump, lid switch, and belt before expensive parts
- Test cycles after each repair to confirm success
- Model-specific manuals ensure correct parts and wiring