Samsung Washing Machine Code SE: Quick Fix and Diagnostic Guide
Urgent guide to samsung washing machine code se—what it means, fast fixes you can try, diagnostic flow, step-by-step repair, and when to call a pro. Stay ahead with Best Washing Machine.

samsung washing machine code se usually means a sensor error that interrupts operation. According to Best Washing Machine, this fault points to a faulty sensor, sensor harness, or a control-board-software glitch. Quick fixes include power cycling, reseating sensor connections, and running a soft reset. If the code persists, plan a professional inspection to avoid overflow or further damage.
What SE Means on Samsung Washing Machines
The code SE on Samsung washing machines is typically described as a sensor error. This fault indicates that one of the built-in sensors—such as the water level sensor, load sensor, or door-latch sensor—failed to report accurate data to the control board. When the sensor signal is ambiguous or out of range, the washer may halt mid-cycle or display SE to protect against potential overflow, improper rinsing, or mechanical damage. Importantly, SE doesn’t always point to a single failed part; it can be a loose connection, corroded contact, or an intermittent sensor fault that only shows up under certain load or water conditions. By understanding SE as a sensor communication or reading issue, you can prioritize checks that restore reliable feedback to the controller.
According to the Best Washing Machine approach to common fault codes, sensor-related errors are among the most frequent culprits in Samsung models, making SE a high-priority diagnosis for both new and older machines. Early attention reduces the risk of secondary damage to the wiring harness or the control board, and it helps you minimize downtime in busy households or commercial settings.
Common Causes of SE and Why They Trigger Problems
SE points to sensor problems, but the root cause can vary. The most common sources include a loose or damaged sensor harness, corroded connector pins, a defective sensor element, or a transient control-board glitch that misreads sensor data. In some models, an error in firmware or a microcontroller reset can masquerade as a sensor fault. Less frequent, but possible, are problems with the main power supply to the sensor network or water main issues that flood the sensor circuit. In any case, the impact is the same: the washer halts to prevent overflow or mis-washing. The likelihood ranking below helps you triage effectively:
- Faulty or loose sensor connection (high)
- Sensor component failure (medium)
- Control board glitch or communication issue (low)
Recognizing these patterns lets you sequence fixes from quick checks to more involved repairs without unnecessary downtime.
Quick Checks You Can Do Safely Before Calling a Tech
You don’t need a professional to start desensitizing SE. Begin with simple, safe steps that reset the controller and restore clean sensor data paths. Start by unplugging the machine, waiting 60 seconds, then plugging back in and performing a soft reset (if your model offers this option). Inspect the sensor harnesses and main wiring loom for loose connectors, bent pins, or signs of corrosion. Reseat each connector firmly, especially at the pressure sensor, water level sensor, and door switch if accessible. If you’re comfortable, check for obvious wear on low-voltage sensor wires and protect against pinching in the rear cabinet. Finally, ensure the drain and water supply hoses are clear and unobstructed; a water issue can sometimes trigger sensor readings that look like SE.
If the unit was recently moved or powered on after a service, a faulty reassembly could be the culprit. In that case, recheck the harness routing to ensure there are no sharp bends or pinched wires. These quick checks often resolve SE without tools, saving you time and money while reducing the risk of accidental damage.
How to Diagnose Sensor-Related Faults Safely
Diagnosing sensor faults requires careful observation and safe handling of electrical components. Start with a visual inspection of sensor housings for cracks or moisture. If your model allows, test sensor signals with a multimeter by checking continuity and resistance against the manufacturer’s specifications. Note any unusual readings, intermittent signals, or stuck sensors during cycle tests. When in doubt, perform a controlled test cycle with a minimal load to verify whether the sensor array reads correctly during fill, agitation, and drain phases. Remember to disconnect power before probing any internal components. If you observe consistent out-of-range readings or non-responsive sensors, replacement is likely: focal sensors include the water level sensor and load sensor. Ensure you source compatible parts and consult the model’s service manual for exact pinouts.
Throughout diagnostics, keep an eye on the control board’s indicator LEDs and error log history. A transient firmware issue can provoke a sensor fault code; a firmware update or factory reset can sometimes clear SE if the hardware passes basic tests. However, avoid repeated resets if you’re not sure of the underlying cause, as this can mask a developing hardware problem.
Step-by-Step Fix Strategy (What to Expect)
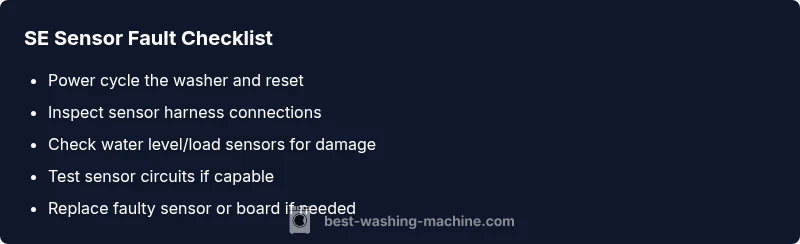
The most common SE fix targets the sensor harness and its connections. The steps below outline a practical path you can follow (with safety in mind). Optional tools include a small flat-head screwdriver, a multimeter, and basic hand tools. Always unplug the washer before starting.
- Power down and unplug the unit. Wait 60 seconds, then plug back in and power up to see if SE persists.
- Open the access panel at the rear or side to reach sensor harnesses. Check for loose or corroded connections; reseat all sensor connectors, especially at the water level and load sensors.
- Inspect sensor hoses for kinks, cracks, or detachment. Replace frayed hoses and ensure proper seating.
- If you have experience with electronics, test the sensor circuits with a multimeter to confirm continuity and resistance against the model’s spec. Replace any sensor showing abnormal readings.
- Reset the control board by performing a full power cycle or using the manufacturer’s reset procedure. Re-run a cycle to confirm whether SE reappears.
- If the problem persists after harness and sensor tests, replace the faulty sensor or the control board. This step often requires a professional technician due to safety and calibration concerns.
Estimated time for this process: about 30–60 minutes for basic checks, 60–120 minutes if you replace components. If you’re uncomfortable with disassembly or handling electronic components, schedule professional repair to avoid data loss or electrical hazards.
Other Causes: Alternative Scenarios and Their Fixes
Beyond sensor faults, SE can appear due to firmware glitches, a failing control board, or intermittent wiring issues that only show under load. If harness checks and sensor replacement don’t resolve SE, you should consider updating the firmware (if supported by your model) or performing a factory reset, as some software hiccups trigger sensor readouts. In rare cases, a motor or pump issue can create sensor-like signals that confuse the controller. If you see recurring SE after repairs, a professional diagnostic is warranted to avoid cascading failures and ensure the machine remains safe to operate.
TIPS & WARNINGS: Safety First and When to Call a Professional
- Always unplug before inspecting any internal components. Do not touch exposed wires without a proper grounding.
- If your model includes exposed high-voltage components after panel removal, consider calling a pro; mishandling can cause electric shock or further damage.
- When replacing sensors or the control board, source OEM or model-accurate parts to avoid compatibility issues.
- If the SE reappears after a sensor repair, there could be a deeper issue, such as a faulty wiring harness or the main control system; a professional diagnosis is recommended.
- Expect a broad cost range for sensor-related repairs, typically varying with part availability and labor; costs can range from a modest service call to a more substantial repair involving sensor or board replacement.
Key Takeaways to Prevent SE in the Future
- Regularly inspect sensor harnesses and connectors during routine maintenance.
- Avoid overloading the washer, as excessive loads stress load and water-level sensors.
- Keep the washer level to prevent sensor misreads; use the built-in leveling feet.
- Maintain a scheduled firmware check if your model supports updates; software fixes can resolve sensor-reading issues.
- Document any SE occurrences for technicians, helping them identify patterns and prevent recurrence.
Steps
Estimated time: 30-60 minutes
- 1
Power cycle and soft reset
Unplug the washer, wait 60 seconds, then plug it back in and power up. Run a short cycle with a light load to confirm if SE reappears. This step often clears transient sensor read errors caused by firmware hiccups.
Tip: A full power cycle can clear temporary memory glitches in the controller. - 2
Inspect harnesses and connectors
Open the access panels and locate the sensor harnesses. Check for loose pins, corrosion, or damaged wires. Reseat all connectors firmly and test by gently wiggling to identify intermittent connections.
Tip: Take photos during disassembly to document wire routing for reassembly. - 3
Check sensors for obvious faults
Visually inspect the water level and load sensors for cracks, moisture, or debris. Remove obstructions and ensure hoses or tubes connected to the sensors are intact. Replace any obviously damaged components.
Tip: Avoid pulling on hoses—disconnect conductors first before handling tubes. - 4
Test sensor signals (optional)
If you have electrical experience, measure resistance/continuity of sensor circuits with a multimeter according to the model’s service manual. Compare readings to specified ranges; replace parts that show abnormal values.
Tip: Only perform this step if you’re confident with electrical testing to avoid harm. - 5
Reset and re-test
Power cycle again after any sensor work, then run a test cycle with a small load. Observe whether SE clears and the machine completes a full cycle without errors.
Tip: Keep the machine dry and avoid splashing water on electronics during testing. - 6
Determine next steps
If SE remains unresolved after sensor checks, the issue may lie with the control board or a deeper wiring fault. Schedule professional service for definitive diagnosis and part replacement.
Tip: Document symptoms, timing, and any recent repairs to share with the technician.
Diagnosis: Machine displays SE and may halt mid-cycle
Possible Causes
- highFaulty or loose sensor connection (sensor harness)
- mediumSensor component failure (damaged water level or load sensor)
- lowControl board glitch or communication issue
Fixes
- easyInspect and reseat sensor harness connectors; unplug/replug at main control and sensor boards
- mediumTest sensor circuits with a multimeter; replace sensor if readings are out of spec
- hardReset the control board and perform a controlled test cycle; if persists, plan professional diagnosis
FAQ
What does Samsung washing machine code SE mean?
SE typically indicates a sensor error affecting one of the machine’s feedback sensors. It often points to the water level, load, or door sensor, or a fault in sensor wiring or the control board. A careful check of connections and sensors usually resolves the issue.
SE means a sensor error. Check your sensors and connections; if it persists, you should get a professional diagnosis.
Can SE be caused by a simple reset?
A soft reset or power cycle can clear transient faults that momentarily trigger SE. If SE returns after reset, the fault is likely deeper in the sensors, harnesses, or control board and requires further inspection.
A reset can clear a temporary fault, but if SE repeats, you’ll need a deeper check.
How do I safely test sensor connections?
Safety first: unplug the unit, open the access panel, and inspect connectors for looseness or corrosion. Reseat connectors firmly and avoid pulling on wires. If you’re unsure, consult a technician.
Unplug the machine, check connectors, reseat them, and avoid touching live components.
What parts are commonly replaced for SE?
Most SE repairs involve the water level or load sensor harness, or the sensors themselves. In some cases, the control board may be implicated. Replacement costs vary by part and labor, typically ranging from a modest service call to a full sensor or board replacement.
Sensor harnesses or sensors are common, sometimes the control board.
When should I call a professional?
If you’re uncomfortable with electrical testing, if SE recurs after checks, or if you discover damaged wiring or a likely control-board fault, contact a qualified technician. Professional diagnosis helps avoid further damage and ensures safety.
Call a pro if you’re unsure or the error keeps coming back.
Watch Video
The Essentials
- Identify SE meaning quickly and triage sensor faults.
- Try safe quick fixes before expensive repairs.
- Prioritize professional help for complex sensor or board issues.
- Document failures to aid technicians and prevent recurrence.