Troubleshoot Whirlpool Washing Machines: A Practical Guide
Learn how to troubleshoot Whirlpool washing machines with a practical, step-by-step approach. Diagnose common faults quickly, fix, and prevent future issues.

The most common Whirlpool starting faults stem from power issues or a failed lid switch. Begin with a simple power check: verify the outlet is live, inspect the cord, and reset the circuit breaker if needed. Also test the lid switch while the door is closed. If the machine still won’t respond, proceed with the diagnostic flow and safe, methodical fixes.
How to troubleshoot washing machine whirlpool
When a Whirlpool washer won’t start, your first move should be methodical, not frantic. According to Best Washing Machine, the fastest path to a fix begins with the simplest checks—power, connections, and safety interlocks—before moving to deeper diagnostics. This approach saves time, preserves your warranty, and reduces unnecessary parts replacement. In this article, we outline a practical, safety-first process tailored to Whirlpool models, with concrete tests you can perform with everyday tools. Expect to assess power availability, inspect the cord and outlet, verify the lid switch, and, if needed, progress through a structured diagnostic flow. Keep the user manual handy for model-specific codes and procedures.
The Whirlpool not starting: common causes
Most Whirlpool starting issues fall into a handful of predictable categories. A tripped circuit breaker or blown fuse can cut power to the washer even when the outlet seems fine. A damaged or loose power cord, or a plug that doesn’t seat fully, can cause intermittent power. The lid switch or door latch is a frequent culprit—if the switch doesn’t register the lid is closed, the machine won’t run. A failed control panel or faulty wiring inside the console can also stop the cycle from starting. Finally, aging units may contend with motor or drive belt wear that prevents engagement. Each cause has a practical fix you can attempt safely before scheduling service.
Safety first when troubleshooting Whirlpool washers
Before you touch any components, unplug the washer and disconnect it from the power source. If you must reach behind the unit, use insulated gloves and avoid damp areas. Never bypass interlocks or jumpstart the control board. If there is standing water or the laundry area is flooded, address that hazard first. Use a non-conductive tool to probe around, and never pull on wiring harnesses. If you smell burning plastic or notice damaged cords, stop and seek professional help. Establishing strict safety rules minimizes electric shock risk and prevents accidental damage to critical components.
Diagnostic flow overview for Whirlpool not starting
A structured diagnostic flow helps you avoid guessing. Start with the simplest checks (outlet power and cord condition), then test the lid switch, followed by a basic control-panel reset. If the machine still won’t respond, inspect the wiring at the back panel and look for obvious signs of damage. Finally, consider the state of the drive motor and main control board. This approach mirrors professional service guides: verify power, confirm interlocks, test critical circuits, and escalate if necessary. By following this flow, you’ll save time and reduce costly mistakes.
Step-by-step fix for the most common cause
The most common not-start fault is a power/lock issue. Step 1: Ensure the outlet and circuit are supplying power by testing with a known-working device. Step 2: Inspect the power cord for wear; unplug and reseat the plug, or replace if you see cracks. Step 3: Confirm the lid switch with the door closed; press the switch or use a multimeter to verify continuity. Step 4: Reset the control board by unplugging for 60 seconds and plugging back in. Step 5: If the display remains dark, check for error codes and consult the user manual. Tip: photograph connections before reseating wires to simplify reassembly.
Maintenance to prevent future issues
Proactive maintenance reduces not-start failures. Regularly wipe down the drum and lint filter (if available), ensuring no debris blocks sensors or the drain. Inspect hoses for bulges, kinks, or leaks and replace them per the manufacturer’s schedule. Use the correct detergent amount to avoid excessive suds that can trigger sensor faults. Run a maintenance cycle monthly if your model supports it, and leave the lid slightly ajar after cycles to promote drying. Keeping the area dry and clutter-free minimizes accidental damage and improves reliability.
When to call a professional
If basic checks don’t resolve the issue, or you notice signs of water leakage, burning smells, or melted plastics, stop and call a qualified technician. A professional can diagnose hidden faults in the control board, motor, or wiring harness with specialized tools. If the unit is under warranty, contact the manufacturer or an authorized service provider to avoid voiding coverage. Have your model number, serial, and a brief fault description ready to speed up service.
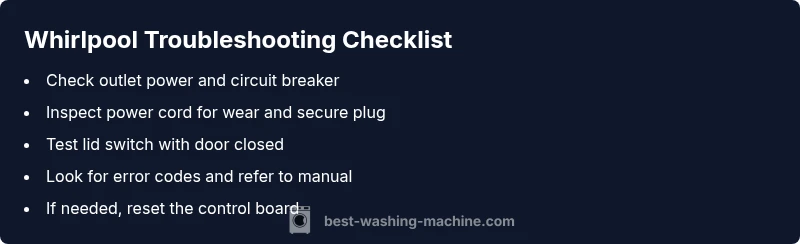
Quick checks you can do in 10 minutes
- Verify the outlet is live using a known-good device. - Confirm the circuit breaker isn’t tripped. - Inspect the power cord for damage and reseat the plug. - Check the lid switch or door latch for obstructions or misalignment. - Review the control panel for error codes or blinking lights. These fast checks catch the majority of trivial faults and set you up for deeper diagnostics if needed.
Common error codes and what they mean
Whirlpool washers use error codes to signal specific issues. For model-specific meanings, consult your user manual or the manufacturer’s official site. In general, codes guide you toward lid-switch problems, drainage faults, or sensor failures. If you’re uncertain about a code, don’t guess; document the code, power down the unit, and follow the manual’s troubleshooting steps or contact support. Avoid attempting to clear codes without understanding their cause, as that can mask a hazardous or mechanical fault.
Steps
Estimated time: 30-60 minutes
- 1
Power and outlet check
Confirm the outlet has power by plugging in a lamp or phone charger. If the outlet is dead, reset the circuit breaker and test again. If the outlet works, move to step 2.
Tip: Use a different outlet on a different circuit if available. - 2
Inspect the power cord
Look for visible damage, fraying, or loose connections at both ends. If the cord is damaged, replace it with an OEM cord and reconnect securely.
Tip: Unplug before handling; avoid DIY cord splices. - 3
Lid switch/door latch test
With the door closed, press the lid switch and listen for a click. If you can measure continuity with a multimeter, the switch is faulty; replace if necessary.
Tip: Some models require a service manual to access the switch. - 4
Reset the control board
Unplug the machine for at least 60 seconds, then plug back in and attempt a new cycle. If there’s still no response, check for error codes.
Tip: Do not reset repeatedly in quick succession; allow a minute between attempts. - 5
Check for error codes and consult manual
If codes appear, consult the user manual or manufacturer site to map codes to fault types. Follow the recommended actions for each code, up to contacting support.
Tip: Document codes before disconnecting any components.
Diagnosis: Machine won't start or respond to inputs
Possible Causes
- highPower issue (outlet, cord, breaker)
- mediumTripped circuit or blown fuse
- highFaulty lid switch or door latch
- lowControl board or wiring fault
Fixes
- easyTest outlet with a known-good device and reset the breaker if needed.
- easyInspect power cord for wear; replace if damaged and ensure plug is fully seated.
- easyTest lid switch continuity with a multimeter or by pressing the switch while attempting to start.
- hardIf the control board/ wiring shows damage or the display remains unresponsive, arrange professional service.
FAQ
Why won't my Whirlpool washer start even though it's plugged in?
Power issues, a faulty lid switch, or a tripped breaker are the most common causes. Verify the outlet and cord, test the lid switch, and reset the control panel before seeking deeper diagnostics.
If it still won't start after basic checks, proceed to the step-by-step guide or contact support for more help.
How do I test the lid switch on a Whirlpool washer?
With the door closed, press the lid switch and listen for a click or confirm continuity with a multimeter. If there’s no continuity, replace the switch or have a professional check wiring.
Test the switch with a meter; replace if it isn’t showing continuity when the lid is closed.
My washer beeps but won’t start. What should I do?
Beeping often signals error codes or sensor faults. Check the display for codes, consult the manual, and reset the unit. If codes persist, escalate to professional service.
Check the display for codes and follow the manual, then reset and try again.
Is it safe to reset Whirlpool washer electronics myself?
A short power reset is generally safe, but avoid repeated resets if the issue persists. If problems continue, consult the manual and consider technician support to prevent further damage.
A quick reset can help, but don’t rely on it as a long-term fix.
What maintenance can prevent starting issues?
Regularly cleaning the drum, inspecting hoses, and using the correct detergent amount reduces sensor and drain issues. Schedule routine checks and keep the area around the machine tidy.
Keep up with maintenance to avoid recurring not-start problems.
When should I call a technician for a Whirlpool washer?
If basic checks fail, there are leaks, burning smells, or you notice damaged wiring, contact a certified technician. Warranty terms may require authorized service for coverage.
If basic fixes don’t work or you see damage, call a pro.
Watch Video
The Essentials
- Start with power and lid-switch checks.
- Follow a safe, stepwise flow before disassembly.
- Document error codes and consult the manual for meanings.
- Call a professional for control-board or motor faults.