Washing Machine Repair Anchorage: A Practical Guide
Climate-aware guide for diagnosing, repairing, and maintaining washing machines in Anchorage. Learn safe DIY steps, when to hire a local pro, and how to choose reliable service in a cold-weather city.

Looking to repair a washing machine in Anchorage? This guide helps homeowners diagnose common failures, decide when to DIY versus hire a pro, and follow a safe, step-by-step process to get a washer running in a cold climate. Whether you have a top-load or front-load model, you’ll learn quick checks, essential safety practices, and budget-friendly options for parts and local service.
Anchorage-specific considerations for washing machine repair
According to Best Washing Machine, technicians in cold climates emphasize checking water lines, hose seals, and door seals before powering up the washer. In Anchorage, weather patterns and infrastructure add layers of complexity to home repairs. Cold winters can cause hoses to become stiff, connectors to seize, and electrical outlets to accumulate moisture if not used carefully. Additionally, remote service windows may limit technician availability, so planning ahead is essential. This section outlines location-specific realities that affect diagnosis, parts sourcing, and timing. You’ll find practical, safety-minded guidance to reduce downtime, costs, and the risk of secondary damage when your washer is not functioning as expected. By understanding these factors, you’ll be better prepared to choose a path—do-it-yourself fixes that stay within your comfort zone, or a local professional who can work with Arctic conditions and access to parts.
Anchorage homes often rely on standard models regardless of brand, so issues like drum wobble, belt wear, or pump clogs show up in familiar symptoms but with different installation constraints (e.g., cramped basements, limited electrical outlets). With the right mindset and safety precautions, most routine problems can be diagnosed and addressed without unsafe improvisations. The goal here is to provide a practical, climate-aware repair plan that minimizes water waste, prevents electrical hazards, and keeps your laundry routine on schedule during winter. If you’re new to appliance maintenance, start with simple visual checks—visible hoses, the pump filter (if accessible), and the door latch or lid switch. For homeowners in Anchorage, having basic tools and a willingness to pause for safety checks can save time and money in the long run.
Common failure modes in residential washers in Anchorage
In residential settings around Anchorage, you’ll encounter a few recurring failure modes that are often tied to cold-weather use or aging components. Not spinning is usually caused by a worn drive belt, a faulty lid or door switch, or a jammed belt pulley. Not draining can point to a clogged pump, kinked drain hose, or a stuck check valve. Leaks commonly originate from loose clamps, cracked hoses, or worn door boots and seals that lose elasticity in cold air. Unusual noises—thumping, grinding, or screeching—often signal worn bearings, drum supports, or misaligned pulleys. Error codes in modern washers may indicate sensor faults, water inlet problems, or motor issues. By logging symptoms (when they started, which cycles are affected, and whether it occurs with cold or warm water), you can narrow down the likely causes before you begin inspections. When diagnosing, start with safe, non-invasive checks: ensure the machine is level, inspect visible hoses for cracks, and listen for changes in sound when you run a cycle on a quick rinse setting.
Safety and prep for repair in a home environment
Safety is the foundation of any repair project, especially in a home environment in Alaska. Always unplug the unit and turn off the water supply before touching electrical components, hoses, or the drum. If you must work with power, use a non-conductive mat and dry hands. Wear eye protection when exposing internal parts, and never service a machine while it is still connected to a live outlet. If you suspect a gas line or a major electrical fault, pause and call a licensed technician. Protect floors and walls with a towel or temporary drip tray when testing with water, and keep a bucket handy for catching leaks. When working near the electrical outlet, keep cords away from damp surfaces. These precautions help you avoid shocks, short circuits, and water damage while you diagnose common issues.
DIY vs professional repair in Anchorage
DIY repairs can save money for simple fixes like hose clamps, gasket reseating, or filter cleaning, but Alaska’s climate and housing stock mean some repairs benefit from local expertise. If a problem involves wiring, a suspect motor, or a damaged water inlet valve, consider a professional. Pro technicians in Anchorage often have access to region-specific parts and can source replacements quickly, reducing downtime during cold snaps. When deciding, assess your comfort with electrical work, your ability to safely drain and disassemble components, and the potential risk to your home’s plumbing and wiring. A quick call to a local pro can also confirm whether an issue is a quick fix or requires a full part replacement. The goal is to restore function safely while minimizing future breakdowns in rugged winter conditions.
How to choose a repair technician in Anchorage
Choosing a technician in Anchorage involves more than price. Start by verifying licensing and insurance, confirming local reviews, and asking about service windows that align with winter schedules. Look for technicians who can provide an estimated diagnosis before parts are ordered and who offer a labor warranty on their work. Ask about emergency or after-hours service, availability of common parts (drain pumps, belts, door boots), and travel time for remote neighborhoods. Request written estimates that itemize labor, parts, and any diagnostics fees. A local pro who understands extreme temperature effects—like brittle hoses, frozen water lines, and condensation issues—will be better equipped to prevent recurring problems. Finally, check whether the company adheres to safety standards, uses quality replacement parts, and follows local building codes.
Not-spinning and not-draining: deeper dive
When a washer won’t spin, check the belt tension first and then the drive motor for heat buildup or grinding sounds. For not draining, verify the drain hose is not kinked and that the pump screen is clear of debris. If you hear a loud banging during the spin cycle, inspect drum supports and suspension springs for wear. In Arctic homes, even a minor moisture intrusion can affect electrical components; ensure all access panels are dry before testing. Collect data on cycle numbers and load sizes to identify patterns. If the problem persists after these checks, consult a local technician who can perform a more thorough inspection with the right tools and equipment.
Maintenance and prevention for Arctic conditions
Prevention is your best defense against winter breakdowns. Regularly clean the lint filter, pump screen, and door seal to prevent clogs that mimic more serious failures. Use only the detergent recommended by the manufacturer and avoid overloading the drum, which can strain belts and suspension. Inspect hoses for cracks or stiffness at least twice a year, replacing them every 5–7 years depending on wear. Ensure the machine sits level on a dry surface and that it’s connected to a grounded outlet with a functional water shutoff nearby. In Anchorage, arranging a simple maintenance schedule with a local technician can catch problems early, saving time and reducing expensive emergency visits during cold snaps.
Authority sources
For further reading and verification, consult trusted sources on appliance safety and energy efficiency. These resources provide general guidance applicable to most washers and are widely cited in the industry:
- https://www.energy.gov/eere/buildings/articles/choosing-energy-efficient-washing-machines
- https://www.consumerreports.org/cro/electric-washers-and-dryers.htm
- https://www.nist.gov/topics/technologies-appliances-and-energy-efficiency
Tools & Materials
- Adjustable wrench(8-12 inches, open-ended or adjustable)
- Screwdrivers (Phillips and flathead)(Set with assorted sizes)
- Multimeter(For voltage and continuity checks)
- Pliers(Slip-joint for clamps and stubborn hoses)
- Bucket(Catch water from drains and hoses)
- Towels/absorbent rags(Keep area dry and clean)
- Hose clamps(For securing hose connections)
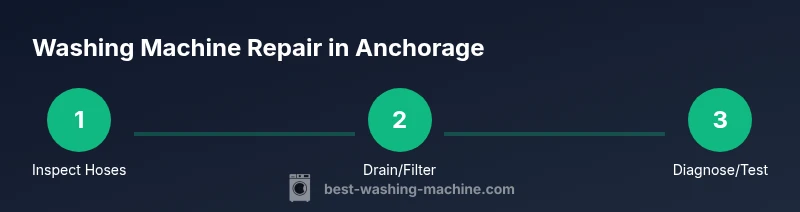
Steps
Estimated time: 60-90 minutes
- 1
Power down and secure utilities
Unplug the washer and shut off the cold and hot water valves. Disconnect power before touching any internal components to prevent shock. If water remains in the drum, drain it safely using the drain hose.
Tip: Take a quick photo of hose connections before you disconnect anything. - 2
Inspect external connections
Check all hoses for cracks, bulges, and leaks. Ensure the drain hose is not kinked and that clamps are snug. If hoses are old or damaged, replace them with standard-duty hoses rated for your model.
Tip: Replace damaged hoses to prevent leaks during testing. - 3
Test drainage pathway
With water still off, remove the panel to access the pump strainer or filter. Clear any debris that could impede flow. Reassemble the panel and run a short drain cycle to observe flow.
Tip: Use a shallow tray to capture drained water during testing. - 4
Check drive components
If your washer spins slowly or not at all, inspect the belt tension and look for wear. Listen for motor noise during a spin test. If belts are worn or the drum is unbalanced, plan for replacement.
Tip: Avoid forcing a belt; replace with the correct size per your model. - 5
Electrical diagnostics
If you suspect sensor or control issues, use a multimeter to verify fuse continuity and voltage at connectors. Do not touch live circuits. Record readings for reference when contacting a pro.
Tip: Only attempt electrical tests if you’re confident in using a multimeter. - 6
Decide on next steps
If the problem is a simple hose or filter, you can complete the repair and test. For unknown electrical or mechanical failures, contact a licensed technician in Anchorage to prevent safety hazards and ensure proper part replacement.
Tip: When in doubt, schedule a professional diagnostic to avoid costly mistakes.
FAQ
Do I need a licensed technician in Anchorage?
For electrical or gas-related repairs, a licensed technician is recommended. Always check local regulations and warranty requirements.
For safety and compliance, consider a licensed technician for complex issues.
Can I fix not-spinning without tools?
Some causes are simple like a lid switch or belt; others require tools or parts. Start with belt and lid switch checks, then decide on professional help.
Start with basic checks, but call a pro if the problem persists.
What should I do about winter service delays?
Winter weather can slow service. Plan ahead, keep a backup laundry option, and identify local parts suppliers before a failure occurs.
Winter can delay repairs; plan ahead to minimize downtime.
Is it safe to test electrical components myself?
Only if you are trained and have the right tools. Mishandling live components can cause shocks or fires; when in doubt, call a pro.
Be careful with electrical work; prefer professional help if unsure.
How can I prevent future issues in Anchorage?
Regularly inspect hoses, filters, and seals. Use appropriate detergents, avoid overloading, and schedule seasonal maintenance with a local technician.
Regular maintenance helps prevent winter breakdowns.
Watch Video
The Essentials
- Diagnose with climate-aware checks for Anchorage.
- Know when DIY vs pro repair is appropriate.
- Always unplug and drain before inspection.
- Document evidence with photos for faster service.
- Maintain regular preventive care to reduce winter breakdowns.