Washing Machine Repair Greensboro NC: A Practical How-To Guide
Comprehensive step-by-step guide to diagnosing, repairing, and maintaining washing machines in Greensboro NC. Learn safety, common faults, tool lists, troubleshooting steps, and maintenance tips from Best Washing Machine.

Learn to diagnose and fix common washing machine issues in Greensboro NC with practical safety tips, a step-by-step approach, and maintenance guidance. This guide covers not draining, not spinning, leaks, belt and pump checks, plus when to call a pro.
Why Greensboro NC matters for washer repair
Greensboro, NC, presents a distinct set of considerations for washing machine repair. Local water hardness, typical usage patterns, and common appliance installations influence how and why washers fail. The Best Washing Machine team has analyzed regional maintenance data and found that many mid-life failures originate from worn belts, clogged pumps, and deteriorated hoses rather than mystery defects. By understanding Greensboro-specific conditions—such as typical load patterns, laundry room layouts, and service accessibility—you can tailor a repair plan that minimizes downtime and cost. This section explains how local factors translate into observable symptoms, helping you prioritize safe, effective fixes over guesswork. Expect to spend a little time gathering the right tools and parts, then following a structured diagnostic process tailored to your model and home setup.
Common symptoms and their likely causes
Washer issues generally fall into a few familiar categories: not draining, not spinning, leaks, excessive vibration, or noisy operation. Not draining is often a clogged pump or filter, or a kinked drain hose. Not spinning can stem from a worn belt, faulty lid switch, or a transfer that’s stuck in spin. Leaks are frequently hose or pump connections, while loud operation might indicate a loose drum, worn bearings, or a damaged pulley. In Greensboro, where space in smaller laundry areas is common, improper installation or tight hose routing can worsen these symptoms. By grouping symptoms with likely culprits, you can quickly decide whether a DIY fix is reasonable or if professional parts replacement is warranted. Always start with the simplest checks (hoses, filters, and connections) before moving to internal components.
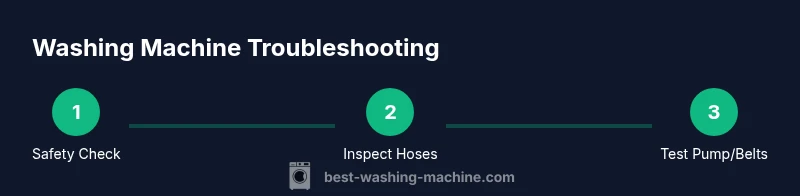
Safety and prep for repair day
Preparation is the cornerstone of a safe, successful repair. Start by unplugging the machine and shutting off the water supply to prevent accidental flooding. Move the washer to a dry, level workspace with good lighting, and have towels, a bucket, and a shallow pan ready for spills. Wear protective gloves to guard against sharp metal edges and hot surfaces. Keep a magnet or small container to hold screws and small parts so they don’t roll away. If you’re unsure about electrical integrity or moisture contact, pause and reassess. Safety first keeps you from creating bigger problems or risking injury when testing components later in the process.
Diagnostic workflow for common faults
A systematic approach beats random fiddling. Start with the external checks: inspect hoses for cracks, bulges, or loose clamps; confirm the inlet valve is fully open and water supply lines aren’t kinked. If water drains but the drum doesn’t turn, test the drive belt (for belt-driven machines) or the drum’s support rollers. If the machine fills but doesn’t agitate, inspect the motor coupling and the agitator mechanism. For electrical concerns, verify power at the outlet with a multimeter, check the lid switch as a safety interlock, and inspect wiring for obvious damage. Document findings step by step to avoid repeating tasks and to communicate clearly with a technician if you escalate the job.
Tools, parts, and cost considerations in Greensboro
Before you buy parts, identify your washer’s model number and consult the user manual or a trusted repair guide. Common replacement parts include pumps, belts, seals, and inlet hoses. In many Greensboro-area households, a targeted repair is cost-effective when the appliance is mid-range and the fix is straightforward. If the part cost plus labor approaches or exceeds a replacement, consider whether upgrading to a more energy-efficient model makes sense for long-term savings. Keep in mind that some components (like electronic modules) may require professional diagnostics or specialized equipment. A careful balance of DIY effort and professional input typically yields the best outcome.
When to call a professional in Greensboro NC
Complex electrical faults, cracked drum bearings, or intermittent problems that resist straightforward testing are signals to escalate. A licensed appliance technician can diagnose hidden wiring, control board faults, or motor issues with calibrated tools and manufacturer-specific guidance. In Greensboro, many pros offer diagnostic visits with a flat or hour-rate fee, which can help you decide whether a full repair or replacement is more economical. When you do hire a pro, provide them with model information, symptom history, and any diagnostics you’ve already completed to shorten the service time and reduce costs.
Maintenance routines to prevent future failures
Preventive maintenance is cheaper than recurring repairs. Regularly inspect hoses for wear, tighten clamps, and replace aged components before leaks form. Run a monthly maintenance wash with a mild detergent and a short hot water cycle to clear residues that accumulate in the drum and plumbing. Consider a water-quality check if you have extremely hard water, as mineral buildup can accelerate wear on seals and pumps. Finally, schedule annual professional checkups to calibrate performance, verify electrical safety, and replace worn parts before they fail in the middle of a load.
Tools & Materials
- Screwdriver set (Phillips & flat-head)(Flat-head #2 and Phillips #2 are most commonly used on front/top-loaders)
- Nut driver or 1/4 inch hex(For panel screws and hose clamps)
- Multimeter or continuity tester(Check switches, power, and wiring safely)
- Pliers (slip-joint and needle-nose)(Useful for hose clamps and small clips)
- Towels or rags(Contain water and keep workspace dry)
- Bucket or shallow pan(Catch water during drain or hose work)
- Flashlight or headlamp(Improve visibility inside panels and behind components)
- Replacement parts (as needed)(Belts, pumps, hoses, or seals identified during diagnosis)
- Model-specific service manual or manufacturer instructions(Helpful for wiring diagrams and torque specs)
Steps
Estimated time: 60-90 minutes
- 1
Unplug and prep workspace
Unplug the washer and shut off the hot and cold water supply. Move the unit to a dry, well-lit area and lay towels to catch any residual water. This initial safety check prevents shocks and keeps your work area clean.
Tip: Have a helper to move the machine if it’s heavy and maintain balance during panel removal. - 2
Remove access panels
Loosen screws and carefully remove the top or back panel according to your model. Keep track of screws and small parts in labeled containers to avoid confusion later.
Tip: Photograph each step so you can reassemble correctly, especially if wiring is involved. - 3
Inspect external connections
Check all inlet hoses, drain hoses, clamps, and water valves for cracks or looseness. Tighten clamps and replace kinked or worn hoses to prevent leaks.
Tip: Test water flow from the supply valve before reconnecting hoses to confirm no obstructions. - 4
Test internal components
With the panel off, inspect the drive belt (if applicable) for wear. Check the pump for debris and clear clogs from the filter or impeller area. Look for burnt smells or melted wiring.
Tip: Never twist or force belts; if they feel brittle, replace them rather than risk snapping during a cycle. - 5
Check electrical safety
Use a multimeter to verify power at the outlet and test the lid switch and door interlock. Look for damaged wires or loose connectors and secure them properly.
Tip: Disconnect the power before testing any live components; safety first prevents shocks. - 6
Reassemble and run a test
Reattach panels and restore water connections. Run a short test cycle with towels in place to observe leaks and listen for unusual noises. Document outcomes for future reference.
Tip: If leaks appear, power off immediately and recheck connections before continuing.
FAQ
What are the most common washing machine repair issues in Greensboro NC?
Not draining, not spinning, and leaks top the list. Most of these are caused by clogs, worn belts, or loose hoses. A structured diagnosis often resolves the problem without major parts replacement.
Not draining, not spinning, and leaks are the most common issues, usually due to clogs, worn belts, or loose hoses.
Can I fix a washer myself, or should I hire a pro in Greensboro?
Many simple problems can be handled with basic tools: hose checks, filters, and belt inspection. More complex electrical or motor issues should be handled by a licensed technician to avoid safety risks.
Many simple problems you can DIY, but complex electrical or motor issues should use a licensed technician.
When should I replace versus repair my washing machine?
If the repair cost plus parts approaches or exceeds the cost of a new unit, or if multiple major components fail, replacement is often the wiser choice for long-term reliability.
If repair costs approach replacement price or several major components fail, replacement may be wiser.
What safety precautions are essential before starting a repair?
Unplug the machine, shut off water valve, and wear protective gloves. Keep the area dry and avoid touching any exposed wiring until power is confirmed off.
Unplug, shut off water, wear gloves, and keep the area dry.
How long does a typical DIY repair take?
Most straightforward fixes take about 1-2 hours, depending on model and parts availability. More complex issues may require longer or professional service.
Most simple repairs take 1-2 hours; complex problems may require more time or a pro.
Watch Video
The Essentials
- Identify symptoms clearly to target the right fix.
- Start with safety: unplug, shut water, and dry work area.
- Check hoses, filters, and external connections first.
- Use the right tools and document your steps for easy reassembly.
- Know when to call a pro to avoid costly mistakes.