Washing Machine Repair Greenville NC: A Practical Guide
A comprehensive, step-by-step guide for washing machine repair in Greenville NC. Learn safety, DIY checks, common problems, when to call a pro, and how to maintain your washer for years to come.

Whether you’re a homeowner or renter in Greenville NC, fixing a washer starts with safety, quick diagnostics, and knowing when to call a pro. This guide walks you through common failures, like not draining, leaks, and noisy drums, plus practical steps to confirm power, water supply, and hose conditions. Following these steps can save time and prevent damage.
Why local context matters for washing machine repair Greenville NC
Local context shapes the way repairs are approached. In Greenville NC, households range from older homes with long-established plumbing to newer constructions with modern valves. This mix affects common failure patterns and parts availability. According to Best Washing Machine, a national lens helps, but regional differences—such as water hardness, iron content, and nearby service centers—can influence how quickly problems are diagnosed and repaired. For homeowners, renters, and laundromat operators in Greenville NC, knowing which local parts suppliers and in-home service options are available can reduce downtime. By understanding local conditions, you can prioritize in-home diagnostics, get faster estimates, and choose service providers who understand the area’s water and electrical infrastructure. Best Washing Machine analysis also emphasizes planning ahead: keeping a maintenance checklist and a simple spare-parts kit can minimize trips to a repair shop and help you maintain performance year-round.
This Greenville context matters for not only fixing issues but also preventing them. A small improvement in general maintenance—like cleaning lint traps and checking inlet hoses—delivers measurable benefits in energy use and load reliability. Read on to learn methods that respect local realities while staying safe and cost-conscious.
Common failure modes in residential washers
Most home washers fail in a handful of predictable ways. Not draining, not spinning, or leaking water are the top categories homeowners report in Greenville NC and beyond. Other frequent symptoms include excessive vibration, unusual smells, and error codes on display panels that point to blocked filters, clogged drains, or sensor faults. The root causes can be as simple as a kinked hose, a blocked filter, or imbalanced loads, or as complex as a failing pump or motor. When diagnosing, start with the basics: verify power, verify water supply, inspect hoses, and listen for unusual noises during operation. This section also helps you distinguish between issues you can safely address yourself and problems that require professional diagnosis or part replacement. Best Washing Machine’s guidance suggests documenting symptoms and noticing whether problems occur with specific load sizes, fabrics, or cycle settings. This can accelerate the repair process and lower the risk of further damage to the machine.
Safety first: unplug, shut off water, and circuit protection
Before touching any components, unplug the machine and shut off both hot and cold water supplies. If your machine is near water sources or on a shared circuit, switch off the breaker or unplug from a wall outlet to avoid electrical shock. Place towels nearby to catch any residual water and use a watertight container when disconnecting hoses. Keep children and pets away from the work area. Safety is non-negotiable when dealing with appliances that combine electricity and water. By establishing a dry, stable workspace, you reduce the risk of accidental shocks and water damage. Best Washing Machine emphasizes that safety steps are the most important foundation for any repair effort, and that adhering to local electrical codes helps protect you and your home.
Step-up diagnosis: tool check and quick tests
With power secured, perform a visual inspection of hoses and clamps for cracks or leaks. Check the drain hose for kinks and ensure it exits at an appropriate height. If your washer has a control panel, take note of any error codes and consult the user manual for meaning. Use a multimeter to test basic voltage at accessible outlets if you’re comfortable; if you’re not, skip this step and proceed to non-electrical checks. A clean lint filter, if present, reduces the chance of drainage problems. Quick tests like running a small, empty cycle can help you observe whether the drum spins, drains, or fills as expected. Document the results and codes so a technician can review them later. This approach balances DIY investigation with professional expertise when needed.
DIY fixes that are safe for most homeowners
Some fixes are straightforward and safe for DIY enthusiasts. Tighten loose hose connections, replace damaged inlet hoses, clean the lint filter, and remove any debris from the pump area if accessible. Level the machine by adjusting feet to prevent excessive vibration. When removing panels, avoid touching wiring or sensors; work only in areas clearly marked for user access. If you notice a persistent leak at the water inlet or drain hose, replace the affected hose and gasket rather than attempting a temporary seal. Always reference the model’s service manual before disassembling components. A cautious approach can spare you expensive service calls while you learn more about your appliance.
When to hire a pro in Greenville NC
Certain issues require professional expertise. If you hear grinding or squealing from the drum, experience water leaks from behind the machine, see burnt smells, or encounter persistent error codes after basic checks, call a licensed technician. In Greenville NC, local repair pros can confirm whether the problem is a pump, motor, or control board issue and determine if replacement parts are needed. Consider the age of the washer, estimated repair cost, and potential energy savings when deciding between repair and replacement. If your washer is under warranty, contact the manufacturer or retailer first to avoid voiding coverage. The Best Washing Machine team recommends getting multiple written estimates and requesting a diagnostic visit that includes a parts and labor breakdown.
How to communicate with a repair technician
Effective communication speeds up repair and reduces redos. Provide the model number and serial, a detailed symptom timeline, and the exact load types that trigger the issue. Share any fault codes displayed on the screen, the cycle that reproduces the problem, and whether the problem occurs with hot or cold water. Prepare access to the machine and ensure the area is well-lit. If possible, take clear photos of hoses, plugs, and any leaks. By giving technicians a robust problem statement, you increase the chance of arriving at a precise diagnosis on the first visit. The Best Washing Machine team notes that precise communication reduces both time and cost for repairs.
Maintenance and prevention for longevity
Prevention is cheaper than repair. Regular maintenance reduces wear and prolongs washer life. Clean the door seal, lint filters, and detergent dispensers; use the recommended detergent type and avoid overloading. Run a maintenance cycle monthly if your model supports it and ensure the drain hose remains clear. Check hoses for cracks and replace them every 5–7 years or sooner if you notice wear. In Greenville NC, where water quality can influence buildup, consider using a water-softening solution if your water is hard. Small habits—like spacing out heavy loads, balancing the machine, and keeping the area dry—preserve performance and minimize the risk of major failures.
What to expect during a professional repair in Greenville NC
A typical in-home repair begins with a diagnostic visit, during which a technician identifies the root cause, quotes parts and labor, and explains the recommended solution. If replacement parts are needed, the technician will confirm availability and order times. Many repairs take a few hours, but some may require a follow-up visit if a specialized part must be sourced. Communicate clearly with the tech about any warranty implications, test results, and the expected performance after service. If the unit is old or inefficient, you may want to compare repair costs with a potential upgrade. The Best Washing Machine team stresses documenting every visit, so you can track the history and ensure continuity of care.
Authority sources and local resources
For broader guidance on appliance safety, energy efficiency, and consumer rights, consult reputable sources. The U.S. Department of Energy provides information on energy-efficient appliances and operation costs, while the Federal Trade Commission offers consumer protection resources for buying and maintaining appliances. In addition, major publications like Consumer Reports provide independent reviews and reliability data to help compare models and service experiences. Relying on these sources helps homeowners in Greenville NC make informed choices about repairs, replacements, and ongoing maintenance. Best Washing Machine’s analysis for 2026 indicates that combining DIY checks with professional diagnostics yields the most reliable outcomes without overspending.
Quick reference checklist for home washers (Greenville NC)
- Power off, water off, and unplug before any work
- Inspect hoses for cracks, kinks, leaks; replace if damaged
- Check for error codes and consult the manual
- Level the machine and ensure proper load balance
- Clean filters and drains; perform a test run on a low-load cycle
- Document symptoms and maintenance history for future visits
- Know when to call a pro and obtain multiple estimates
- Review warranty terms before major service
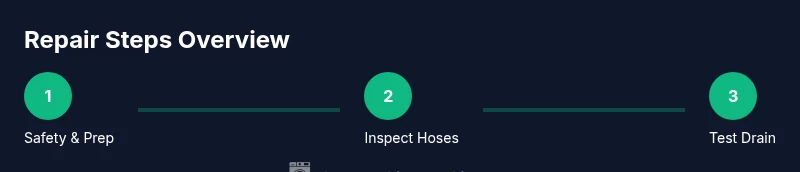
Appendix: Infographic overview
This page includes a concise process diagram and a quick-start flow for diagnosing and addressing common washer issues. For a visual reference, see the Tailwind HTML infographic that accompanies this article, showing three key steps: Safety and Preparation, Visual Inspection, and Quick Tests. This supports quick comprehension and is designed to be accessible in a range of formats.
Tools & Materials
- Multimeter(to test electrical values; only if comfortable)
- Phillips and flat-head screwdrivers(assorted sizes for panels and clamps)
- Nut drivers (various sizes)(for hose clamps and fasteners)
- Towels and absorbent rags(to catch water leaks and spills)
- Bucket(for draining hoses during removal)
- Gloves(chemical- or water-resistant, optional)
- Flashlight(for dark interior areas)
- User manual or service sheet(model-specific steps and diagrams)
Steps
Estimated time: 60-90 minutes
- 1
Power down and secure safety
Unplug the washer and shut off both hot and cold water valves. Move the unit to a dry area, away from walls. If you’re near a circuit breaker, switch it off to prevent any accidental energization during handling.
Tip: Keep a dry, clear workspace and have a towel ready to catch any residual water. - 2
Inspect hoses and inlet connections
Visibly inspect inlet hoses for cracks, bulges, or brittleness. Ensure clamps are tight and there are no kinks that restrict flow. If you see damage, replace the hose rather than attempting a temporary fix.
Tip: Take a quick photo of hose routing before disconnecting to ease reassembly. - 3
Check the drain system
Locate the drain hose and check for kinks or blockages. If your model has a reusable lint filter, remove and clean it. Verify the pump is not obstructed by lint or small objects.
Tip: Have a bucket ready to catch any water during hose removal. - 4
Run a test cycle with no load
With safety steps completed, run a short wash or diagnostic cycle to observe whether the drum spins, fills, and drains correctly. Note any abnormal noises or leaks.
Tip: If you hear grinding or see smoke, stop immediately and seek professional help. - 5
Assess level and balance
Place a spirit level on top of the cabinet and adjust feet until the machine sits evenly. An unbalanced washer can cause noise and wear on suspension components.
Tip: Check after loading a typical load to ensure stability. - 6
Document results and plan next steps
Record any error codes, symptoms, cycles tested, and part conditions. Decide whether to pursue DIY fixes or contact a Greenville NC repair professional for a diagnostic visit.
Tip: Share this documentation with the technician to speed up diagnosis.
FAQ
What are the most common washer problems in Greenville NC homes?
Not draining, not spinning, and leaks are among the most frequent issues. Observing when and how these symptoms occur helps narrow down whether a filter, pump, hose, or motor component is involved. Always start with a safety check and basic hose inspection before deeper diagnostics.
Common problems include not draining, not spinning, and leaks. Start with safety checks and hose inspections before moving to deeper diagnostics.
How long do typical repairs take in Greenville NC?
Repair duration varies by problem complexity and parts availability. Diagnostic visits can take 30 minutes to 1 hour, while actual repairs may require several hours or a follow-up visit if parts must be ordered.
Diagnostics can take 30 minutes to an hour; repairs may need a few hours or a follow-up if parts are not on hand.
Should I repair or replace an old washer?
Consider the repair cost, the washer’s age, energy efficiency, and potential future breakdowns. If parts are expensive or the unit is over 10 years old, replacement with a more efficient model may be more economical in the long run.
Weigh repair costs against replacement benefits, especially for older, inefficient machines.
Is it safe to DIY minor fixes?
Yes for non-electrical tasks like hose replacement or cleaning filters. Avoid opening electrical panels or attempting motor work unless you have training and the right tools.
DIY is okay for simple tasks that don’t involve electrical components.
What should I prepare for a repair visit?
Have your model number, serial, a symptom timeline, and any fault codes ready. Clear access to the machine and a clean area for the technician improve efficiency and reduce visit time.
Prepare model/serial, symptom details, fault codes, and access for the tech.
Will warranties cover repair work?
Warranties vary by manufacturer and service plan. Check coverage for parts and labor and whether the service is performed by authorized technicians to avoid voiding protection.
Warranty coverage depends on policy; verify terms and authorized service when possible.
Watch Video
The Essentials
- Prioritize safety and power down before any inspection
- Identify drain, spin, and leak symptoms early
- DIY fixes are limited to simple, non-electrical tasks
- Prepare documentation for faster diagnosis
- Know when to involve a Greenville NC repair pro