Washing Machine Repair Naperville: A Practical, Local Guide
Learn practical steps for diagnosing and repairing washing machine issues in Naperville. This guide offers safe DIY fixes, when to call a pro, maintenance tips, and local considerations to save time and money.

You're going to learn how to diagnose and repair common washing machine problems in Naperville, decide between DIY fixes or a local pro, and prepare for service. This guide covers safe at-home checks, symptom-specific steps, and tips to minimize downtime and costs. According to Best Washing Machine, timely diagnosis in Naperville often saves money.
Naperville-specific considerations for washing machine repair naperville
Naperville households often balance repair costs, service availability, and parts stock differently than markets elsewhere. Local technicians may prioritize energy-efficient models and common failure modes, while warranty coverage and home insurance can influence who you contract and what work is permitted. This makes a Naperville-focused approach helpful: prepare the right information, know your model, and understand local service timelines. According to Best Washing Machine, a well-prepared homeowner in Naperville can shorten downtime and reduce unexpected charges by clarifying symptoms, providing the model number, and asking about travel fees or diagnostic charges upfront. In this guide, you’ll learn symptom checks, safe at-home diagnostics, and how to evaluate whether to repair or replace. By the end, you’ll have a local-ready plan that fits a typical suburban laundry room and respects cold winters and busy schedules.
Common causes of washer problems you’ll see in Naperville homes
Most washer problems boil down to three broad areas: wear and tear on mechanical parts, drainage and clog issues, and electrical/control faults. In Naperville, seasonal demand and high-efficiency models can stress inlet valves, pumps, and belts faster, making failure modes appear sooner in the appliance’s life. Common symptoms often overlap, so a methodical approach helps: for example, a drum that fills but won’t agitate could point to a lid switch or a worn belt; a washer that won’t drain may be a blockage, a failed pump, or a kinked drain hose. By mapping symptoms to these core causes, you can triage quickly and decide whether DIY steps or a professional is needed. Best Washing Machine analysis notes that keeping a symptoms log, model number, and any error codes helps technicians arrive prepared and reduces diagnostic time.
Quick diagnostic checklist for symptoms
- Confirm the machine is plugged in and the circuit has power; test a different outlet if needed. If it won’t start, the issue may be electrical rather than mechanical.
- Check water supply hoses for kinks, leaks, or blockages; ensure both hot and cold valves are fully open.
- Inspect the drain hose for kinks or blockages and verify the drain pump is not clogged.
- Look for visible leaks around the drum, hoses, and water inlet valves; note the location and frequency of any drips.
- Run a test cycle and observe the drum, pump, and lid switch in action; listen for unusual noises like grinding or rattling.
- Read error codes on the display and cross-check with your model manual for specific fault meanings.
A structured checklist keeps you organized and minimizes second-guessing when you call for help.
Safe DIY fixes you can try this weekend
- Clean and reseat the pump filter or lint trap if your model has one; a clogged filter can cause draining issues and poor performance.
- Tighten loose hoses at both ends; replace worn or cracked hoses to prevent leaks.
- Level the washer on a flat surface; an unlevel machine can shake, impair operation, and stress components.
- Clean the detergent drawer and seal; residue can cause odor, buildup, and improper dispensing.
- Clear minor drain line blockages using a small amount of hot water and gentle flushing from the back, not the drum.
- Reset the control panel as per the manual after completing fixes to clear lingering error codes.
Safety note: always unplug the unit and turn off water supply before any internal inspection. Do not attempt high-voltage or component replacement beyond basic fixes.
When to call a professional in Naperville
If you observe persistent leaks, a nonfunctional pump, motor overheating, or recurring error codes after basic steps, it’s time to bring in a pro. In Naperville, local pros can quickly source parts, confirm warranty eligibility, and handle complex diagnostics safely. If the issue involves the main electrical supply, drum bearings, or a failed control board, professional service is recommended to avoid injury and further damage. Request a written estimate that includes labor, parts, travel, and diagnostic fees before work begins. The timing of service can depend on demand, parts availability, and weather, so scheduling early in the week often yields faster turnaround.
How to choose a reliable local repair technician
- Verify licensing and insurance; legitimate technicians carry current licenses and liability coverage, which protects you and them in case of accidental damage.
- Look for technicians with clear, upfront pricing and transparent diagnostic procedures; avoid firms that pressure you for immediate decisions.
- Check recent customer reviews, focusing on Naperville-area service quality and response time; prioritize those with responsive communication.
- Confirm any warranty on labor and parts; reputable technicians offer some form of guarantee and will honor it if the same fault recurs within the warranty period.
- Request a written estimate with a breakdown of labor hours, parts, and any potential additional costs ahead of time.
- Ask about compatibility with energy-efficient models and eco-friendly repair practices; local service could be more attuned to environmental concerns.
Maintenance routines to extend life and reduce emergencies
Regular maintenance is the best way to prevent emergencies and costly repairs. Create a simple seasonal checklist and stick to it:
- Inspect and replace inlet hoses every 3–5 years or when you notice wear; use stainless-steel reinforced hoses for added durability.
- Clean the lint trap and pump filter (if applicable) monthly to prevent clogs and poor draining.
- Run an empty wash with a descaling or white-vinegar routine every 1–3 months to limit mineral buildup in hard water areas.
- Level and balance the machine to minimize vibration and component wear; keep floors clean to prevent slipping during maintenance.
- Keep the lid switch aligned and test it regularly; a faulty switch can cause intermittent operation and safety risks.
Following these routines helps maintain performance and preserves your washer’s lifespan, especially in a busy Naperville household.
Energy efficiency and water use during repairs and maintenance
Maintaining energy efficiency in Naperville means choosing repairs that restore original efficiency curves rather than replacing with outdated models. When you repair a washer, prioritize parts that affect spin speed, water inlet control, and automatic load sensing. Regularly check inlet valves for leaks; a small drip wastes water and raises bills over time. Use the manufacturer’s eco-friendly cycles and avoid high-temperature cycles unless necessary, which saves energy and reduces wear on components. For homes with hard water, treat mineral deposits that can reduce efficiency and increase energy use. In many cases, a properly functioning washer will use less energy and water when cycles are optimized and maintained.
Replacements parts and upgrade options
When a repair becomes cost-prohibitive, replacements can be a smart choice. Common parts you may need include pumps, seals, belts, door/lid switches, control boards, and hoses. Upgrade options worth considering in Naperville households include high-efficiency models with better water recycling, quieter operation, and longer-lasting components. If you plan to upgrade, compare energy ratings, spin speeds, capacity, and reliability data from credible sources. Always confirm compatibility with your existing plumbing and electrical setup, and factor in installation time and potential minor retrofits. Keeping an eye on warranty terms and long-term parts availability will help you choose a durable option that fits your budget.
Tools & Materials
- Owner’s manual for your washer (model, serial, and service manual)(Have paperwork handy for model-specific troubleshooting and part numbers)
- Screwdrivers (Phillips and flat-head)(Small and medium sizes; keep organized as you remove panels)
- Multimeter(Used to check voltage, continuity; handle with care)
- Pliers and wrenches(For hose clamps, fittings, and quick disconnections)
- Bucket and towels(Contain spills and wick up residual water)
- Replacement hoses (stainless steel preferred)(Keep on hand if hoses show wear or cracks)
- Flashlight or headlamp(Improve visibility inside panels or under the machine)
- Detergent drawer cleaner or mild descaler(Prevent buildup that can affect dispensers)
Steps
Estimated time: 45-90 minutes
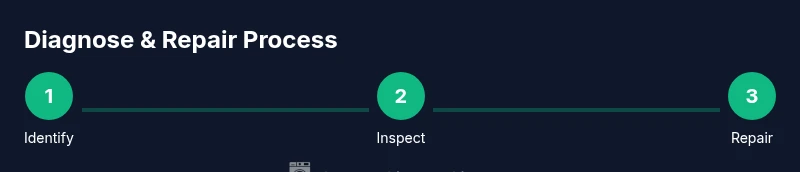
- 1
Identify the symptom and model
Record the exact problem, note any error codes, and locate the model and serial numbers. This helps you search for model-specific fixes and ensures technicians have precise information.
Tip: Take photos of the control panel with error codes displayed. - 2
Ensure safety and power down
Unplug the washer and shut off water valves before inspecting any components to avoid electric shock and water damage.
Tip: If the cord is frayed or the plug shows scorch marks, do not proceed. - 3
Inspect hoses, filters, and external components
Check inlet hoses for kinks or leaks, and inspect the drain hose for blockages. Remove and clean accessible filters or lint traps.
Tip: Keep a towel handy for any residual water when disconnecting hoses. - 4
Test the drain system and pump
With the unit unplugged, access the pump area and remove visible debris. Reconnect and run a short cycle to observe drainage.
Tip: If you hear grinding or see the pump stalling, stop and call a pro. - 5
Check electrical controls and lid switch
Inspect the lid switch and wiring for damage. Use a multimeter to verify continuity where your manual indicates.
Tip: Don’t bypass safety switches; they are essential for safe operation. - 6
Decide on next steps
If symptoms persist after basic checks, evaluate repair vs. replacement costs and warranty terms. Consider a pro for complex electrical or motor issues.
Tip: Request a written estimate before any paid work.
FAQ
What are the most common washing machine problems in Naperville?
Drainage and leak issues, not spinning, and control panel errors are among the most frequent problems. Start with a safety check, inspect hoses and filters, and consult the model manual for error codes before seeking help.
Common problems include leaks, not spinning, and drainage issues. Start with safety checks and inspect hoses and filters, then consult your manual for error codes.
How long does a typical Naperville repair take?
Repair time varies by issue and parts availability. Minor fixes can be completed in a few hours, while more complex problems may require a follow-up visit after parts arrive.
Repair time depends on the issue and parts; minor fixes may be done in a few hours, complex repairs may need a second visit.
Should I repair or replace an old washer?
If repair costs approach 50% or more of a new unit, replacement often makes more sense. Consider energy efficiency and long-term reliability when deciding.
If repairs cost half or more of a new washer or it’s outdated, replacement is usually wiser.
Is it safe to DIY washer repair?
DIY repairs can be safe for simple tasks like hose replacements or filter cleaning, but avoid electrical or motor work unless you’re trained. Follow model manuals and unplug the unit before any work.
DIY is okay for simple tasks like hose or filter cleaning, but avoid electrical work unless trained. Always unplug first.
How can I find a reliable Naperville repair technician?
Look for licensing and insurance, clear estimates, and recent local reviews. Ask about warranties on labor and parts, and request a written quote before work.
Look for licensed, insured techs with good local reviews and a written quote before starting.
What maintenance helps prevent leaks?
Regular hose inspections, level positioning, and cleaning of filters prevent leaks and clogs. Promptly address minor leaks before they become major issues.
Inspect hoses regularly, keep the washer level, and clean filters to prevent leaks.
Watch Video
The Essentials
- Assess symptoms first to avoid unnecessary repairs.
- Use a structured diagnostic checklist for accuracy.
- Know when DIY ends and professional help begins.
- Keep maintenance simple and regular to prevent major failures.
- Choose local Naperville pros with clear pricing and warranties.