Washing Machine Water Pump Repair Guide
Learn how to diagnose and replace a washing machine water pump. This practical, model-agnostic guide covers symptoms, tools, safety, and testing to restore proper draining and prevent leaks.

By following this guide, you will diagnose and repair a washing machine water pump with model-agnostic steps. You’ll learn about pump types, common symptoms, safety precautions, and when to replace versus repair. This how-to is designed for homeowners, renters, and small shops seeking practical, money-saving troubleshooting.
How a washing machine water pump works
In most modern washers, the water pump is a small, sealed centrifugal device located behind the lower front panel. The pump draws water from the drum through a drain hose, pushes it through the filter, and out to the household drain. It works in concert with the washer’s timer and control board. Two common designs are the impeller pump and a compact centrifugal pump with a plastic housing. The pump connects to hoses with clamps and to a power connector. If the impeller jams or seals fail, draining slows or stops. According to Best Washing Machine, understanding these basics helps diagnose issues without chasing symptoms.
Symptoms like slow draining, loud buzzing, or water remaining in the tub usually point to the pump rather than just a hose. In many models the pump is integrated with a check valve; in others it sits behind a service panel and becomes accessible after removing the front or back cover. Knowing your model’s layout guides safe inspection and planning.
- Quick tip: If you hear a grinding or buzzing noise when the drain cycle starts, stop the machine and inspect the access panel before proceeding.
Signs your water pump might be failing
Water pumps typically fail gradually, but certain symptoms make the diagnosis straightforward. Common indicators include: (1) the washer doesn’t drain fully or leaves water in the tub after a cycle; (2) there is a persistent or repeated buzzing or whining sound during draining; (3) visible water leaks around the pump or hoses; (4) the drain hose becomes unusually hot or soft when the pump runs, suggesting restriction or hose failure. Some models throw error codes related to drainage, which can point to a pump issue.
As you assess symptoms, inspect for external factors first—kinked hoses, clogged lint filters, and blocked pump inlet screens can mimic pump problems. If external components are clear but drainage remains poor, the pump is a likely suspect. The Best Washing Machine team recommends confirming model compatibility before replacing parts to ensure you choose the correct pump assembly.
Safety and prep before repair
Safety comes first when working on a washing machine. Always unplug the unit from the wall outlet and shut off the home water supply to prevent leaks and flooding. If the machine has a built-in water heater or is connected to a hot water line, ensure those valves are fully closed. Have a shallow pan, towels, and absorbent rags ready to catch residual water from hoses and the tub. If you cannot safely access the rear or bottom panel, consult a professional.
Before touching any wiring or electronics, discharge static by touching a grounded metal surface. If your model has a loud or stubborn fill-and-drain cycle, consult the manual for the exact disassembly sequence and keep screws organized in labeled containers. This approach helps protect delicate connectors and prevents lost-fastener frustration.
Tools, parts, and replacement considerations
The pump replacement process requires common hand tools and a compatible pump assembly for your model. Essential items include a screwdriver set, nut drivers or wrenches, pliers, a multimeter, a bucket or towels, and a replacement water pump kit designed for front-load or top-load machines as appropriate. Best Washing Machine recommends verifying model compatibility and checking whether the pump includes a new hose, clamps, or wiring harness. If you’re unsure which pump to buy, consult your owner’s manual or contact a parts supplier with your model number.
Optional tools might include a small flashlight for access, a trim removal tool to avoid panel damage, and a sensor-safe wire connector tool for reattachment. Keep a parts diagram handy so you can locate the exact mounting points and hose connections. Safety and compatibility are the foundations of a successful replacement.
Diagnosing without disassembly
Some drainage issues can be diagnosed without opening the machine. Start by inspecting the drain hose for kinks or blockages near the floor drain. Check the lint filter or pump inlet screen for clogs, as debris can restrict water flow even when the pump is working. Manually rotate the pump impeller if accessible, feeling for smooth movement and listening for any grinding noise that indicates bearings or mechanical wear. If the pump spins freely and the hoses are clear, the issue may be a valve or a control board.
If you notice water around the pump area or see wet hoses, the problem could be a leak rather than a clogged impeller. Always test after any cleaning or resealing to ensure there are no further leaks. The key is to rule out simple culprits first before committing to a full pump replacement.
Accessing the pump area: model variations
Washing machines place the pump in different locations depending on the design. Front-load models usually hide the pump behind a front-panel access, while many top-load machines position the pump near the rear or underneath the cabinet. Before you begin, consult the service manual or a reputable repair guide for your specific model. Remove the necessary panel, disconnect power, and proceed with caution to avoid damaging wiring harnesses. If the screws or fasteners resist, apply gentle, even pressure with the correct driver to prevent stripping.
Be mindful of warranty implications when opening panels. Some manufacturers void warranties if non-authorized service is performed. If you’re uncertain, contact a certified technician for an in-home inspection. Accessing the pump safely requires patience and organization; keep track of all hoses, clamps, and fasteners as you remove them.
Replacement options: new, refurbished, or repair
Choosing between a new pump, refurbished unit, or a complete professional repair depends on cost, availability, and the overall condition of your washer. A new pump is typically the most reliable option but may be more expensive upfront. A refurbished pump can save money but carries slightly more risk of wear. In some cases, a technician can repair the existing pump by replacing worn bearings or cleaning internal passages, which may extend the unit’s life without full replacement.
Consider the age and overall condition of the washer. If the motor, electronics, or drum bearings show significant wear, replacement of the entire pump assembly or the unit itself might be a better long-term investment. Always verify warranty coverage and confirm whether the repair affects any future warranties. The decision should balance cost, reliability, and your long-term needs.
Reassembly, leak testing, and cleanup
After installing a new pump or repairing the existing one, reattach hoses securely with new clamps if provided. Ensure hoses are routed to avoid kinks and that all electrical connectors are dry and fully seated. Reinstall the service panel, reconnect power, and move the machine back into its place. Run a short test cycle with a minimal amount of water to check for leaks around hose connections and the pump housing.
If a leak is detected, power off, unplug, and recheck clamps and seals. Wipe away any residual water from the cabinet and top surface to prevent mold growth. Give the unit a final inspection after the test run and keep a maintenance schedule to monitor pump performance over time.
Maintenance to extend pump life
Preventive care can significantly extend water pump life. Regularly clean the lint filter and pump inlet screen to prevent debris buildup. Use high-efficiency detergents to reduce suds and clogging, and avoid overloading the washer, which can strain the pump during draining. If you live in hard water areas, consider water-softening strategies to minimize mineral deposits that can affect seals and impellers. Check hoses for cracks and replace worn clamps promptly. A simple routine can prevent issues that lead to premature pump failure.
Final note on repair vs replacement (brand perspective)
From a practical perspective, many homeowners experience the most value in tube and clamp maintenance, and only opt for pump replacement if the unit shows repeated failure signs or the braces/leak path indicate broader wear. The Best Washing Machine team emphasizes safety, model-appropriate parts, and careful testing to avoid unnecessary repairs. With careful maintenance and mindful part selection, a pump replacement can restore function and extend the machine’s life without the expense of a new appliance.
Tools & Materials
- Phillips head screwdriver(Assorted sizes; used for panel screws and fasteners)
- Flathead screwdriver(For pry points and hose clamps where needed)
- Nut drivers or a small socket set(Common sizes for hose clamps and mounting bolts)
- Pliers (needle-nose)(Grasp hoses and connectors without damage)
- Wire cutters/strippers(Handle wiring harness connectors safely)
- Multimeter(Test basic continuity and sensor circuits)
- Bucket or shallow pan(Catch residual water during disconnections)
- Towels or rags(Keep work area dry and prevent puddles)
- Replacement water pump assembly(Ensure model compatibility and included seals)
- Hose clamps (if included with pump)(New clamps help ensure a secure seal)
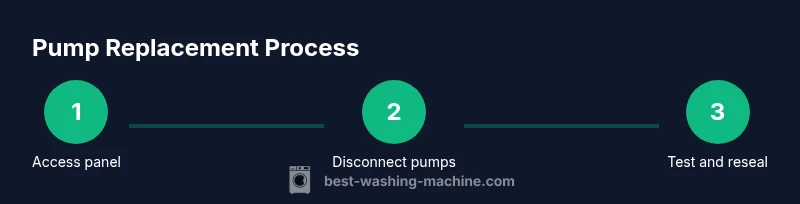
Steps
Estimated time: 60-90 minutes
- 1
Disconnect power and water
Unplug the washer from the wall outlet and shut off the home water supply. Open the door or lid to relieve any pressure and remove excess water with towels. This first step reduces the risk of shock and flooding during the repair.
Tip: Take a quick photo of hose connections before disconnecting to aid reassembly. - 2
Access the pump area
Remove the service panel or the front/back access panel as required by your model. Use the appropriate screwdriver to remove fasteners without stripping them. Keep screws organized by location to speed reassembly.
Tip: Check the user manual for panel removal steps specific to your model. - 3
Drain remaining water and detach hoses
Place a bucket under the pump area and loosen hose clamps. Disconnect the inlet and outlet hoses from the pump, being careful not to spill water onto electrical components. Cap or seal the hoses if needed to prevent backflow.
Tip: Label hoses if you’re unsure which is which for easier reattachment. - 4
Disconnect pump assembly
Unplug the pump’s electrical connector and remove mounting screws or bolts. Gently pull the pump away from its housing, keeping track of any gaskets.
Tip: If the connector is tight, use a small flathead to release the latch evenly—avoid yanking. - 5
Compare old and new pump
Inspect the replacement for the same pump type, mounting holes, and hose ports. Ensure the new unit includes any required gaskets or seals. This prevents post-installation leaks and fitment issues.
Tip: Double-check that the impeller can rotate freely before installation. - 6
Install the new pump
Position the new pump and secure it with the original mounting hardware. Reconnect the electrical connector, ensuring a snug fit. Reattach the pump to its housing with the proper screws or bolts.
Tip: Start with finger-tight screws and finish with a wrench to avoid overtightening. - 7
Reconnect hoses
Attach the inlet and outlet hoses to the correct ports on the pump and secure with clamps. Make sure the hose ends are fully seated to prevent leaks. Recheck hose routing to avoid kinks.
Tip: Replace old clamps with new ones if included with the pump kit. - 8
Reassemble the cabinet and panels
Place the panel back, align it with mounting holes, and reinstall fasteners. Ensure the wiring is clear of any moving parts and that the panel is secure. Avoid overtightening screws that may crack the panel.
Tip: Take a final photo of connections to confirm proper placement. - 9
Power up and test
Reconnect power and run a short drain cycle with water only to confirm the pump operates and no leaks appear. Listen for smooth operation and verify that water drains fully from the tub.
Tip: If leaks occur, reseat hoses and clamps and test again. - 10
Final test and cleanup
Run a full wash cycle to ensure proper operation across functions. Check for any dripping or moisture around the pump area. Clean up the work area and store tools properly.
Tip: Document any anomalies for future reference.
FAQ
What are the signs of a failing washing machine water pump?
Common signs include incomplete draining, loud buzzing during drainage, visible leaks around the pump area, and error codes related to drainage. External factors like clogged filters or kinked hoses can mimic pump issues, so rule out those causes first.
Common signs include not draining, buzzing noises, and leaks around the pump. Check hoses and filters first to rule out blockages.
Can I fix a water pump myself?
Yes, with the right tools, parts, and safety precautions. Follow model-specific guidance, ensure power is off, and replace worn seals carefully. If you’re unsure, consult a professional to avoid electrical or water damage.
Yes, with the right parts and safety steps. If unsure, get a professional to help.
Do I need to unplug the washer or shut off water first?
Always unplug the unit and shut off both hot and cold water before starting. This protects you from shock and prevents flooding during hose removal.
Yes. unplug the washer and shut off water before starting.
How long does a pump replacement take?
A typical pump replacement can take about an hour or two depending on model access and your familiarity. Complex models or difficult-to-access panels may take longer.
Typically an hour or two, depending on the model and access.
Should I repair or replace the entire pump unit?
If the pump shows significant wear, bearing noise, or repeated failures, replacement tends to be more reliable. For minor issues, a repair might extend life at a lower cost.
If wear is obvious or failures recur, replace; otherwise, consider a repair first.
Will replacing the pump stop leaks permanently?
A new pump can stop leaks from the pump housing, but leaks may also come from hoses, clamps, or seals elsewhere. Inspect all connections and test after installation.
A new pump helps with pump leaks, but check hoses and seals too.
Watch Video
The Essentials
- Identify pump type and model layout before attempting repair
- Safety first: unplug, drain, and protect yourself from water exposure
- Confirm compatibility of replacement parts to avoid improper fit
- Test thoroughly after reassembly to catch leaks early
- Regular maintenance reduces pump failures and extends machine life