Washing Machine Drain Pump Replacement: Step-by-Step Guide
Learn how to replace a washing machine drain pump with our detailed, safety-focused guide. Get tools, steps, tests, and maintenance tips to restore proper drainage and prevent leaks.

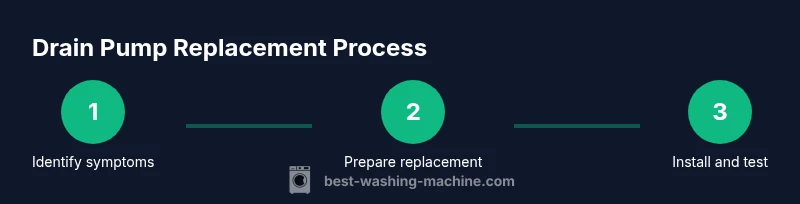
Replace a failing or clogged washing machine drain pump to restore drainage and prevent leaks. This guide covers how to identify the issue, gather tools, safely disconnect power and water, swap in the correct pump, and test for leaks. Always unplug the machine, shut off the water, and verify model-fit before starting.
Why replacing the drain pump matters
The drain pump is essential for removing used water between cycles. Without a working pump, a washer may stop at not-draining, leave water in the tub, or trigger error codes. The drain pump moves water out through the drain hose after the wash or rinse phase. When it fails, you may notice standing water, unusual grinding or humming noises, or a pump that refuses to run on command. Recognizing these symptoms early helps you decide whether a replacement is required or if a maintenance cleanout will do. According to Best Washing Machine, most pump failures stem from worn impellers, mineral buildup, or loose electrical connections. Regular maintenance—such as cleaning the pump screen and inspecting hoses—extends life and reduces unexpected breakdowns. In this section, you’ll learn how to recognize the symptoms, select the right replacement, and plan a safe workflow for installing a new pump. This approach also minimizes water damage and downtime in busy homes.
For homeowners, renters, and small laundry operations, the drain pump replacement is a practical repair that can be completed with basic tools and some patience. By understanding the role of the pump and the common failure modes, you’ll be better prepared to diagnose issues quickly and avoid unnecessary parts purchases. The goal is to restore normal drainage while preserving other components like hoses, seals, and the motor.
Selecting the right replacement pump
Choosing the correct drain pump is crucial because pumps are not universally interchangeable across models. Start by confirming your washer’s make, model, and serial number. Compare the old pump’s part number with retailer listings or the manufacturer’s guide to ensure a precise match. Pay attention to the impeller direction, voltage, connector type, and inlet/outlet size. Incompatible pumps can fit physically but fail to move water effectively, cause leaks, or burn out quickly. If you’re unsure, remove the pump for a photo and contact a parts supplier with the model details. Best Washing Machine analysis shows that compatibility and connector fit are the top predictors of long-term reliability. In some cases, manufacturer repair catalogs list two or three suitable pumps. In those scenarios, choose the one with identical electrical terminals and mounting holes. Finally, decide whether to buy an OEM or an aftermarket pump—OEM tends to align with warranty expectations, while aftermarket options may offer cost savings.
Safety and prep work
Safety should come first in any appliance repair. Begin by unplugging the washer from the wall outlet and turning off the household water supply. If your unit has a detachable power cord, unplug it before you touch any internal components. Put on protective gloves to guard against sharp edges and residual water. Place towels or a shallow pan to catch any fluid that spills when you disconnect hoses. Work on a dry, stable surface with adequate lighting. If you have a front-load machine, move it away from the wall to access the back panel or toe-kick area. For top-loaders, remove the top panel or service access panel as directed in the manual. Finally, review the model-specific service guide for any nuances, such as integrated hoses or moisture sensors, that could affect the replacement process.
Diagnosing a faulty pump and testing
Before swapping parts, verify that the issue is indeed the drain pump and not a clogged discharge hose or a blocked filter. Check for standing water in the tub after a spin cycle and listen for the motor attempting to run with a humming sound. Inspect the drain hose for kinks or blockages and remove any lint screens or pump screens if accessible. If you have a multimeter, test the pump’s electrical connector: disconnect it and measure continuity at the terminals when the machine is powered. A nonresponsive circuit or an open circuit usually indicates a defective pump or a blown fuse in the control board rather than a simple clog. If the pump fails the tests, proceed with replacement and re-test after installation to confirm the issue is resolved. After replacement, run a short test cycle with no clothes to confirm proper drainage and ensure there are no leaks at hose clamps.
According to industry best practices, documenting the symptoms, test results, and part numbers helps with warranty claims or future repairs. This diagnostic step is essential to avoid unnecessary labor and parts costs.
Replacement overview and steps
Replacing a drain pump involves safe disassembly, careful handling of hoses, and a secure reassembly. Start by removing the pump mounting screws or clips, then detach the intake and outlet hoses. Remove the electrical connector, and extract the old pump from its housing. Compare the new pump to the old unit to confirm valve orientation, connector type, and mounting compatibility. Install the new pump by attaching the hoses (secure with clamps) and reconnecting the electrical connector. Mount the pump in place with the original screws or clips, ensuring there are no gaps that could cause leaks. Finally, restore power and perform a careful test, watching for drains efficiency and any signs of leakage around hose joints and seals.
Post-replacement testing and maintenance
After completing the replacement, run a full wash cycle or at least two shorter test cycles to verify proper drainage. Check for leaks around the pump, hoses, and clamps. If you notice damp spots, tighten clamps and reseat hoses as needed. Clean the pump area to remove any debris that could accumulate and interfere with operation. Periodic maintenance—such as cleaning the pump screen, inspecting hose connections, and replacing worn clamps—helps prevent recurrent drain problems. If your model has an integrated filter, clean or replace it according to the manufacturer’s schedule. Keeping a spare set of clamps and a small screwdriver set can speed future maintenance and prevent rust or corrosion on metal fasteners. Remember that even a correctly installed replacement can fail prematurely if driven by abrasive water or recurrent jams; address the underlying cause, such as hard water build-up, to extend life.
Maintenance tips to extend pump life
To maximize the life of your drain pump, perform light maintenance every few months. Remove the access panel and visually inspect the pump area for signs of wear or mineral buildup. Clean the screen and the pump cavity to prevent clogs. Ensure the inlet hose is free of kinks and that the outlet hose has a smooth path to the drain. Use a water-softening approach if you have hard water to minimize mineral buildup on impellers and seals. Finally, keep the area around the washer dry to avoid rust on metal fasteners and to reduce mold growth near the motor housing. Regularly testing the drain function during routine cycles helps spot issues early and saves on emergency repairs.
Tools & Materials
- replacement drain pump (model-matching)(Ensure compatibility with your washer model and motor type)
- Phillips head screwdriver(For mounting screws)
- Flathead screwdriver(For prying and hose clamps)
- Needle-nose pliers(Grip springs/clamps and hoses)
- Bucket or towels(Contain residual water during teardown)
- Multimeter (optional)(Check electrical continuity if needed)
- Replacement hose clamps (optional)(Ensure secure hose connections)
- Shop rag or brush(Clean pump area and ports)
Steps
Estimated time: 60-120 minutes
- 1
Power down and unplug
Unplug the washer from the wall outlet and switch off the circuit if needed. If the machine has a shared outlet, ensure no other devices are on the same circuit to prevent overload during testing.
Tip: Keep the power cord unplugged during the entire replacement to avoid shock. - 2
Shut water supply and drain remaining water
Close the hot and cold water valves and disconnect hoses carefully to drain residual water into a bucket. Have towels ready for any splashes and avoid pulling hoses with force.
Tip: Place towels inside the drum to catch small drips as you detach hoses. - 3
Access the pump housing
Gain access to the pump by removing the back panel or toe-kick, depending on the model. Some machines require service panels, others a front panel; consult your manual for access points.
Tip: Take a photo of the internal layout before disconnecting anything. - 4
Disconnect electrical and hoses
Carefully unplug the pump’s electrical connector and release hose clamps from the inlet and outlet hoses. Note the orientation of hoses for reinstallation.
Tip: Label each hose with tape to simplify reassembly. - 5
Remove old pump and inspect housing
Unscrew the pump mounting and remove the unit. Inspect the housing for cracks or corrosion and check the hose ports for wear or damage before installing the new pump.
Tip: If the housing is damaged, replace the entire assembly rather than just the pump. - 6
Install replacement and reconnect
Mount the new pump, reattach hoses with clamps, connect the electrical plug, and ensure there are no kinks or twists in the lines. Tighten all fasteners firmly but avoid overtightening.
Tip: Double-check that clamps are secure and routed away from moving parts. - 7
Test the unit for leaks and drainage
Plug in the washer, run a short wash or drain-only cycle to verify drainage and check for leaks around all hose connections. If leaks appear, reseat hoses and re-tighten clamps.
Tip: Watch the unit for several minutes after starting the test to catch slow leaks.
FAQ
What are common signs that my drain pump needs replacement?
Common signs include water left in the drum after a cycle, unusual grinding or humming noises, and error codes indicating not draining. If the pump motor runs but water isn’t moving, the impeller may be worn or blocked.
Look for standing water after a cycle and strange noises. If the pump runs but water doesn’t drain, you may need a replacement.
Can I replace the drain pump myself or should I hire a pro?
Many homeowners with basic tools can replace a drain pump using model-specific guides. Some models have integrated components that are best handled by a technician, especially if you encounter wiring or sensor complications.
If you’re comfortable with basic appliance repairs and have the manual, a DIY replacement is feasible. For complex models, consider a pro.
Will replacing the drain pump affect my washer’s warranty?
Warranty terms vary by brand and policy. Some warranties require professional service for certain repairs; check the terms and consider OEM parts to preserve coverage.
Warranty depends on your policy; OEM parts and professional service may be required to keep coverage.
Do I need a model-specific pump or will a generic fit work?
A model-specific pump is the safest choice. Even if a pump looks similar, electrical connectors and mounting points can differ, affecting performance or causing leaks.
Always choose a pump that matches your model’s part number and connector type.
How long does drain pump replacement typically take?
Most replacements take about 60–120 minutes depending on the model and how easily panels come off. A slower pace with careful testing is safer than rushing the job.
Usually about an hour to two, depending on model access and your familiarity.
What if water leaks after replacement?
Double-check all hose clamps, seals, and the pump’s mounting. Reseat hoses if leaks appear, and test again after tightening connections.
If you see leaks, recheck clamps and seals and run another test cycle.
Watch Video
The Essentials
- Identify pump issues before buying parts.
- Match the replacement pump to model compatibility.
- Secure all hose connections and clamps during reassembly.
- Test drainage and check for leaks after installation.