Washing Machine Seal Repairs: Step-by-Step Guide Homeowners
Learn how to diagnose and repair leaks from washing machine seals, including door boot and tub seal replacements. Safety-first, with tools list, step-by-step instructions, and maintenance tips from Best Washing Machine.

Most washing machine seal leaks can be resolved by inspecting the door boot or tub seal, replacing worn gaskets, and resealing hose connections. Start by unplugging the unit and turning off the water, then dry the area. Gather a seal kit, screwdrivers, pliers, and towels, and follow the step-by-step repair guide below.
Understanding Washing Machine Seals and Why They Fail
The seal in a washing machine serves two critical jobs: it keeps water from leaking out of the drum and it helps maintain the appliance’s energy efficiency by preventing water from seeping into electrical components. Over time, seals wear out due to repeated heating and cooling cycles, detergent residue, and normal wear on the clamp rings and boot material. In front-loading models, the door boot forms the primary flexible barrier between the tub and the cabinet; in top-loaders, the tub seal sits around the outer drum. Even small splits, cracks, or pinhole leaks can allow moisture to escape, causing basements or laundry rooms to flood with soap suds or hot water. When seal integrity degrades, you may notice dampness around the door, persistent detergent residue, or a musty odor from mold growth. According to Best Washing Machine, adopting a proactive approach to diagnosing and repairing seal leaks can save water, protect your floors, and extend the life of your washer.
In this section we’ll explore why seals fail, how to recognize the symptoms, and how to decide whether a seal repair is a DIY task or a job for a professional. While some repairs are straightforward, others require model-specific parts and careful reassembly to avoid creating new leaks. By understanding the role of seals, you’ll be better prepared to plan repairs, stock the right tools, and execute a careful seal replacement without compromising safety.
Common Seal Problems and Symptoms
Washing machine seals can degrade in several ways, each producing distinct symptoms. A torn or cracked door boot is the most obvious failure mode in front-loaders, often accompanied by water spraying out from the hinge area or down the front of the machine. For top-load models, a worn tub seal can cause water to pool near the bottom of the unit after a wash cycle or when spinning. In both cases, you may also notice louder operation, louder drum spins, or an unusual smell from mold and mildew around the gasket. Leaks aren't the only sign: if you see dampness on the floor, oily residue in the drum, or soap residue on the door, these are indicators that a seal is compromised. Detergent buildup can accelerate wear, particularly if you use high-suds detergents in front-load machines, which increases the stress on the boot. If your washer leaks when filling, but stops after a minute, it could indicate a loose or misaligned seal that needs reseating rather than full replacement. It’s essential to identify whether the leak is coming from the door boot, the tub seal, or the plumbing connections; the repair path varies accordingly.
In addition to visible damage, pay attention to musty odors near the door area, which can signal mold growth behind a degraded seal. Regularly inspecting for signs of wear helps catch problems early and reduces the risk of water damage. As you gain experience with washing machine seal repairs, you’ll recognize common patterns—cracks in the boot, brittle rubber, or gaps created by loose clamps—that point to specific repair steps.
Safety First: Assessing Repair Viability
Before you reach for tools, prioritize safety. Unplug the machine, shut off the cold water supply, and pull the plug from the outlet to eliminate any risk of electric shock. Move the washer away from the wall to give yourself room to work and protect the surrounding area with towels or an old sheet to catch stray water. If you’re working on a rental unit, inform the landlord and review any warranty or service restrictions. Now assess whether the leak is minor and localized to the boot or seal, or if there is rust, deep cracking, or moisture behind the drum that may require specialist attention. If you encounter unusual noises, a burning smell, or feel heat near electrical components, stop immediately and consult a technician. A critical decision in seal repairs is whether you can access the seal safely and whether replacement parts exist for your model. If you’re not confident, don’t proceed; sealing a bad seal improperly can worsen leaks or compromise electrical safety. This is where Best Washing Machine’s maintenance guidance helps you decide whether DIY is feasible or if professional service is warranted.
Diagnosing Leaks: Door Boot vs Tub Seal
To correctly repair a washing machine seal, you must distinguish between door boot (or door gasket) leaks and tub seal leaks, as the parts and techniques differ. Door boot issues usually manifest as water around the door frame, spray from the door seam, or visible cracks in the flexible boot. Inspect the boot by peeling back the inner and outer lips and looking for tears, stiffness, or loose clamps. For tub seals, look for water pooling at the base of the machine after a cycle or after spinning; you may also see rust stains along the drum edge. If the drum spins freely with the belt, the tub seal is often the culprit. Note that some machines use integrated seals within the drive assembly, which can complicate diagnosis. Confirm your findings by running a controlled test with the access panel open (and always with the unit unplugged). When in doubt, take photos and compare with model-specific repair guides from trusted sources.
Successful diagnosis hinges on isolating the source of the leak. If you identify a seep at the door boot, you’ll likely replace the boot and clamps. If the leak stems from the drum area, you may be looking at a tub seal replacement, which can be more complex and might involve resealing the rear of the tub. In both cases, keeping track of where you see water help you map the repair flow and avoid chasing leaks across the entire chassis.
Repair Options: Seal Kit Replacement vs Full Door Boot Replacement
Repair decisions hinge on damage type, availability of parts, and your comfort with disassembly. A torn door boot generally calls for a door boot seal kit, which includes the boot, clamps, and sometimes hoses. Replacing just the boot is cheaper and often straightforward if the rest of the door frame is intact. A worn tub seal, on the other hand, may require replacing a large gasket ring around the drum; in some designs, you may also need to replace bearings or the rear tub seal housing. For a high-end or widely used model, a OEM seal kit ensures fit and performance. Some older machines use a single-piece seal that is integrated with the tub; replacement may require more disassembly and care to avoid damaging the drum. If the seal kit doesn’t come with installation instructions tailored to your model, consult the manufacturer’s guide or Best Washing Machine’s model-specific repair notes before proceeding. Always verify that you have the right parts and that you can access fasteners without forcing the frame.
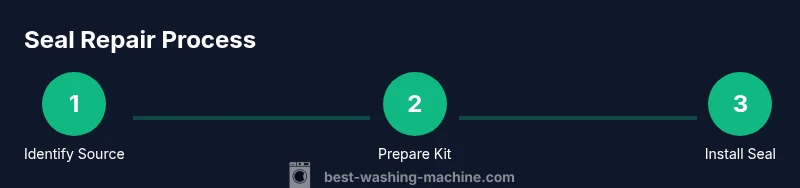
Step-by-Step Repair Overview
Below is a high-level overview of the seal repair process. For the detailed, model-specific steps, follow the linked guide in the STEP-BY-STEP block. 1) Disconnect power and shut off water; 2) Gain access to the seal area by removing panels or the front housing as needed; 3) Detach old seal components, noting their order; 4) Clean mating surfaces and inspect for damage; 5) Install new seal kit, ensuring correct orientation; 6) Reassemble the housing, secure clamps, and test fit; 7) Run a test cycle with a shallow load and inspect for leaks; 8) Reposition the washer and dry surroundings. This overview emphasizes the importance of slow, deliberate work and using the right tools to avoid warping seals or misaligning components. Remember to maintain a clean workspace to prevent small parts from rolling under the unit, and to keep water away from electrical outlets.
Maintenance to Prevent Future Leaks
After completing a seal repair, you can reduce the risk of recurring leaks by adopting simple habits. Regularly inspect door boots and tub seals for signs of wear, cracks, or stiffness, especially after heavy loads or high-spin cycles. Use the correct type and amount of detergent to minimize excessive suds that can seep behind seals; front-loading washers are particularly sensitive to residue build-up. Ensure hoses and clamps remain tight, but avoid overtightening, which can crack fittings. If you notice water pooling near the base after a cycle, pause use and re-check the seal alignment. Periodic cleaning of the seal area prevents mold growth and deterioration. Best Washing Machine analysis shows that proactive maintenance and early detection save water and extend component life, reinforcing the value of routine seal inspections.
Authority Sources
- https://www.energy.gov/eere/energysaver/articles/washing-machines
- https://www.epa.gov/watersense
- https://www.consumer.ftc.gov/articles/how-keep-your-washing-machine-clean
Tools & Materials
- Seal repair kit (door boot seal or tub seal)(Model-specific kit; verify compatibility with your washer model)
- Screwdriver set (Phillips and flat-head)(Small sizes (#1-2) for fasteners and clamps)
- Torx bits/driver(Some models use Torx screws; have a set handy)
- Pliers (needle-nose)(For clamps and hoses)
- Plastic pry tool / putty knife(Gently release clips without tearing rubber)
- Towels and absorbent rags(To catch drips and keep workspace clean)
- Bucket or basin(Catch water during disassembly)
Steps
Estimated time: 60-120 minutes
- 1
Power down and prep
Unplug the washer from the wall and shut off the cold water supply. Move the unit away from the wall and lay towels on the floor to catch any residual water. This keeps you safe and maintains a dry work area during the seal repair.
Tip: Use a cord organizer to keep the plug and cord out of the way while you work. - 2
Access the seal area
Remove the front panel or top panel as required by your model to expose the door boot or tub seal. Take photos of the current setup before removal so you can reassemble correctly.
Tip: Label screws and clips with tape to avoid misplacing them. - 3
Remove old seal components
Detach clamps and remove the old boot or seal. Note the orientation and order of parts so you can replicate the arrangement with the new kit.
Tip: Check for tears or cracks in the adjacent hoses. - 4
Clean mating surfaces
Wipe the drum rim, tub edge, and boot surfaces with a clean, dry rag. Remove detergent residue and mineral build-up that can affect seal seating.
Tip: Do not use sharp tools that could scratch metal or plastic. - 5
Install the new seal
Place the new boot or tub seal in the correct orientation and secure with clamps or fasteners as specified by the kit. Ensure there are no folds or twists that could cause leaks.
Tip: Double-check alignment against the original configuration. - 6
Reassemble and secure
Reinstall panels, check that hoses are reconnected, and tighten all clamps evenly. Make sure the door or drum spins freely without rubbing.
Tip: Avoid over-tightening clamps; this can damage seals. - 7
Test for leaks
Plug the machine back in, run a short wash cycle with a shallow load, and observe the seams closely for any signs of leaking.
Tip: Keep towels ready in case you need to catch stray water. - 8
Final check and cleanup
Inspect the area after the cycle completes. If moisture remains, re-inspect seals and clamps and consider a second test run. Restore the washer to its normal position.
Tip: Document the repair with photos for future reference.
FAQ
Can I fix a leaking washing machine seal myself?
Yes, many leaks from the door boot or tub seal can be repaired with the right kit and careful disassembly. If you see extensive wear, rust, or water behind the drum, consider professional service. Always follow safety steps and model-specific guides.
Yes, you can fix common leaks yourself with the right seal kit and careful steps, but stop if you see extensive wear or danger signs.
How do I know whether to replace the door boot or the tub seal?
Inspect the leak source: door boot leaks show around the door frame; tub seals leak near the drum base. If the boot is torn or the seal is worn evenly, replace the affected component. Complex or uncertain cases may require professional help.
Check where water is coming from—door frame versus drum area—and replace the damaged part accordingly.
What tools are essential for seal repairs?
At minimum, a seal kit, screwdrivers, pliers, and towels. Some models require Torx or hex bits. Always unplug and shut off water before starting.
Have a seal kit, screwdrivers, pliers, and towels ready, and ensure power and water are off before you begin.
Will seal repairs void my warranty?
Repairing a seal yourself can affect warranty terms. Check your warranty, model terms, and whether professional service is required for coverage. If in doubt, consult the manufacturer or a certified technician.
Check your warranty first; some terminations require professional service for coverage.
How long do seal repairs take?
Most repairs take about 60-120 minutes, depending on model and access. More complex tub-seal work can take longer. Plan for a longer session if you’re new to this.
Most seal repairs take about an hour or two depending on model complexity.
Can I prevent future leaks after seal repairs?
Yes. Regularly inspect seals, use the right detergent amount, secure hoses, and avoid overloading. Periodic cleaning around seals reduces mold and residue buildup.
Keep an eye on seals, load properly, and clean around the seals to prevent future leaks.
Watch Video
The Essentials
- Identify the exact seal type before starting
- Use model-specific seal kits for best fit
- Work slowly to avoid damaging clips or drum
- Test for leaks with a controlled cycle after reassembly