Where Do Washing Machines Leak From? A Practical Troubleshooting Guide
A practical, urgent guide to locating and fixing washer leaks. Learn common sources, step-by-step checks, and when to call a pro. Based on Best Washing Machine Analysis, 2026.

Most washing machine leaks come from hose connections, door seals, or pump fittings. Start by unplugging the machine and shutting off the water supply. Check inlet hoses for tight connections and cracks, then inspect the door boot for wear and the drain hose for kinks. If the leak persists, follow the step-by-step guide below.
Where Do Washing Machines Leak From? A Practical Start
Leaks can feel urgent, and answering where do washing machines leak from is the first step toward stopping water damage. In many homes, leaks originate at three areas: hose connections, door or tub seals, and the pump or drain hose. According to Best Washing Machine, leaks are usually traced to worn gaskets, loose clamps, or cracked hoses rather than dramatic internal failures. This guide will walk you through safe checks, practical fixes, and when to escalate to professional service in 2026. Starting with the easiest checks reduces risk and cost. Before touching any water, unplug the machine, turn off the water supply, and have towels ready. If you keep a simple leak diary—noting where water appears and after which cycle—you’ll see patterns that guide the repair. The Best Washing Machine team emphasizes that quick, systematic diagnostics protect floors, cabinets, and electrical components while giving you confidence to fix common leaks.
Common Leak Sources and How They Look
Leaks almost always come from four families of components: external hose connections, the door boot or seal around the drum, the drain or pump hoses, and any crack in the tub or pump housing. In practice, you may notice dampness along the back panel where hoses connect, water around the door opening after a cycle, or a fine spray signaling a small leak at a clamp. The door boot is a frequent wear point, especially on front-loaders, and drain hoses can develop cracks near bends or where they contact shutoffs. By visual inspection and a gentle tug, you can separate likely culprits from false alarms. Best Washing Machine analysis shows that addressing hose integrity and door seals resolves the majority of household leaks. Keep a flashlight handy and check for soap residue that can mask dripping.
Safety First: Power, Water, and Tools
Safety is non-negotiable when diagnosing washer leaks. Always unplug the machine and shut off the water supply before touching any internal parts. If you see exposed wiring or water near outlets, do not proceed—call a professional. Use a shallow pan or towels to manage water and wear gloves to protect your hands from sharp metal edges. Gather basic tools: a flat-head screwdriver, pliers, a flashlight, and new hoses or door seals if you anticipate replacements. Document the current setup with photos before removing components; this makes reassembly precise and avoids cross-wiring of hoses. Remember, the goal is to stay dry and safe while you identify the leak source.
Quick On-Site Checks You Can Do Now
To triage quickly, perform simple checks in this order: check the inlet hose connections at the back for looseness or cracks; examine the drain hose for kinks or a position that causes water to trap; inspect the door boot for cracks or tears; and feel along the tub rim and rounded seams for dampness. If you find a hose that’s loose, tighten it with the appropriate clamp and re-test with a small amount of water added or a light cycle. If dampness persists around the door boot, you may be dealing with a worn seal that requires replacement. Keep the door closed during tests to replicate real-world conditions.
Inspecting Hoses and Connections: The Visible Path to a Fix
Hoses are the most common leak source. Inspect both inlet and outlet hoses for bulges, cracks, or soft spots. Replacing aging hoses is inexpensive and surprisingly effective. Check clamps for corrosion or looseness, and ensure clamps are in the correct orientation. Drain hoses should be free of kinks and not crushed by nearby plumbing. When tightening, avoid overtightening—crushing the hose can cause leaks later. If you discover a damaged hose, replace it and test with a short cycle. Small leaks often disappear after a fresh seal or clamp is installed, but persistent dampness warrants deeper inspection of internal parts.
Replacing Seals, Gaskets, and Pumps: What to Expect
Door seals and tub gaskets wear with time, creating gaps through which water escapes. Replacing a boot can restore watertight performance; the process is straightforward in many models, but some machines require a technician for proper alignment. If the pump or its housing seems cracked or a clamp is loose on a pump hose, replacement is often the best long-term fix. This work may involve removing panels, draining residual water, and reconnecting hoses with care. In most cases, a correct seal or hose swap resolves the leak, and you can resume normal cycles with a test run. Always verify proper drainage and absence of puddles after the repair.
Prevention: Routine Maintenance to Stop Leaks
Preventing leaks starts with regular inspection and mindful usage. Schedule periodic checks of hose connections, tighten clamps as part of a maintenance routine, and replace hoses every few years or when you notice wear. Use high-quality hoses and avoid over-tightening connections. Keep the area around the washer dry and clear of clutter to prevent accidental damage. Clean the lint filter and pump screen as recommended by your model’s manual to prevent clogs that can back up and cause leaks. Early fixes save money and reduce the risk of water damage.
When to Call a Pro and What to Expect in 2026
Some leaks require professional assistance, especially those involving tub seals, pump assemblies, or internal plumbing. If you see water behind the washer during a load or if the leak persists after replacing the obvious parts, contact a qualified technician. The Best Washing Machine team notes that a trained technician can diagnose seal wear, pump integrity, and internal leaks with specialized tools. Expect a diagnostic visit to include a test run, a parts quote, and a clear explanation of the repair steps. Pro service can prevent further damage and ensure your warranty terms remain intact.
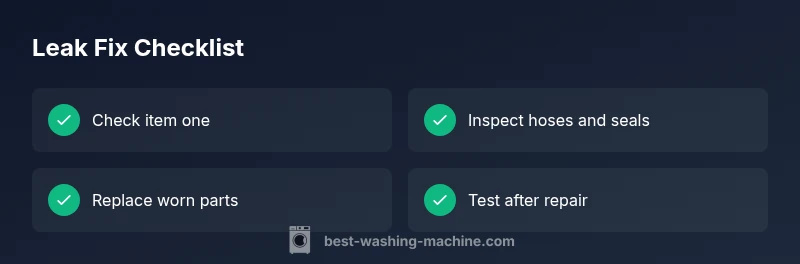
Steps
Estimated time: 45-60 minutes
- 1
Power down and prepare the area
Unplug the machine, shut off the water supply, and place towels around the base. If water is pooling, use a shallow pan to catch drips during inspection. This first step keeps you safe while you investigate.
Tip: Take a quick photo of hose connections before removing anything. - 2
Check inlet hoses
Inspect both hot and cold supply lines for cracks and tightness at the fittings. Replace any deteriorated hoses and re-tighten clamps to ensure a proper seal. Run a test cycle without laundry to observe for leaks.
Tip: Always use the correct hose type for your model. - 3
Inspect the door boot and tub seal
Look for tears, cracks, or folds in the door boot around the drum. A worn boot is a common leak source in front-loaders. If you find damage, replace the boot following the manufacturer’s instructions and re-check after a cycle.
Tip: Check both the outer seal and inner rings for wear. - 4
Examine drain path and pump
Check the drain hose for kinks or obstructions and ensure it slopes toward the drain. Inspect the pump housing and clamp connections for looseness or cracks. Tighten, replace, or reseat as needed, then run a short test cycle.
Tip: Watch for sprays near the pump area during testing. - 5
Test with water and monitor
With all checks complete, run a full cycle using only water or a small load to confirm the leak is fixed. Observe all joints and seams closely for several minutes. If any leak reappears, stop the cycle and reassess the most suspect area.
Tip: Never leave a running test unattended. - 6
Seek replacement parts as needed
If a component shows wear beyond simple tightening, replace it with approved parts for your model. Document part numbers and follow torque specs. Re-test after installation.
Tip: Keep the warranty and receipt handy in case of part issues. - 7
Finalize and prevent future leaks
Clean the area, dry all surfaces, and note maintenance tasks for future reference. Establish a periodic check routine to inspect hoses, seals, and clamps and keep a log to spot trends early.
Tip: Schedule a hose inspection every 6–12 months.
Diagnosis: Water pooled around the washer during or after cycles
Possible Causes
- highLoose or damaged inlet/outlet hoses and connections
- highWorn or cracked door boot/gasket
- mediumCracked pump housing or loose clamps on pump hose
- lowOverfilled drum due to faulty pressure switch
- lowTub seal leak from worn components
Fixes
- easyTighten all hose clamps and replace cracked hoses; ensure proper routing and no kinks
- mediumReplace worn door boot/gasket; test for leaks around the seam
- mediumReplace or reseat pump and clamps; verify drain hose is not crushed or kinked
- easyReplace the pressure switch or repair fill controls if overfilling occurs
- hardRepair or replace the tub seal; this often requires professional service
FAQ
What is the most common cause of a washing machine leak?
The most common leaks come from loose hoses or worn door seals. Address these first before opening the machine. If the problem persists, inspect the drain path and pump for other issues.
Most leaks come from hoses or door seals. Check those first, then look at the drain and pump if it keeps leaking.
Can I fix a leaking hose myself?
Yes, if you can safely access the hose. Replace cracked or aged hoses and ensure clamps are snug. Always unplug the unit and shut off water before starting.
Yes. If you can reach it safely, replace the hose and snug the clamps after unplugging and turning off the water.
Is it safe to operate a leaking washer?
No. Leaks near electrical components can pose shock or fire risks. Stop use immediately, unplug, and dry the area. If water is pooling, call a professional.
No. Turn it off and unplug it. Water near electronics is dangerous; call a pro if you can't fix it quickly.
How often should I inspect hoses?
Inspect hoses during routine maintenance, at least every 6–12 months. Look for cracks, bulges, or soft spots, and replace aging hoses proactively.
Check hoses every 6 to 12 months and replace aging ones before they fail.
Will leaks affect warranty?
Warranty coverage varies by model and cause. Wear-related seals may be covered if a defect, but improper maintenance can affect eligibility. Check your manual and warranty terms.
Coverage varies; read your manual to see if the leak is considered a defect or wear.
What should I do if the tub seal is leaking?
A leaking tub seal often requires professional service. If you’re comfortable, you can confirm by a slow leak behind the drum, but repairs typically involve detaching the drum and re-sealing.
Tub seal leaks usually need a pro; untrained DIY can cause more damage.
Watch Video
The Essentials
- Start with hoses and door seals for the simplest fixes.
- Visual inspection often reveals the leak source.
- Replace aging hoses and worn gaskets to prevent recurring leaks.
- Call a pro for tub seals or pump issues.