What Size Drain Is Needed for a Washing Machine? A Guide
Learn the standard drain size for washers, why a 2-inch standpipe is typically recommended, and how to verify local codes. Practical tips cover standpipe height, traps, venting, and common installation pitfalls.

Most washing machines require a standpipe drain that is 2 inches in diameter. The standard setup uses a 2" drain with a trap and a vent to prevent siphoning and sewer gas. Some compact or specialty machines may allow smaller connections, but local code and the manufacturer's guidance should be followed. When in doubt, install a 2-inch drain and verify with a pro.
Drain basics: why size matters
According to Best Washing Machine, drain sizing is not optional; incorrect sizing can lead to backups, leaks, and code violations. The drain size determines how quickly water leaves the washer and how effectively the standpipe accepts the hose. Most residential installations rely on a standard standpipe diameter of 2 inches, which accommodates the typical washer discharge without gurgling or siphoning. A smaller drain may restrict flow or cause overflow risk, while an excessively large drain is rarely an issue but can complicate the trap and vent arrangement. The fundamental principle is to maintain a smooth, steady flow from the washer into the drainage system while preventing sewer gas entry and foul odors. When sizing a drain, homeowners should also consider the distance from the washer to the standpipe, the presence of a trap, and the path of the vent. Incorrect routing can create backups or odors, even when the pipe itself is technically capable.
Standard sizes and what to expect
Most new washers and laundry rooms are designed around a 2-inch standpipe, and the national code assumptions align with this standard. The 2-inch diameter is typically large enough to handle the discharge rate of modern front-load and top-load washers, including high-efficiency models that use less water but may require a consistent drain path. Some compact or older units can operate with a 1-1/2 inch connection, but that is less common and often relies on specific hose fittings or local exceptions. When planning a new installation, verify the drain's inner diameter, the standpipe height, and the trap configuration. Manufacturers rarely publish a drain size smaller than 2 inches for standard installations, and installers should adhere to the equipment’s installation guide. Additionally, check local building codes, which may specify standpipe dimensions, vent arrangements, and minimum clearances around the drain to prevent accidental overflow during heavy cycles.
How to measure and verify locally
To determine the correct drain size, start by locating the standpipe or floor drain the washer will feed into. Use a caliper or a simple tape measure on the inside diameter of the standpipe opening to identify the nominal size; in most cases, you will see a 2-inch diameter printed on the pipe or drain assembly. If you find a 1-1/2 inch opening, consult the washer’s manual and your local code before proceeding, as some jurisdictions require a 2-inch standpipe for new installations. For a practical check, compare the drain hose diameter (often 5/8 inch) and the standpipe opening; connection should be snug but not overly tight. If you must adapt, use manufacturer-approved adapters that maintain a proper seal. Finally, confirm the recommended height by measuring from the floor to the top of the standpipe and ensuring the top is typically 18 to 30 inches above the floor, with allowance for the laundry room layout. If you are uncertain, document measurements and consult a licensed plumber.
Installation considerations: standpipe, trap, vent
A proper trap and vent prevent sewer gas and backflow. The standpipe should extend above the trap to ensure water remains in the trap during cycles; a typical standpipe height range is 18 to 30 inches, depending on local codes and the washer's hose length. The trap should be located within a few inches of the floor and vented to the building's waste line to allow air exchange during drainage. Use a washable, durable P-trap designed for laundry drains, and ensure the drain connection uses the correct hose clamps and sealant to prevent leaks. If the washer is placed next to a sink or tub with a shared drain, ensure the configuration maintains proper slope and avoids siphoning. Finally, install a standpipe guard or a small overflow option if available; these devices help prevent accidental spills if the washer overfills or if the standpipe becomes blocked.
Special cases: compact washers, laundry sinks, outlets
Some compact washers or machines installed in tight spaces may permit different drain configurations, but these exceptions are controlled by manufacturer guidelines and local codes. When a compact washer is used, you might see a 1-1/2 inch drain connection at the appliance, with a dedicated adaptor to the standpipe. Laundry sinks or utility sinks sometimes use a dedicated drain connection that bypasses a typical standpipe; in these cases, maintain proper slope and ensure the trap remains accessible for cleaning. In multiunit buildings like apartments or condos, you may encounter shared drain lines with stricter venting and trap requirements; always verify with building management or a licensed plumber before making changes. Finally, if your space uses a wall-mounted laundry box or a recessed utility area, ensure the drain—whether hidden or exposed—remains level and accessible for maintenance.
Troubleshooting drainage issues common mistakes
Common mistakes include using an undersized standpipe, skipping the trap, or neglecting venting, which can lead to slow drainage, gurgling sounds, or sewer odors. Avoid trimming or shortening the standpipe below code height, as this can cause backflow during high-water events. Do not route the drain hose directly into a sink without a standpipe—this can create cross-contamination or backflow risk. Ensure the hose is secured to avoid backspin, and keep it above the standpipe rim to prevent siphoning. If you notice standing water around the washer or frequent backups, inspect the home’s main drain or check for clogged traps in the standpipe. Consult a professional if you detect persistent odors, leaks, or water damming behind the appliance; these are signs that the drain system may be undersized or poorly vented.
Code, safety, and maintenance considerations
Beyond sizing, following code requirements is essential for safety and long-term reliability. Local codes influence standpipe height, trap type, vent sizing, and the minimum clearance around the hose and outlet. Regular maintenance—checking the trap, cleaning the standpipe, and inspecting the hose connection—helps prevent clogs and leaks. Use a drain cover if your standpipe is exposed to debris, and periodically verify that the vent stack remains unobstructed. If you perform any renovation that affects the laundry area, recheck your drain configuration against the latest code, as standards can evolve. Best practices include documenting measurements, keeping a copy of the washer’s installation guide, and scheduling an annual inspection if you operate a multi-unit facility. By staying proactive about drain sizing and maintenance, you can avoid costly calls and protect your home from water damage.
Maintenance tips after installation
After the drain is properly sized and installed, routine checks are essential. Periodically inspect the standpipe for cracks or leaks, ensure the trap remains full to seal odors, and confirm that the vent is not blocked by debris. Clean the drain hose screen if your unit has one, and avoid introducing solid objects into the drain by using a lint filter or washing synthetic fabrics separately. If you upgrade to a new washer, re-check the drain size and standpipe height—as newer models may have different hose configurations or discharge rates. Finally, maintain documentation of the installation, including measurements and code references, to simplify future repairs or relocations.
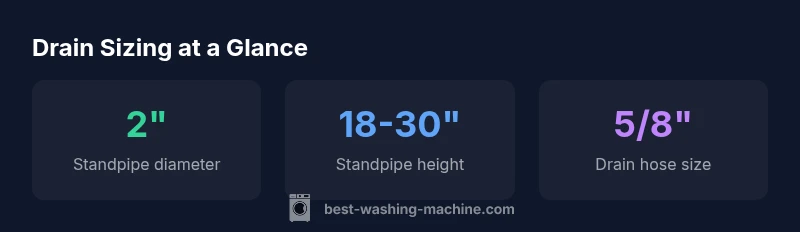
Washing machine drain sizing basics
| Aspect | Typical Requirement | Notes |
|---|---|---|
| Drain diameter | 2 inches | Standard for most installations |
| Standpipe height | 18-30 inches | Measured from floor to top of standpipe |
| Drain hose size | 5/8 inch | Common connection size |
FAQ
What size drain is required for a standard washing machine?
Typically a 2-inch diameter standpipe drain is required. Many models and codes assume a 2" drain with trap and vent.
A standard washer usually needs a 2-inch drain with a trap and vent.
Can I use a smaller drain than 2 inches if I have a compact washer?
Some compact units may allow 1-1/2 inch connections with adapters, but always verify the washer manual and local codes.
Check the manual and local code before using a smaller drain.
Do I need a trap and vent for the washing machine drain?
Yes. A trap and proper venting are typically required to prevent sewer gases and backflow and to maintain drainage performance.
Yes, you usually need a trap and vent.
What if the standpipe height differs from the standard?
Follow local codes; typical standpipe height is 18–30 inches. Heights outside that range can affect drainage and spillage.
Follow local codes; typical heights are 18–30 inches.
Is a drain without a standpipe allowed?
Some configurations exist, but they are uncommon and usually require special approvals. Consult a plumber.
Consult a plumber for nonstandard setups.
Where can I find the washer’s drain requirements?
Refer to the washer’s installation manual and local building codes. If in doubt, a licensed plumber can confirm.
Check the manual and local codes, or ask a plumber.
“"Clear drainage is essential to prevent overflows and mold growth; following standard drain sizes keeps your laundry room safe and compliant."”
The Essentials
- Use a 2-inch standpipe where possible
- Include trap and vent per code
- Match hose connection size and standpipe height to local standards
- Check the washer manual and local codes