How Difficult Is It to Install a Washing Machine? A Practical Guide
Discover the real factors that affect washing machine installation difficulty, plus a clear path to either DIY success or pro help. Includes space, hookups, safety, and a step-by-step plan.

Installing a washing machine isn't just about connecting hoses; the difficulty depends on your space, hookups, and your comfort with tools. This guide helps you gauge the task by outlining typical steps, common pitfalls, and safety checks. By the end, you'll know whether to DIY or hire a pro, and what supplies you'll need to succeed.
Why installation difficulty varies
For many homeowners, the question of how difficult to install washing machine isn't fixed; it depends on the details of your space, the model you choose, and your own comfort with hands-on tasks. The first factor is machine type: front-load machines tend to require more precise leveling and may need a more complex drainage setup, while top-load units often simplify the water inlet connections but still demand careful height alignment. The second factor is existing hookups: a standard cold and hot water supply with a standpipe drain and a dedicated 120-volt circuit makes things easier; nonstandard valves, flexible hoses, or a shared circuit can complicate the job. Third, the physical location: tight corners, narrow doorways, low ceilings, or a recessed alcove can hinder movement, lifting, and leveling. Finally, your experience and tools matter: if you own a level, basic wrenches, and pipe tape, you can handle many straightforward installs. In this section we’ll examine how each variable influences difficulty and give you a practical framework to decide whether to DIY or hire a pro. The bottom line: the more standard your space and hookups, the closer you’ll be to a quick, frustration-free install, and the more unique the setup, the more extra time and care you’ll need. This assessment is the starting point for the broader decision: how difficult to install washing machine for your home.
Assessing space, hookups, and access
Before you buy or unbox a new washer, walk the space where the machine will live. Measure the doorway width, clearance to walls, and the height of the room to ensure the unit can rotate into place without tilting. Check the available space behind the machine for hoses and venting, and confirm you can access shutoff valves and the electrical outlet without moving furniture. Take note of any irregular floor surfaces; even small slopes can affect level and vibration during a wash cycle. If you’re replacing an old machine, compare the new unit’s dimensions to the old footprint and verify that the drainage path remains free of kinks or bends. In addition to physical space, validate hookups: do you have standard 3/4-inch water supply valves, a visible standpipe or drain, and a nearby 120V outlet with proper grounding? If any of these are missing or nonstandard, plan for adapters, longer hoses, or a pro assessment. By mapping the room and connections first, you’ll understand whether the job is a 30-minute fit or a more involved project.
Electrical and water supply basics
Most modern washers require a dedicated electrical circuit and a secure water supply. Start by locating the circuit breaker for the laundry area and ensuring it has a spare capacity. Many homes use 15- or 20-amp circuits; check the washer’s label for current draw and ensure your breaker matches. For water, confirm the inlet hoses are designed for cold and hot water supply and that you have shutoff valves accessible. If your home has rigid copper lines, you may need new flexible hoses with built-in strain relief. Drain considerations are also key: a standard standpipe 18-30 inches high is typical, with a trap below to prevent sewer gas backflow. Do not install a washer on a shared drain with another appliance; this can cause siphoning and floods. Grounding is essential; ensure the outlet is GFCI-protected if required in your region and that your dryer outlet is not shared with critical circuits. If you encounter unusual voltages, leaks, or corroded valves, stop and consult a licensed electrician or plumber.
Front-load vs top-load: installation differences
Front-load machines have different door clearance and often require level surfaces with four adjustable feet; you’ll also need careful hose routing to avoid kinks and to accommodate a taller height. Some models require a rigid stand or anti-vibration pads. Top-load units generally have simpler inlet connections and are less sensitive to door clearance, but you must ensure a level platform to minimize rocking during spin cycles. Drains for both types should connect to a standpipe or a drain box; however, the drain hose height and the attachment method can differ, which affects doorway access and cabinet fit. In tight spaces, consider the orientation of the washer relative to the doorway and the ability to pivot it into position. If your wall outlets and water lines are offset, you may need adapters or longer hoses. Understanding these differences up front will help you estimate time, tools, and potential extra parts needed for your specific model.
Tools, hoses, and parts you’ll need
Even a straightforward installation benefits from a small toolkit. Essential hand tools include an adjustable wrench, a screwdriver, pliers, and a level. You’ll want two hoses rated for the machine’s water intake: a cold water hose and a hot water hose—new hoses are recommended to prevent leaks. Don’t forget a drain hose, a bucket for spills, Teflon tape for threaded connections, thread sealant if required by your model, and hose clamps to secure the drain hose. Have a basic flashlight handy to inspect valve screens and hose ends, and consider a spare shutoff valve key if yours is difficult to reach. If you anticipate drilling holes or mounting a bracket, include a carpenter’s bit and a drill. Finally, check the manufacturer’s manual for any model-specific hardware; some units include anti-vibration pads or a transit kit that must be removed before first use. With these tools and parts ready, you’ll minimize delays and keep the install moving smoothly.
Common pitfalls and how to avoid them
Leaks are the most common problem when installing a washing machine. Avoid this by tightening hose connections by hand until snug, then give a quarter turn with a wrench—never over-tighten, which can crack fittings. Use new hoses and inspect the rubber gaskets; replace if signs of wear show. Drain line issues—ensure the drain hose is not crushed or bent and that it’s secured at the correct height to prevent backflow and siphoning. Electrical mistakes—never run a washer on an extension cord or a shared outlet with heavy loads; verify the outlet is grounded and meets the washer’s amperage. Leveling problems can cause excessive vibration and movement; place the machine on a flat, stable surface and adjust the feet evenly. Finally, skip shortcuts: never force the machine through a doorway with the door open and never bypass safety warnings in the manual. Taking a careful approach reduces service calls and protects your home from water damage.
When to hire a professional and what to expect
If you’re unsure about any step—especially the water and electrical connections—or if the space has nonstandard plumbing, panels, or gas lines (in rare laundry-room setups), hiring a licensed pro is wise. A technician can verify circuit capacity, valve integrity, and drain performance, and they can install anti-vibration measures and proper wall mounting when required. Expect clear communication about parts, permits if needed, and a written estimate before work begins. A pro will typically complete with a safety check, a test run, and a short debrief on maintenance tips to avoid future issues. If you decide to DIY, plan for a slower pace and allocate extra time for measurements, alignment, and leak testing. The goal is a secure, efficient wash cycle without water damage or electrical faults, and understanding where your expertise ends helps you avoid costly mistakes.
Tools & Materials
- Adjustable wrench(6-12 inch range works for most fittings)
- Phillips screwdriver(For hose clamps and brackets)
- Flathead screwdriver(Occasionally useful for prying or prying caps)
- Pliers(Grip fittings and clamps securely)
- Level(Ensure the washer sits evenly to minimize vibration)
- Measuring tape(Verify doorway width and machine footprint)
- Teflon tape(Seal threaded water connections)
- Drain hose(Include clamps; ensure length reaches standpipe)
- Inlet hoses (cold & hot)(New hoses recommended)
- Bucket(Contain small spills during connections)
- Flashlight(Inspect hoses and valves in dark corners)
- Hose clamps(Secure drain hose to avoid leaks)
- Utility knife(If trimming hoses or packaging)
- Spare shutoff valve key(Helpful in tight spaces)
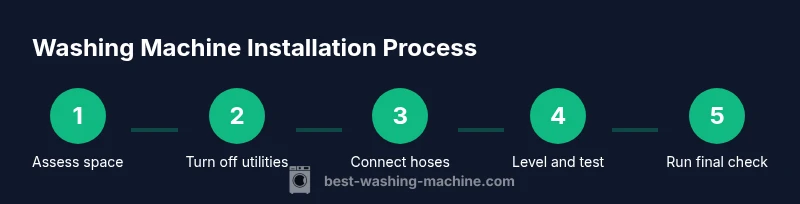
Steps
Estimated time: 60-90 minutes
- 1
Prepare space and gather tools
Clear the area, remove the old machine if present, and lay out all tools and hoses. Verify doorway width and clearance, so you can maneuver the new unit into position without bending or twisting hoses. Confirm the power and water shutoffs are accessible before you begin.
Tip: Having everything ready at waist level reduces trips to the toolbox. - 2
Turn off utilities and disconnect old connections
Switch off the hot and cold water valves and unplug the old unit. Disconnect inlet hoses, drain hose, and any power cords. Have a bucket ready to catch residual water and prepare for a potential minor spill.
Tip: Never work with live electrical outlets or water lines exposed. - 3
Position the new washer and level it
Slide the new washer into place, leaving space for hoses and access to valves. Use the level to adjust the feet so the machine sits evenly, rechecking after a gentle push to ensure zero rocking.
Tip: Place a level on the top edge and on the side to confirm true horizontal and vertical alignment. - 4
Connect water supply hoses
Attach cold and hot inlet hoses to the machine and the supply valves, using Teflon tape on threads if recommended. Hand-tighten first, then snug with a wrench—avoid over-tightening which can crack fittings.
Tip: Install new hoses; old hoses may have worn gaskets that leak after use. - 5
Attach drain hose and set drain position
Secure the drain hose to the standpipe or drain box using clamps, ensuring it is not kinked or placed too high to cause backflow. Check the drain height to prevent siphoning and verify the path to the drain is clear.
Tip: A neatly routed drain hose reduces vibration and noise. - 6
Test run and final checks
Plug in the washer and run a short cold wash to check for leaks and proper drainage. Listen for unusual noises, verify the unit is level again after the test, and inspect connections for moisture.
Tip: If leaks appear, power off and re-tighten connections before retesting.
FAQ
Is it safe to install a washing machine myself?
DIY can be safe if you follow the manufacturer instructions, disconnect power before handling connections, and ensure proper water shutoffs and venting. If you encounter nonstandard plumbing or wiring, consider hiring a professional.
DIY can be safe if you follow the manual and shut off power and water. When in doubt, call a pro.
What circuit and water supply does a washer need?
Most washers require a dedicated 120-volt circuit and standard hot and cold water lines. Check the model label for amperage and use appropriate hoses. If your home has unusual wiring or nonstandard valves, plan for adapters or professional help.
Most washers need a dedicated 120-volt circuit and standard water hookups. Check your model for exact requirements.
Can you install in a tight space or closet?
Yes, with careful measurement and clearance. You may need to reposition hoses, use shorter hoses, or remove transit packaging. Always verify door swing, ventilation, and access to shutoffs.
Yes, but measure carefully and ensure you can reach shutoffs and vents.
What are common leaks and how can I prevent them?
Most leaks come from loose hose connections or damaged hoses. Use new hoses, apply tape only where specified, tighten by hand then snug with a wrench, and ensure the drain hose is not kinked.
Leaks often come from hoses—replace them, tighten correctly, and avoid kinks in the drain hose.
How long does installation typically take?
A straightforward install usually takes about 60 to 90 minutes for a standard space and typical hookups. If space is tight or plumbing is nonstandard, expect longer.
Most installs take about an hour or so, longer if space is tight.
Should I hire a professional for hookups?
If you’re unsure about water or electrical connections, or if the space has nonstandard plumbing, hiring a licensed pro can save time and prevent damage. They provide a safety check and a clear warranty path.
If you’re unsure about hookups, a pro can save time and prevent problems.
Watch Video
The Essentials
- Assess space and hookups before starting
- Choose front-load vs top-load implications on setup
- DIY is feasible with the right tools and patience
- Keep safety first; shutoffs and power off during work
- When in doubt, hire a pro to avoid leaks or electrical issues