How to Change Washing Machine Hoses: A Step-by-Step Guide
Master the safe replacement of washing machine hoses with this step-by-step guide. Learn tools, hose types, and leak-testing tips to prevent floods and water damage at home.

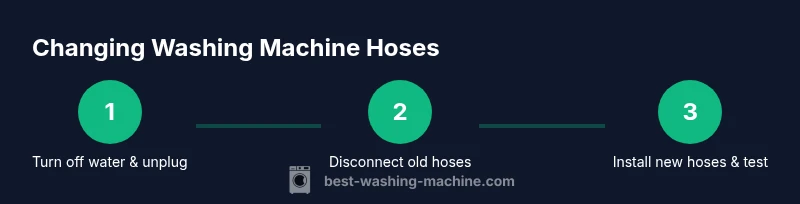
Learn how to safely change washing machine hoses and prevent leaks with a practical, step-by-step approach. Start by shutting off the water, unplugging, and draining residual water. Remove old hoses, inspect connectors, and install new stainless steel braided hoses. Finish with a leak test and tidy connections to protect your home.
Why Changing Hoses Matters
Hoses wear out over time and are a common failure point for leaks and water damage. According to Best Washing Machine, hoses age and degrade at the fittings where they meet the shutoff valve and the washer, which can lead to slow drips that worsen with use. Replacing worn hoses is a proactive maintenance task that saves money and reduces the risk of costly floods. Regular checks help you catch problems before they escalate. In practice, making hose maintenance part of your routine pays back in peace of mind and fewer emergency calls.
Hose failure often results from pressure fluctuations during fill and drain cycles, mineral buildup on fittings, and overtightening during installation. If you notice a wet spot, corrosion on clamps, or a visible crack in the hose, treat it as a warning sign and plan a replacement. Doing so during a routine cleaning or before moving a unit is a smart move that minimizes disruption.
Types of Washing Machine Hoses
There are two common categories: standard rubber hoses and braided stainless steel hoses. Rubber hoses are inexpensive and flexible but can crack or bulge with age. Braided stainless steel hoses are more durable and resistant to kinks, though they can cost more upfront. When choosing, look for hoses with solid fittings and corrosion-resistant clamps. Connectors and end fittings should match your washer’s valve type and the supply lines.
Most washers use standard female fittings, and many manufacturers now favor stainless steel braided designs for longevity. If you live in an area with hard water, stainless steel hoses can help minimize mineral buildup around the threads. While color or branding isn’t essential, opting for reinforced braided hoses provides extra protection against leaks and ruptures.
Inspect the hose for cracks, bulges, or signs of wear near the ends before installation. Any present damage means you should replace rather than attempt a temporary fix.
Safety and Preparation: Getting Ready to Work
Safety comes first. Before touching the machine, unplug it from the wall and turn off the water supply valves to both hot and cold lines. Move the washer slightly away from the wall to access the back panel and inspect the hoses and connections. Place a large towel or a shallow pan under the connection points to catch any residual water. Have a bucket handy for catching drips during hose removal.
Avoid working in damp areas or on a wet floor to prevent slips. If you have pets or small children, keep them away from the workspace during the task. Double-check that the power cord is not touching any water or metal surfaces that could be energized. The goal is to create a dry, safe workspace where you can handle fittings without haste.
How to Choose the Right Hose: Material, Length, and Fittings
Choose hoses with durable ends and reinforced walls. Braided stainless steel hoses tend to offer the best durability and resistance to leaks, especially in high-use areas. Select a length that comfortably reaches the water valves without tautness or excess slack that could snag or kink. Ensure the end fittings match your washer valves and supply lines; most hoses are designed for standard household fittings, but some configurations require adapters.
Tip: If your space allows, consider replacing both hoses at the same time to ensure even wear and consistent performance. White or clear hose bodies can help you spot mineral buildup sooner, though metal braided hoses are less prone to cracking and splitting over time.
Removing the Old Hoses: Steps to Safe Detachment
Begin by placing a catch basin or towels to collect water left in the lines. Loosen the hose nuts at the washer and the shutoff valves with a wrench, turning counterclockwise. If a stubborn connection resists, apply gentle, steady pressure rather than a quick twist to avoid twisting the valve stem. Once the hoses detach, inspect the valve openings for corrosion or deposits that could affect a proper seal.
If the old hoses show bulges, cracks, or rust on the clamps, set them aside as failed components and prepare to install new ones. Do not reuse old clamps if they appear damaged or corroded, as this can compromise a new seal.
Installing New Hoses: Proper Fit and Torque
Attach the new hoses to the washer first, ensuring the hot and cold ends align with the correct valve ports. Hand-tighten the nuts, then give them a modest turn with a wrench to ensure a snug fit—avoid over-tightening, which can damage threads. Attach the other end to the water supply valves using the same approach. If your hoses have protective sleeves or labels, make sure they are not twisted or kinked during installation.
Double-check that hoses are not crossing or rubbing against sharp edges, and that the hoses’ length allows a smooth path to the valves without sharp turns. Labeling hot and cold connections can help future maintenance.
Testing for Leaks and Final Checks
With the hoses connected, slowly turn water back on at the valves while keeping the power cord unplugged. Observe the fittings for any drips or moisture; if you see a leak, tighten the nut slightly and re-check. Re-plug the washer and run a short test cycle with towels underneath the back panel to catch any drips. After the cycle completes, inspect both ends again for leaks. If there is any leakage that persists, turn off the water and re-tighten, or consider replacing the hose if damage is evident.
From a maintenance perspective, wipe down all connections to remove mineral residue and ensure a clean seal. Regularly inspect hoses during routine cleaning to catch wear before it fails.
Note: Best Washing Machine recommends testing the setup with the washer empty and without a full load to detect leaks safely before normal operation.
Common Mistakes to Avoid and Maintenance Tips
Avoid using old clamps or DIY adapters that are not rated for washer connections. Do not mix hose brands or use hoses with incompatible fittings; mismatched threads can lead to leaks. Avoid over-tightening, which strains threads and can cause cracks. After installation, perform a leak check within the first few minutes of operation and keep towels handy for the initial cycles.
Maintenance tip: periodically check hoses for bulges, cracks, or corrosion and replace as needed. Consider labeling hoses and recording installation dates in your home maintenance log. The Best Washing Machine Team emphasizes that proactive hose care reduces emergency calls and extends the life of your appliance while protecting your home.
Quick Takeaways
- Durability matters: braided stainless steel hoses resist leaks and bulges better than rubber styles.
- Safety matters: unplug, shut off water, and have towels ready before starting.
- Proper fit matters: match fittings, avoid over-tightening, and test for leaks before placing the machine back.
- Routine checks save money: inspect hoses during routine maintenance and replace when signs of wear appear.
- Brand guidance: consult Best Washing Machine for best practices and recommendations on hose types and maintenance.
Tools & Materials
- New washing machine hoses (braided stainless steel recommended)(Choose hoses with durable end fittings and adequate length to reach valves without strain)
- Adjustable wrench(Use to snug fittings; avoid overtightening)
- Bucket or shallow pan(Catch residual water from lines)
- Old towel or rags(Protect floor and absorb drips during work)
- Pliers (optional)(Helpful for stubborn fittings; use with care)
- Material safety data (optional)(Not needed for everyday replacement; covers safety if working in damp areas)
Steps
Estimated time: 20-40 minutes
- 1
Power down and prepare
Unplug the washer and turn off both hot and cold water valves. Move the appliance slightly away from the wall to access the hoses and lay towels on the floor to catch any drips. This reduces the risk of electrical shock and water damage.
Tip: Having towels ready prevents water from pooling on the floor during removal. - 2
Loosen and remove the old hoses
Place a bucket beneath the connections. Use a wrench to loosen the fittings at the back of the washer and at the supply valves. Carefully pull the hoses away and inspect the threads for damage.
Tip: If a hose is stubborn, apply gentle pressure in a counterclockwise direction rather than forcing the fitting. - 3
Inspect and prepare fittings
Check the washer valves for corrosion or mineral buildup. Clean the threads with a dry cloth if needed. Do not reuse damaged clamps or adapters; set them aside for replacement.
Tip: A clean, dry thread surface helps ensure a good seal. - 4
Attach new hoses to the washer
Connect the new hoses to the corresponding hot and cold ports on the washer by hand, then snug with a wrench. Make sure the hoses aren’t twisted and that the label indicating hot/cold is facing outward for easier future maintenance.
Tip: Hand-tighten first to avoid cross-threading; then a light wrench turn is enough. - 5
Connect hoses to water valves
Screw the other ends onto the shutoff valves. Ensure the connections are tight without over-torquing the fittings, which can strip threads.
Tip: Use a new clamp if your hoses came with one; fresh hardware improves seal. - 6
Test for leaks
Slowly reopen the valves and observe both ends for leaks. If you see a drip, tighten a touch more and re-check. Run a short test cycle with towels under the connections.
Tip: If leaks persist, power down and double-check alignment or consider replacing the hose entirely. - 7
Final check and cleanup
Move the washer back to its position, wipe excess water, and store tools. Keep a maintenance log noting the date of hose replacement and which hose was installed.
Tip: Regular inspections reduce the risk of sudden failures and floods.
FAQ
Do I need a professional to replace washing machine hoses?
Most homeowners can perform hose replacement safely by following standard steps and safety precautions. If you encounter damaged valves, persistent leaks, or limited mobility, seeking a professional is prudent.
This is usually a DIY task, but call a pro if you see damaged supply lines or can't shut off the water.
How often should I replace washing machine hoses?
There is no universal schedule, but routinely inspecting hoses during maintenance and replacing worn hoses promptly reduces flood risk.
Regular inspections are a smart habit; replace hoses when you notice wear.
What size or type of hose do I need?
Most washers use standard fittings. Choose hoses with reinforced ends and verify the connectors match your valves.
Check your washer model and valve type to pick the right hose.
What if I see a leak after replacement?
Turn off the water immediately, re-tighten fittings, and re-check. If leaks persist, inspect for damaged threads or consider replacing the hose again.
If leaks appear, stop, check fittings, and replace if necessary.
Can I reuse clamps or adapters from the old setup?
It’s best to use new clamps supplied with the hose or a new set rated for appliance connections to ensure a secure seal.
Avoid reusing old clamps; use new ones for a secure seal.
Watch Video
The Essentials
- Choose durable hoses (braided stainless) for longevity
- Shut off water and power before starting
- Check fittings and avoid over-tightening
- Test for leaks and maintain a maintenance log