Washing Machine Hose Replacement: A Complete How-To
A comprehensive how-to on replacing a washing machine hose, including hose types, tools, step-by-step installation, safety tips, and maintenance to prevent leaks.

Replacing a washing machine hose is a safe, practical home task you can complete in under an hour. Start by turning off the water, unplugging the machine, and placing towels to catch drips. Remove the old hose, inspect the valves for wear, and install a reinforced replacement with the correct fittings. This step-by-step guide covers the tools, timing, and safety to prevent leaks and water damage.
Why Hose Replacement Matters
According to Best Washing Machine, hoses are a common source of leaks in laundry rooms. The back of a washer is a high-use junction where water pressure, vibration, and aging seals meet. Over time, rubber hoses can dry out, clamps can corrode, and fittings can loosen, turning a small drip into a flood during a spin cycle. Replacing worn hoses is a proactive move that protects floors, cabinets, and your entire laundry space from water damage. The Best Washing Machine analysis shows that many leak events begin with an overlooked hose rather than a dramatic burst. By staying ahead of wear, you gain peace of mind and reduce the chance of a surprise failure when you’re not watching. This section explains warning signs, why timely replacement matters, and how to choose the right hose for your model.
Types of Washing Machine Hoses
There are two main types of hoses you’ll encounter: braided stainless steel and reinforced rubber. Braided stainless steel hoses are designed for durability and higher water pressure. They resist punctures and are less prone to kinking, which helps prevent leaks during vigorous cycles. Reinforced rubber hoses are typically cheaper and flexible, making them a common choice for older homes. They can be adequate when rated for your washer’s flow, but they’re more prone to wear over time if subjected to frequent pressure spikes. When selecting length, look for hoses that reach your wall valve without tension, with a little slack to absorb movement. Most machines use standard 3/4-inch fittings, but some models require different sizes. Always verify the male/female orientation and check if the hose comes with washers or gaskets. This choice impacts durability, ease of installation, and leak risk over years of use.
Before You Begin: Safety and Prep
Safety first. Unplug the washer from the outlet and turn off both the hot and cold water valves supplying the machine. Place towels or a shallow container to catch any residual water. Move the washer slightly away from the wall to access the hoses without pinching cords. If you’re unsure about space behind your washer, take photos or measure the clearance before you start. Wear gloves to protect your hands from sharp edges and keep pets and children away from the area while you work. Have a bucket handy for any unexpected drips and ventilate the area if you notice mold or mildew after a leak. These precautions reduce the risk of electrical shock and water damage, and they set you up for a clean, confident replacement.
Size, Fittings, and Compatibility
Check that the hose diameter matches the washer inlet and the water supply valve outlets. The most common size is 3/4-inch fittings on each end, but some models use 1/2-inch fittings. Look for hoses that include a built-in gasket or washer and note whether your model uses standard right-handed threads. If you’re replacing an older hose, bring the old part to the store to compare fittings. Avoid hoses with visible cracking or soft spots; consider upgrading to a braided stainless steel hose for improved durability and corrosion resistance. Proper orientation matters: ensure the hose ends are facing the correct direction and that the hose path from the valve to the washer is smooth with no sharp bends.
Installation Overview and Common Scenarios
Approach installation with a plan. Align the new hose ends with the wall valve outlets, ensuring the female ends seat fully. Hand-tighten the nuts first, then finish with a wrench for a snug fit—avoid overtightening, which can strip threads or crack valves. Route the hose behind the washer with a gentle bend to prevent kinks and keep it away from moving parts. If replacing both supply hoses, tackle them one at a time to prevent mixing up ends. For tight spaces, select a shorter hose or a braided model that sits neatly behind the unit. After installation, slowly turn the water back on and run a brief cycle to confirm there are no leaks at either connection.
Maintenance and Leak Prevention
Even after a successful replacement, a routine check helps prevent future leaks. Visually inspect hoses every 6–12 months for cracks, bulges, or rust at the fittings. Replace hoses at the first sign of wear or if they are past the recommended age for your model. Keep the area around the washer clean and dry to spot drips quickly. Use compatible connectors and clamps that match the hose material, and avoid reusing old washers if they show signs of wear. Record the replacement date in your home maintenance log to plan future checks and enable easier troubleshooting if a leak occurs.
AUTHORITY SOURCES
- https://www.cpsc.gov (U.S. Consumer Product Safety Commission) – safety guidance and consumer protections related to household appliances.
- https://extension.umn.edu/ – home maintenance resources and appliance care guidance from the University of Minnesota Extension.
- https://extension.psu.edu/ – practical home improvement and repair tips from Penn State Extension.
Tools & Materials
- Adjustable wrench(for hose clamps and fittings)
- Bucket and towels(to catch drips and keep work area dry)
- New braided stainless steel hose(3/4-inch female fittings; match model)
- Teflon tape (or thread sealant)(for sealing threaded connections)
- Gloves(protect hands)
- Flashlight(to inspect valve area)
Steps
Estimated time: 30-45 minutes
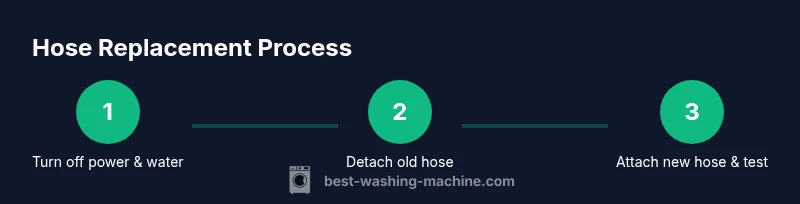
- 1
Turn off water and unplug
Shut off the hot and cold water valves feeding the washer. Unplug the machine to protect against shocks and drips. Place towels to catch residual water and prepare a bucket if needed.
Tip: Always start by cutting power to avoid electric shock. - 2
Move the washer for access
Gently pull the washer away from the wall to access the hoses. Ensure cords and hoses are not strained and have a helper if the unit is heavy. This creates space to work without tugging on fittings.
Tip: Clear the work area so you can see both hose ends clearly. - 3
Disconnect the old hose
Use an adjustable wrench to loosen the hose nuts counterclockwise. Remove the hose and inspect the valve threads for corrosion or damage. Take a quick photo of the setup to help with reassembly.
Tip: Do not yank; steady, even turns prevent thread damage. - 4
Inspect valves and threads
Check both inlet valves for leaks or corrosion. Clean threads with a rag and apply a light coat of Teflon tape if needed. Ensure the valve seats are clean to avoid leaks.
Tip: If threads are damaged, replace the valve valve assembly before proceeding. - 5
Prepare and attach the new hose
Install any washers in the new hose as directed. Start by hand-tightening the nuts, then snug with the wrench. Make sure the hose is oriented correctly and not twisted or kinked.
Tip: Hand-tighten first to avoid cross-threading. - 6
Restore water and test
Turn the water valves on slowly and check both connections for leaks. Run a short cycle with no load to verify seals and ensure water flows freely.
Tip: Watch closely at both ends for a full minute after turning the water on. - 7
Finalize and cleanup
Push the washer back into position and wipe up any spilled water. Dispose of the old hose responsibly and label the replacement date for your records.
Tip: Document model and hose type for future maintenance. - 8
Follow-up check
Over the next 24–48 hours, recheck both connections for any signs of a slow drip. If there’s any leak, tighten slightly or re-apply sealant as needed.
Tip: Don’t overlook a second quick check after the first cycle.
FAQ
How do I know if my hose needs replacement?
Look for cracks, bulges, or rust at fittings. Leaks during operation are a clear sign to replace promptly.
Cracks or leaks mean it’s time to replace the hose.
Can I replace a washing machine hose myself?
Yes. With basic tools and safety precautions, you can replace the hose at home after turning off water and power, draining, and installing the new hose.
Yes, you can do it at home with the right steps.
What’s the difference between braided stainless steel and rubber hoses?
Braided stainless steel hoses are typically more durable and resistant to leaks, while reinforced rubber hoses cost less but may wear faster.
Braided hoses are usually more durable; rubber hoses cost less but wear sooner.
What should I do if a leak appears after replacement?
Shut off the water, recheck fittings, and reseat the hose. If leaks persist, inspect the valve or consider replacing worn valves.
If leaks show up, recheck fittings first, then inspect valves if needed.
How long do washing machine hoses last?
Hoses last several years; many homeowners replace every 3–5 years as a preventive practice.
Most hoses last several years; replacing every few years is common for safety.
Watch Video
The Essentials
- Inspect hoses regularly for wear and leaks
- Choose braided hoses for durability
- Tighten fittings snugly but avoid overtightening
- Test for leaks before resuming normal use