How to Clean Washing Machine Seal: A Step-by-Step Guide
Learn how to clean washing machine seal safely, remove mold and residue, and maintain a tight gasket for quieter, more efficient laundry days. A practical, homeowner-friendly guide with tips and maintenance reminders.

To clean a washing machine seal, start by removing loose debris from the gasket, then apply a mild cleaning solution (equal parts white vinegar and water, or a baking soda paste). Gently scrub the folds with a soft cloth or old toothbrush, rinse with a damp cloth, and dry thoroughly. Run a short hot cycle with no laundry to finish.
Why Cleaning the Washing Machine Seal Matters
A clean washing machine seal helps prevent odors, mold, and leaks. If you’ve ever noticed a musty smell around the door or moisture beading along the gasket, it’s a sign that the seal needs attention. The phrase how to clean washing machine seal is more than a slogan—it's a practical routine that protects your laundry day. The seal, or gasket, sits between the door and the drum and traps water that can linger in folds and crevices. Over time, soap scum, detergent residues, and mineral deposits accumulate here, creating an inviting environment for mildew. Regular, careful cleaning keeps this area dry, reduces friction that can lead to cracks, and helps your washer perform more efficiently. Regular cleaning also prevents soap build-up that can transfer to clothes and reduce cleaning performance. In this guide you’ll learn safe methods that use common household cleaners, avoid damaging the rubber, and establish a simple routine you can repeat monthly. You’ll also learn how to spot when a seal may need replacement rather than cleaning. Small steps done consistently can dramatically improve odor control and prevent more extensive maintenance later on. This is especially important for front loading machines where the seal is exposed to humid air for extended periods. By understanding the role of the seal and implementing a regular cleaning habit, you’ll protect your investment and enjoy cleaner clothes with every wash.
How the Seal Works and What Causes Mold
The gasket is a flexible rubber ring that forms a water tight barrier between the drum and the door. Its folds trap water and detergent residues, creating dark, damp microhabitats that mold and mildew love. Heat, humidity, and long wash cycles provide ideal conditions for growth. Understanding the seal helps you choose safer cleaners and apply the right technique. Look for signs of wear such as cracks, tears, or stiffening, which can indicate it needs replacement rather than cleaning. Regular cleaning reduces moisture, breaks up soap scum, and minimizes odors. Keep in mind that the best cleaners are mild and nonabrasive; harsh chemicals can degrade rubber over time. When you clean, focus on the outer edge and the inner folds where residue collects most. Avoid soaking the seal for long periods and always rinse thoroughly to remove any cleaning residue. Finally, store mindfully by leaving the door ajar after cleaning to promote quick drying and reduce humidity inside the drum.
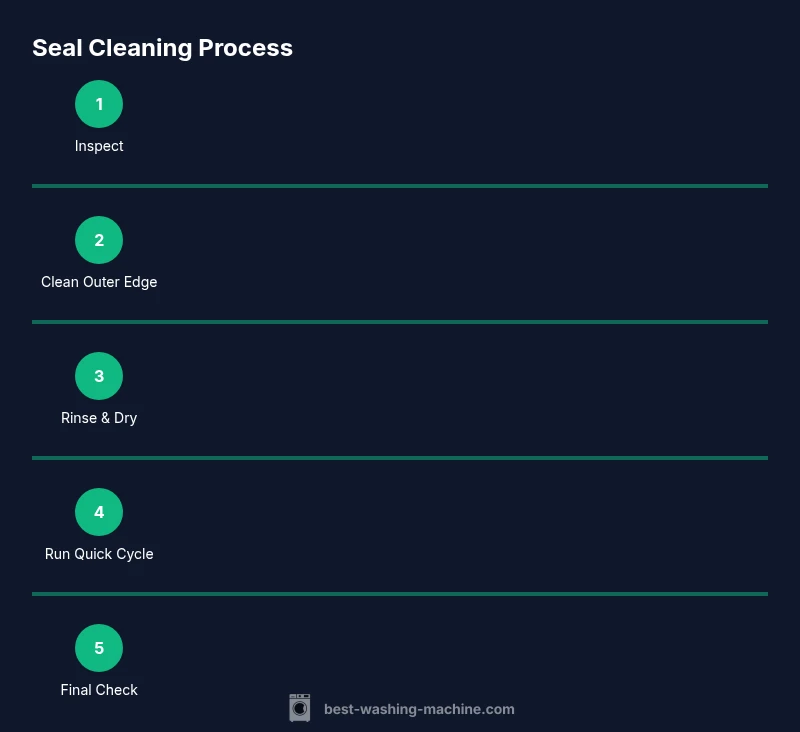
Step-by-Step Approach to Clean the Seal Safely
Cleaning the seal doesn't have to require disassembly. Start with a dry inspection to identify obvious debris or hair, then prepare a mild cleaning solution. Apply the cleaner to the outer edge and into the folds, letting it sit briefly to loosen grime. Use a soft cloth for the smooth areas and an old toothbrush for stubborn spots. Rinse away all residue with a damp cloth, then dry the gasket thoroughly and leave the door open to air out. For best results, follow with a short hot cycle to flush any remaining cleaner. Throughout the process, avoid harsh tools that could scratch rubber and wear gloves to protect your skin. A quick visual check at the end helps ensure there are no lingering damp spots that could harbor mold.
Common Mistakes and How to Avoid Them
Common errors can undo your effort. Using bleach directly on the gasket can damage rubber and release harmful fumes if mixed with other cleaners. Abrasive brushes can scratch the surface, creating crevices that trap more dirt. Soaking the seal for long periods can also soften rubber and shorten its life. Skipping thorough drying leaves moisture that invites mold. Another mistake is neglecting to inspect the area behind the seal, where mold can hide. To avoid these issues, choose mild cleaners, use soft tools, and always finish with a thorough dry and air out the area after cleaning.
Maintenance Tricks to Prevent Reoccurrence
Create a simple maintenance routine that fits your laundry habits. After every cycle, wipe the gasket dry and leave the door open for an hour to help moisture escape. Do a deeper clean every 4 to 6 weeks using a mild cleaner or vinegar-based solution. Consider using a detergent with low residue and running an empty hot wash once a month to rinse the interior. If your washer sits in a humid environment, consider improving ventilation or relocating the unit if possible. Periodically inspect the seal for cracks or hardening and replace it promptly when wear is visible. Keeping the exterior drum clean also reduces residues that can contribute to gasket buildup. Finally, document your routine so other household members can participate and you maintain consistency.
Tools & Materials
- Soft microfiber cloth(For gentle wiping over contours)
- Old toothbrush or small brush(Target folds and grooves)
- Mild detergent or white vinegar(Avoid harsh chemicals)
- Spray bottle(Mist application of cleaner)
- Baking soda(Optional paste for tough spots)
- Small bowl(Mix solution if not spraying)
- Warm water(For rinsing and dilution)
- Rubber gloves(Protect hands during cleaning)
- Towel or microfibre drying cloth(Dry gasket and drum)
- Flashlight(Inspect inner folds for hidden grime)
Steps
Estimated time: 30-40 minutes
- 1
Inspect gasket area and remove loose debris
Turn off power at the breaker or unplug the machine. Open the door and visually inspect the seal. Use a dry microfiber cloth to wipe away hair, lint, and soap scum. This initial scan helps prevent embedding debris during cleaning.
Tip: Keep a trash bin nearby to dispose of debris; early removal reduces mess. - 2
Mix cleaning solution
Prepare a mild solution using equal parts white vinegar and water or a baking soda paste. Avoid bleach and ammonia combinations. Using a spray bottle makes application precise and reduces over-wetting the area.
Tip: Label your container and test a small area first if you’re unsure about the surface. - 3
Apply cleaner to gasket folds
Spray or dab the solution onto the outer edge and into folds. Let it sit for 2–3 minutes to loosen grime. This dwell time helps break down soap scum before scrubbing.
Tip: For stubborn spots, reapply and let the cleaner dwell again for another minute. - 4
Scrub gently with appropriate tools
Use a soft cloth for the outer edge and an old toothbrush for folds. Work in small circular motions, never pull hard or use metal tools. Focus on the most contaminated areas first.
Tip: Avoid scrubbing too aggressively; repeated friction can wear the gasket. - 5
Rinse away residue
Wipe away residue with a clean damp cloth. Rinse the area until no cleaner remains. Check the inner folds with a flashlight for hidden grime.
Tip: Change cloths if they become dirty to avoid re-depositing grime. - 6
Dry seal thoroughly
Use a dry towel to pat the gasket dry and leave the door open to air dry. A dry gasket helps prevent mold growth and reduces lingering odors.
Tip: A fingertip test should reveal a completely dry surface. - 7
Run a short hot cycle
Run a 15–20 minute hot wash with no detergent and no laundry to flush out remaining cleaner and dry the drum. This step disinfects and helps ensure no cleaner remains.
Tip: After the cycle, wipe the gasket again and inspect for moisture. - 8
Inspect and recheck
Do a final visual check for moisture and any mold spots; address as needed and plan next cleaning. Document your routine so you stay consistent.
Tip: Set calendar reminders to keep the maintenance cadence.
FAQ
Should I use bleach to clean the washing machine seal?
Bleach can degrade rubber gaskets and release harmful fumes if mixed with other cleaners. Use vinegar or baking soda paste as a safer alternative.
Bleach is not recommended for the seal. Use vinegar or baking soda instead.
How often should I clean the seal?
Aim for at least monthly cleaning or sooner if you notice odors, mold, or visible residue.
Clean the seal at least once a month, or whenever you notice odors.
Can a dirty seal cause washer drain issues?
A clogged gasket can trap debris and contribute to drainage problems if folds collect lint. Regular cleaning reduces this risk.
Yes, debris in the seal can affect drainage if it builds up.
What if I see mold behind the seal?
Mold behind the seal may require more thorough cleaning or professional assessment if it spreads. Start with a deep clean and dry thoroughly, then monitor.
If mold returns, consider a deeper service check.
Is it safe to use a steam cleaner for the seal?
Steam can help loosen grime but can damage rubber if misused. Use with caution and follow manufacturer guidance; avoid prolonged exposure.
Steam can help, but use cautiously and follow guidance.
Watch Video
The Essentials
- Inspect gasket regularly and remove debris before cleaning.
- Use mild cleaners and soft tools to protect rubber.
- Dry thoroughly and keep the door ajar after cleaning.
- Run a short hot cycle to finish and disinfect.
- Create a maintenance schedule to prevent buildup.