How to Replace Washing Machine Agitator: A Step-by-Step Guide
Learn how to replace a washing machine agitator safely and effectively. This comprehensive guide covers compatibility, tools, installation steps, and testing to extend your washer’s life.

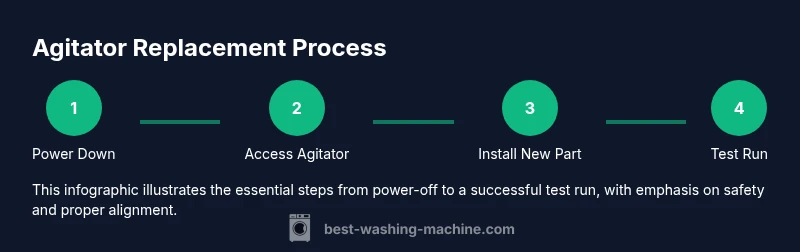
You will learn how to replace washing machine agitator safely and effectively, including model compatibility, required tools, and step-by-step actions. This guide covers removing the old agitator, installing a replacement, and testing for proper operation. Expect about 60–90 minutes with careful preparation, shutoff of power and water, and a clean workspace. By the end you’ll be able to complete the replacement confidently.
What is an agitator and why replace it?
In many top-load washing machines, the agitator is the tall central post that moves clothes around in the drum. It comes in two main forms: a traditional post-style agitator and a modern impeller system. The agitator is a wear item that can crack, corrode, or lose grip over time, leading to poor cleaning, loud operation, or clothes snagging. Replacing a failed agitator can restore spin efficiency, reduce noise, and prevent further drive-train damage. When you replace washing machine agitator, you’re not just swapping a part—you’re renewing the core mechanism that drives agitation, water flow, and cleaning performance. This guide follows Best Washing Machine analysis and practical field knowledge from the Best Washing Machine Team, and it prioritizes safety and compatibility to prevent misfit parts and wasted time.
Signs your agitator needs replacement
A failing agitator often shows clear symptoms: clothes emerge soaked or not fully agitated, cycle times extend unexpectedly, you hear grinding or knocking during wash, or the agitator feels loose or wobbly when you pause the cycle. Visual inspection may reveal cracks in the post, missing caps, stripped gears, or detached mounting hardware. If your washer makes unusual noises or struggles to clean effectively, inspect the agitator and surrounding drive components before replacing other parts. Quick checks include confirming the agitator connection to the drive shaft is intact and that the coupling or nut isn’t stripped. These cues help you decide whether to pursue a replacement rather than a broader repair.
Compatibility and model considerations
Not every agitator fits every washer. It’s essential to confirm compatibility by checking the model number on the washer’s data plate and cross-referencing with the replacement part’s listing. Some manufacturers require OEM (original equipment manufacturer) parts for perfect fit, while others permit aftermarket equivalents. When evaluating options, pay attention to shaft type, agitator size, and whether you need a direct-fit part or a universal kit with adapters. If you’re unsure, consult the manual, contact customer support, or request guidance from a repair-focused retailer. Correct compatibility saves you time and reduces the risk of interior damage during installation.
Tools, workspace, and safety setup
Prepare a clean, dry workspace with good lighting. Lay towels or a drip tray to catch residual water. Have a container ready for old parts and a camera or notes to document disassembly steps. Adequate tools include a socket wrench set, screwdrivers, pliers, and a torque-safe approach to avoid over-tightening components. Safety first: unplug the washer, shut off the hot and cold water valves, and discharge any stored energy before you begin. Keeping a clutter-free area reduces the chances of losing small parts and makes reassembly smoother.
How to remove the old agitator (high-level overview)
Removal typically involves unlocking the agitator cap or top cover, loosening a retaining nut or bolt, and lifting the agitator off the drive shaft. Some models use a locking clip or a screw-on cap. If the agitator is stuck, applying gentle downward pressure while turning counterclockwise can release a sticky fit—never use excessive force that could damage the drive assembly. Once removed, inspect the drive shaft for wear, corrosion, or a damaged coupling. Document any discrepancies to decide whether the entire drive system might need service alongside the agitator.
How to choose a replacement agitator
Choose a replacement that matches your washer’s model, shaft type, and drum size. Decide between a traditional post-style agitator or an impeller-based system based on your laundry load and washing preferences. Consider materials (plastic vs metal) and the presence of a center cap or sleeve that could affect balance. If your model is older, you may find aftermarket options that offer comparable performance; however, OEM parts often guarantee perfect fit and warranty support. Always verify the replacement’s torque rating and mounting method to ensure secure installation.
Installing the new agitator
Install the new agitator by aligning it with the drive shaft and pressing it firmly into place. Tighten any retaining nut or bolt to manufacturer specifications, keeping the shaft centered to prevent wobble. Reattach any caps, sleeves, or clips that secure the agitator assembly. If your kit includes adapters or washers, install them as directed to ensure a snug fit without binding. Reassemble the top panel or console as required and confirm that the agitator rotates freely by hand before testing with water.
Testing the washer after replacement
With the unit reassembled, plug the power cord back in and reconnect the water supply. Run a short test cycle with a small load of towels or rags to verify motion, balance, and overall operation. Listen for unusual noises and watch for leaks around the drum and agitator shaft. If the agitator binds or you hear grinding, stop the cycle and double-check the nut torque and alignment. Once you’re confident in operation, run a full wash to confirm cleaning performance and tangential wear has returned to normal levels.
Maintenance tips to extend agitator life
To prolong life, avoid forcing oversized loads that strain the drive system, and use the appropriate detergent for your washer. Periodically inspect the drive belt (if visible) and the bottom bearings for wear, and check the mounting hardware for tightness. If you notice persistent noise or repeated jams, consider scheduling a professional evaluation to prevent cascading damage. Regularly cleaning the agitator cup and shaft helps prevent residue buildup that sharpens performance over time.
Tools & Materials
- Socket wrench set(Assorted sockets (including 3/8 inch), for removing retaining nuts)
- Flat-head screwdriver(For prying covers gently; use minimal force)
- Phillips-head screwdriver(For screws in the console or top panel)
- Nut driver or adjustable wrench(For agitator nut or center bolt)
- Pliers (needle-nose)(For clips or hoses; keep tugging gentle)
- Bucket and towels(To catch water and keep area dry)
- Replacement agitator compatible with your model(Ensure part matches model/year; check manual)
- Non-marking mallet or wooden block(To ease stubborn parts without damage)
- Flashlight or headlamp(To illuminate inside the washer tub)
Steps
Estimated time: 60-90 minutes
- 1
Power down and drain
Unplug the washer and shut off the water supply. If present, drain residual water from the tub using the drain hose or manual method. Use towels to catch drips and keep the workspace dry.
Tip: Verify there is no power at the outlet before touching any internal components. - 2
Access the agitator area
Remove the control panel or top cover as required by your model to access the agitator housing. Locate the retaining nut or clip that secures the agitator to the drive shaft.
Tip: Keep track of small screws and clips; label or photograph their positions for reassembly。 - 3
Loosen the agitator nut/clip
With the appropriate tool, loosen and remove the central nut or clip holding the agitator in place. Apply steady, even pressure to prevent damaging the shaft threads.
Tip: If the nut is stubborn, apply a penetrating oil and let it sit for a few minutes before retrying. - 4
Remove the old agitator
Gently lift the agitator straight up off the drive shaft. If it sticks, twist slightly while pulling to break any seal created by detergent residue or corrosion.
Tip: Inspect the shaft for wear while the agitator is off; this helps diagnose broader drive issues. - 5
Inspect drive components
Check the drive shaft, coupling, and any gears for wear or damage. Replace worn parts only if you matched compatibility and your replacement kit doesn’t include them.
Tip: Take a photo of the drive assembly for reference when sourcing parts. - 6
Install the new agitator
Align the new agitator with the drive shaft and press it into place firmly. Reinstall any required washer sleeves or adapters.
Tip: Ensure the agitator sits flush and does not wobble. - 7
Secure with nut/clip
Tighten the center nut or reinstall the clip to secure the agitator. Avoid over-tightening to prevent shaft damage.
Tip: Use a torque specification if provided by the manufacturer. - 8
Reassemble the cabinet
Replace the top panel or console and reconnect any removed hoses or clips. Ensure the area is clean and dry before restoring power.
Tip: Double-check that all fasteners are snug but not overtightened. - 9
Test run and verify
Power on the washer and run a short test cycle with a small load. Look for smooth agitation, balance, and no leaks around the shaft area.
Tip: If leaks appear, recheck the gasket and mounting hardware before a full wash.
FAQ
Do I need to drain the washer before starting the replacement?
Yes. Unplug the machine, shut off water, and drain residual water from the tub. Keep a towel handy for leaks and follow safety steps.
Yes—unplug, shut the water, and drain the tub before starting.
What agitator types exist and how do I choose?
There are traditional post-style agitators and impeller systems. Your choice should match the washer design and the replacement part’s compatibility with the drive shaft.
There are two main types: post-style and impeller. Pick the one that fits your model.
Can I replace the agitator myself or should I hire a professional?
If you have basic tool skills and feel comfortable working with appliances, DIY replacement is feasible. For newer or complex drive systems, a pro can prevent accidental damage.
Yes, if you’re comfortable with tools; otherwise consider a pro.
How do I know the replacement will fit my washer?
Check the model number in your manual or data plate and verify the part number or compatibility list from the supplier. OEM parts typically guarantee fit.
Check the model number and the replacement part’s compatibility list.
What is the typical cost for a replacement agitator?
Prices vary by model and part type. Expect to budget for the part and any small tools you may need; avoid cheap, uncertain options for critical components.
Costs vary; expect to pay for the part and any misc tools.
How long does an agitator replacement take?
Most installations take about 60–90 minutes with basic tools and a methodical approach.
Typically 60 to 90 minutes with the right parts and careful steps.
Should I replace other drive components at the same time?
If wear is evident in the drive shaft, coupling, or gears, consider inspecting and possibly replacing those parts to prevent future failures. Coordinate with your part supplier for a complete kit when available.
If wear is visible, consider replacing related parts to prevent future issues.
What maintenance helps extend agitator life?
Use appropriate detergent, avoid overloading the drum, and clean the agitator and shaft area occasionally to prevent residue buildup that can hinder performance.
Keep loads balanced, use the right detergent, and clean the unit periodically.
Watch Video
The Essentials
- Verify compatibility before purchasing the agitator.
- Power down and drain safely before work starts.
- Handle the agitator and drive components gently.
- Test the unit thoroughly after installation.
- Perform regular maintenance to extend life.