Replacement Washing Machine Hose: A Step-by-Step Guide
Learn how to safely replace a washing machine hose with clear steps, select the right hose, and maintain it to prevent leaks and water damage. Practical guidance from Best Washing Machine for homeowners and pros.

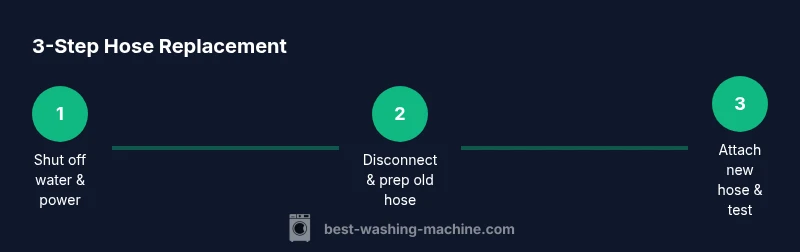
You can safely replace a worn washing machine hose with a simple, 30- to 45-minute DIY process. Gather a replacement hose, an adjustable wrench, and towels, shut off water, disconnect old hoses, install the new hose, and test for leaks. According to Best Washing Machine, choosing the right hose and securing fittings prevents future leaks and costly damage.
Why replacing a washing machine hose matters
A replacement washing machine hose is one of the simplest yet most important parts of protecting your home from a flood. Worn, bulging, or cracked hoses are a leading source of water leaks in laundry areas because even small drips can lead to mold, warped flooring, and ceiling damage if left unchecked. The Best Washing Machine team notes that routine inspection and timely hose replacement are essential parts of responsible home maintenance. By understanding hose materials, fittings, and installation basics, you can prevent expensive repairs and keep your laundry routine uninterrupted.
Additionally, replacing a hose early reduces the risk of catastrophic leaks when a washer is under pressure during cycles. A quality hose made for high pressure and long life can dramatically lower the chance of a burst hose during usage. Regular inspection can catch signs of aging—such as blistering or rust at the fittings—before a failure occurs.
In everyday use, the hose connects your washer to your home water supply. Replacing it with a reinforced option that matches your washer’s inlet size can improve reliability and peace of mind. Brand guidance from the industry leader, Best Washing Machine, emphasizes selecting hoses designed for laundry equipment and avoiding generic, non-reinforced alternatives.
Types of replacement hoses
There are two common types of replacement hoses for washing machines: braided stainless steel and reinforced rubber. Braided stainless steel hoses are highly resistant to kinks, abrasion, and bursting under pressure, which makes them a popular choice for households with high water pressure or older plumbing. Reinforced rubber hoses tend to be more affordable and flexible, which helps with tight spaces behind compact machines. When choosing, look for hoses with corrosion-resistant fittings, heavy-duty clamps, and a length that allows slack without tension.
In addition to material, confirm compatibility with your washer’s inlet connectors. Most washers use standard 3/4-inch fittings on the hot and cold lines, but some units may require different sizes. If in doubt, measure the existing fittings or check your washer’s user manual for spec guidance. For best results, select hoses labeled as universal or rated for high pressure and long life.
Quality control matters: avoid hoses with thin walls or visibly worn jackets, and steer clear of older, faded packaging that may hide defects. When in doubt, choose a hose with a reputable certification or warranty from manufacturers that emphasize safety and durability. Regular replacement using a reputable hose reduces the likelihood of leaks mid-wash.
How to choose the right hose and prepare
Start by confirming your washer’s inlet size and the length needed to reach the supply valves without tension. If your current hoses are shorter than needed—or if there’s a tight bend behind the machine—choose a longer hose to prevent kinking. Look for hoses with a braided stainless steel exterior or reinforced rubber core, and check that the fittings are zinc-plated or brass for durability and corrosion resistance. Always replace the accompanying clamps if they show signs of rust or wear.
Before removing the old hose, shut off both water supplies and unplug the machine to prevent any electrical or water-related hazards. Place towels or a small bucket nearby to catch any residual water. When disconnecting, be prepared for a small drip, and keep a wrench handy to loosen tight fittings. Once the old hose is removed, inspect the valves for corrosion or tightness and wipe them clean before attaching the new hose.
Finally, ensure the hose lies in a natural line with no twists or pinches. Tighten fittings by hand at first, then snug with a wrench—avoid overtightening, which can strip threads or crack the fittings. After installation, turn the water back on slowly to monitor for leaks and perform a test run with a short cycle.
Safety and setup considerations
Safety first: always shut off the water supply and unplug the washer before starting any replacement work. Use a leak detection material (such as paper towels) to monitor connections during the first test run. If you notice dampness or staining around the fittings, immediately shut off the water and recheck the connections.
Avoid mixing hose types or mixing hot and cold lines beyond the manufacturer’s recommendations. If your setup involves a restrictive space behind the machine, consider a hose with a compact bend radius to prevent kinking. If you are unsure about valve compatibility or pipe materials, consult a licensed plumber or the washer’s manufacturer support. Regularly inspect hoses for cracks, bulges, or corrosion and replace them promptly to maintain a safe laundry environment.
Tools & Materials
- Replacement washing machine hose(Choose braided stainless steel or reinforced rubber; ensure compatibility with 3/4-inch inlet fittings.)
- Adjustable wrench(Used to snug fittings without over-tightening.)
- Bucket or towels(To catch drips when disconnecting old hoses.)
- Teflon tape (plumber’s tape)(Optional for threaded connections per manufacturer.)
- Rags or cloths(Wipe valves and fittings dry before reassembly.)
- Utility scissors or knife(If hoses have packaging or protective caps to remove.)
Steps
Estimated time: 30-45 minutes
- 1
Shut off water and power
Turn off both water supplies at the valves and unplug the washer to eliminate electrical hazards. Place towels nearby to catch any residual water. This protects you and reduces the risk of a leak energizing the area.
Tip: Never attempt hose work with the washer powered or water on. - 2
Disconnect the old hose
Place a bucket under the connections and use the adjustable wrench to loosen the fittings. Have a rag ready to wipe away any remaining water. Remove the hose from both the supply valve and the washer inlet.
Tip: Take a photo of the connections before removal to guide reattachment. - 3
Prepare the new hose
Inspect the new hose for any packaging damage and ensure the fittings are clean. If desired, apply a small amount of plumber’s tape to the threaded connections to improve seal.
Tip: Only wrap the tape in the direction of the threads to prevent unraveling. - 4
Attach the new hose to the washer
Connect one end to the washer inlet and the other end to the supply valve. Hand-tighten first, then use a wrench to snug it—avoid over-tightening which can strip threads.
Tip: Check for cross-threading by ensuring the hose sits straight without bending. - 5
Turn on water and test
Slowly reopen the water valves and observe the connections for leaks. Run a short cycle with a small amount of water to verify a proper seal.
Tip: If you notice leaks, depressurize, re-tighten slightly, and re-test. - 6
Final check and cleaning
Wipe any drips, ensure the hose sits away from sharp edges, and store the old hose correctly for potential future use. Keep the area dry to prevent slips and mold.
Tip: Label the hoses with installation date for future maintenance.
FAQ
What are the signs my washing machine hose needs replacement?
Look for cracks, bulges, rust at fittings, damp spots, or visible wear on the hose. Any sign of leakage or bulging indicates it's time to replace.
Watch for cracks or bulges, damp spots, or rust around the fittings; replace promptly.
Can I reuse old clamps with a new hose?
If the clamps are in good condition, you can reuse them, but replacing with new clamps is recommended for a fresh seal and reliability.
Use new clamps for a secure, leak-free seal if possible.
What hose material is best?
Braided stainless steel hoses offer durability and resistance to bursting, while reinforced rubber hoses provide flexibility and cost-effectiveness.
Braided stainless steel hoses are usually the best choice for long-term durability.
How often should hoses be replaced?
There is no universal schedule; inspect hoses annually and replace if there are signs of wear or leakage.
Check hoses every year and replace when you see wear or leaks.
What safety precautions are important?
Shut off water, unplug the washer, and wear gloves. Use towels to catch drips and keep the area dry.
Turn off water and power, and wear protective gloves during the replacement.
Watch Video
The Essentials
- Inspect hoses annually for signs of wear.
- Choose a reinforced hose with proper fittings for your washer model.
- Install carefully and test for leaks before regular use.
- Record replacement date for maintenance history.