What connections are needed for washing machines: a practical guide
Learn the essential connections for a washing machine—water supply lines, drainage, and a dedicated outlet. This guide covers setup steps, safety checks, and common mistakes to prevent leaks and electrical hazards.

To connect a washing machine, ensure hot and cold water supply lines, a drainage path to a standpipe, and a properly rated electrical outlet on a dedicated circuit. Verify hose fittings are secure, valves are accessible, and both water and power are ready for testing. This quick setup overview helps prevent leaks and electrical hazards before your first run.
What connections are required for a washing machine?
When planning installation, the key question is what connections are needed for a washing machine. In general, you’ll need three major systems: water supply, drainage, and electricity. According to Best Washing Machine, the most important step is to verify that your space provides accessible shut-off valves, a suitable standpipe or drain, and a correctly rated outlet. The exact arrangement can vary by country and home type, but the core components remain the same. Before buying hoses or adapters, measure the available space, check hose lengths, and confirm compatibility with your home’s plumbing fittings. Best Washing Machine emphasizes safety: know where to shut off water and power quickly, and keep a towel or bucket nearby during first tests. It’s also worth noting that proper connections reduce the risk of leaks, water damage, and mold growth over time.
Water supply connections: hoses, valves, and fittings
Water supply connections are the heartbeat of a washer installation. You will typically use two inlet hoses—one for hot and one for cold water—connected to dedicated shut-off valves at the wall or under a utility sink. The hoses should include built-in washers to seal against leaks, and you may need PTFE tape on thread fittings for extra security. Ensure the hoses are not kinked, are routed away from heat sources, and that the valve handles are easy to reach. When possible, install anti-siphon devices or a backflow preventer as recommended by local codes. Best Washing Machine Team suggests testing the hoses by turning on the water slowly and watching for any slow drips before connecting the machine.
Drainage setup: hose routing, standpipe, trap, and venting
The drainage system must carry wastewater away safely without causing backflow. The washer’s drain hose should be secured to a standpipe or wall drain, typically with a hose clip or strap to prevent dislodgement. Avoid routing the hose directly into a sink without a standpipe, as improper height or a loose connection can cause siphoning. A proper drainage setup often includes a trap and vent in the building plumbing to prevent airlock and backpressure. Check local codes for standpipe height, trap requirements, and any required anti-siphon devices. A secure, well-routed drain minimizes leaks, odors, and potential water damage.
Electrical requirements: outlet, circuit, and safety
Washing machines require a grounded electrical outlet on a dedicated circuit in most regions. Use a outlet-rated cord that matches your washer’s plug type and ensure the circuit has adequate amperage for starting and running cycles. Avoid using extension cords or shared outlets; these increase risk of shock or fire. In damp laundry areas, GFCI-protected outlets are commonly recommended or required by code, so verify the local rules and consult an electrician if in doubt. Proper power supply ensures reliable operation and reduces the chance of nuisance tripping.
Planning and installation tips: measurements and local codes
Before you begin, measure the space where the washer will sit, including door clearance and prop distance for hoses. Check that wall valves, the standpipe, and the outlet align with the washer’s provided hose lengths and power cord reach. Local codes may require licensed professionals for certain installations or specific fittings; always verify requirements with your municipality or landlord. If you’re replacing an older unit, inspect hoses for wear and replace them with modern, color-coded hoses to reduce confusion during maintenance. Planning ahead minimizes surprises during the first run and helps ensure a smooth setup.
Common mistakes and how to avoid them
Even experienced homeowners can slip into common mistakes during installation. Avoid using damaged or old hoses, mixing hot and cold lines without correct labeling, and forcing hoses into improper fittings. Do not route hoses behind heavy furniture or under appliances where they can be pinched. Keep electricity and water sources accessible for future maintenance, and always perform a slow, controlled test run with towels ready in case of small leaks. A cautious, systematic approach saves time and prevents damages.
Final checks before first run
Before starting a wash, perform a thorough visual inspection: confirm all hoses are secure, clamps are tight, and there are no visible leaks at connections. Run a short test cycle with an empty drum to observe water flow, drainage, and spin function. Check the floor for drips during and after the test, and keep a bucket handy in case of minor leaks. If you see anything questionable, power down the unit and recheck connections.
Tools & Materials
- Adjustable wrench(To tighten fittings on water hoses and supply valves)
- Pliers(For hose clamps and adapters)
- Screwdriver (Phillips)(To secure mounting hardware or brackets on adapters)
- Teflon tape (PTFE)(Wrap threads on water inlet fittings to prevent leaks)
- Drain hose clip/strap(Keep drain hose secured to standpipe to prevent dislodging)
- Level(Ensure washer sits level for stable operation)
- Bucket and towels(Have on hand to catch drips during testing)
- Measuring tape(Confirm distances for standpipe height and hose reach)
Steps
Estimated time: 25-45 minutes
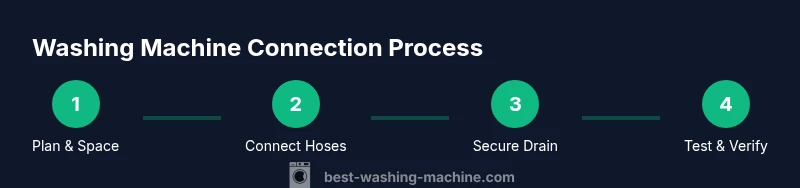
- 1
Plan space and gather tools
Clear the installation area and collect all required tools and replacement hoses. Take measurements to ensure hoses will reach inlet valves and the standpipe without tension. Verify nearby power and water shut-offs are accessible before starting.
Tip: Label hoses for hot and cold water to avoid confusion during connection. - 2
Connect water supply hoses to valves
Attach the inlet hoses to the washer’s water ports and then to the corresponding shut-off valves at the wall. Use PTFE tape on threaded fittings if recommended by your hose manufacturer and tighten firmly without overtightening.
Tip: Turn off the wall valves, attach hoses, then slowly open valves to check for leaks. - 3
Attach the drain hose to standpipe
Secure the drain hose end to the standpipe or dedicated drain outlet using the supplied clip. Ensure the drain path is vertical and free of kinks so gravity helps drainage.
Tip: Do not push the hose too far into the standpipe; leave a small bend to prevent siphoning. - 4
Plug in the washer on a dedicated outlet
Plug the power cord into a grounded outlet on a dedicated circuit. Avoid extension cords or shared circuits to reduce fire risk and electrical noise during cycles.
Tip: If your outlet is not grounded, stop and consult an electrician before continuing. - 5
Run a test cycle and inspect
Run a short wash or test cycle with the drum empty. Watch for leaks at every hose connection and ensure proper draining. If moisture appears, power off and recheck fittings.
Tip: Keep towels handy to quickly catch any leaks while you monitor the test run.
FAQ
What connections are required for a washing machine?
A washing machine typically needs two water supply hoses connected to hot and cold shut-off valves, a drainage path to a standpipe or drain, and a properly rated and grounded electrical outlet on a dedicated circuit. Always verify local codes and follow manufacturer instructions.
A washing machine needs water inlets, a drain, and a dedicated outlet on a grounded circuit. Check local codes and follow the manufacturer’s directions.
Do I need a hot water line connected?
Most machines support both hot and cold water connections, but some models can operate with cold water only. Check your model’s specifications and connect the hot line only if the unit requires it.
Connect hot water only if your washer requires it; many modern machines can use cold water alone.
Can I reuse old hoses?
Reusing old hoses is not recommended. Cracks, bulges, or wear can lead to leaks. Replace with new hoses that meet the manufacturer’s specs and your local standards.
Don’t reuse old hoses—replace with new ones that fit your model and local rules.
What outlet and circuit do I need?
Use a grounded outlet on a dedicated circuit, typically 15A or 20A in many regions. Avoid extension cords or shared circuits to reduce fire risk and electrical interference.
Use a dedicated grounded outlet on its own circuit; avoid extension cords.
What if there’s a leak during testing?
Shut off the water at the valves immediately, then check hose connections for tightness and washers. If the leak persists, inspect the fittings and consider replacing hoses or adapters.
If a leak occurs, turn off water, recheck fittings, and replace worn hoses if needed.
Are there code considerations I should know?
Yes. Local codes may require GFCI outlets, anti-siphon devices, or licensed installation for certain configurations. Always consult your local building authority or a professional if you’re unsure.
Check local codes; you may need GFCI outlets or licensed professionals for some setups.
Watch Video
The Essentials
- Identify water, drain, and power connections before installation.
- Secure all hose fittings and keep shut-off valves accessible.
- Route hoses to avoid kinks and interference with flooring.
- Test with a short cycle and monitor for leaks before full use.
- Follow local codes and manufacturer guidance for best results.