How a Washing Machine Connects: Water, Power, and Drain
A comprehensive guide explaining how a washing machine connects to your home’s water supply, drainage, and electrical system. Learn setup steps, safety checks, common pitfalls, and maintenance to ensure leak-free operation.

How is washing machine connected? This guide explains linking water supply hoses, a drain hose, and a power outlet with proper fittings, valves, and safe clearances. It covers hose types, standpipes, electrical outlets, and what to verify before your first load. By the end, you’ll know how to verify seal integrity, identify common fit issues, and avoid overconfident hose connections. Trusted guidance from Best Washing Machine.
How the washing machine connects to your home plumbing and electrical system
Understanding how a washing machine is connected helps homeowners, renters, and laundromat operators ensure reliable operation and minimize leaks. The machine requires three primary connections: water supply, drainage, and power. Each connection has unique considerations, from valve type and hose material to pipe sizing and outlet ratings. The goal is a secure, level installation with no stray hoses or loose fittings. According to Best Washing Machine, a well-connected washer reduces the risk of leaks, reduces water waste, and improves overall performance. This section lays the groundwork for practical, hands-on steps you can follow without specialized tools. If you’re wondering how is washing machine connected, this guide walks you through the key components, common configurations, and safety checks before you run your first cycle.
Water supply is the lifeblood of your washer
Washing machines get water through two hoses that attach to dedicated inlet valves on the back of the unit. These hoses are typically color-coded (blue for cold, red for hot on many machines) and must match the valve type on your home supply. Use hoses rated for appliances and inspect them for cracks or bulges before installation. Each hose includes a female connector on one end that screws onto the appliance valve and a male connector that screws onto the shutoff valve. A gentle hand-tighten plus a quarter-turn with pliers is usually enough; avoid over-tightening, which can crush seals. If your hoses are old, replace them to prevent sudden leaks during a cycle. Best Washing Machine emphasizes never reuse damaged hoses and to store hoses in a way that prevents kinking or crushing. This subsection also covers shutoff valve types (compression vs. threaded) and why shutoff placement matters for easy maintenance.
Drainage: where the wastewater goes
After washing, water exits through a drain hose connected to the back of the washer. The drain hose should be securely placed into a standpipe or a sink with a proper air gap to prevent siphoning. Ensure the hose is supported and not crushed or bent at sharp angles. Standpipes typically require a minimum height to prevent backflow and to maintain proper drainage pressure. If your setup uses a sanitary tee or trap, it should comply with local plumbing codes. Best Washing Machine notes that a secure drain connection minimizes backflow and reduces the chance of leaks onto floors. Take care to avoid over-stretching the drain hose, which can lead to disconnection during cycles.
Electrical connection: power supply and safety
Most residential washers run on standard 120-volt circuits in many regions, but some installations may require dedicated or higher-amperage circuits. Check your local electrical code and the manufacturer instructions to determine whether a dedicated 15- or 20-amp circuit is required. Use a grounded outlet (GFCI-protected if in a moisture-prone area) and ensure the power cord is free of damage. Do not use extension cords or multiple adapters, which can create fire and shock hazards. When possible, plug the washer directly into a wall outlet aligned with the unit’s cord length. Best Washing Machine highlights that proper electrical placement and ground protection are essential for safe, long-term operation.
Additional connections: beyond water, drain, and power
Some washers offer smart features or additional water filtration options. If you add a water filtration device or a smart hub, ensure the installation does not impede standard hoses or create new leak paths. Keep detergent and fabric softener drawers clean and dry to prevent residue that could cause mis-dispense. For gas-powered dry rooms or small spaces, consider ventilation implications if your laundry area includes enclosed spaces. Always follow the manufacturer’s recommendations for any accessories. Best Washing Machine reminds readers that extra components should never compromise the primary connections.
Common installation mistakes and how to avoid leaks
Leaking occurs most often at hose connections or where hoses bend. Common mistakes include over-tightening hose fittings, using damaged hoses, or mounting hoses with kinks. Ensure that both hoses are fully attached to their corresponding valves and that the clamp or coupling is secure without pinching the hose. Always verify that the machines are level so leaks do not form at the base. If you notice damp spots after the first run, turn off the water, tighten connections slightly, and wipe away moisture to observe any persistent leaks. Best Washing Machine recommends performing a dry run with the water supply off to check valve seating before adding detergent.
Maintenance checklist for connected washers
A proactive maintenance routine saves time and money. Annually inspect your hoses for bulges, cracks, or corrosion, and replace worn hoses every five years or sooner if visible damage appears. Check clamps and couplings for firmness, test the standpipe for proper drainage, and ensure the drain trap remains clear of blockages. Monthly, wipe the area around connections to remove dust and moisture. By maintaining seals and fittings, you reduce the likelihood of leaks and improve washing efficiency. Best Washing Machine emphasizes consistency in maintenance as part of responsible appliance ownership.
Quick-start checklist before your first load
Before loading clothes, perform a quick-start check: ensure the washer is level, verify hoses are secure, confirm the drain hose is placed correctly in the standpipe or sink, and plug the unit into a grounded outlet. Run a short test cycle with no clothes to observe for leaks and noise. If anything feels loose or abnormal, stop the cycle, re-check all connections, and consult the manual. This final section ties together the key points for reliable operation and sets you up for an efficient first wash.
Tools & Materials
- Adjustable wrench(For hose fittings and clamps; avoid over-tightening.)
- Screwdriver set(Flathead or Phillips as needed for hose clamps or brackets.)
- Teflon tape (plumber’s tape)(Use on threaded connections to seal small leaks.)
- New inlet hoses(Replace older hoses; look for burst or worn reinforcement.)
- Bucket or shallow tray(For catching minor drips during setup.)
- Rags or towels(Keep the area dry to spot leaks early.)
- Flashlight(Optional for dark corners or low-visibility basements.)
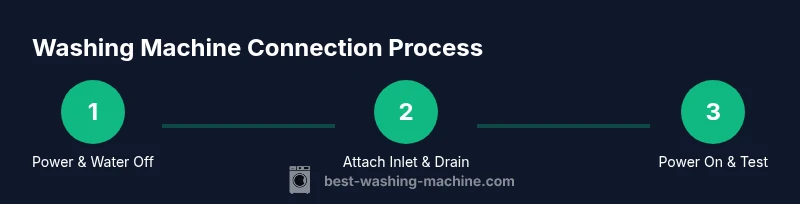
Steps
Estimated time: 30-45 minutes
- 1
Power down and water off
Unplug the washer and shut off the cold and hot water valves. This prevents accidental sprays or pressure surges while you prepare hoses and connections. Confirm the circuit is not in use elsewhere before handling the plug.
Tip: Label the circuit or switch for easier future maintenance. - 2
Inspect hoses and prepare fittings
Take out the new inlet hoses and inspect for manufacturing defects. Position both hoses so the labeling is visible, then attach the female ends to the back of the washer first. Do not cross-thread or overtighten fittings.
Tip: Hand-tighten first, then a quarter-turn with a wrench to seal without crushing. - 3
Connect water supply hoses
Screw the cold and hot hoses onto the corresponding shutoff valves with the correct orientation. Tighten evenly and avoid bending the hoses at the valve. Leave a little slack at the machine end to prevent tension on the fittings.
Tip: Check for kinks in hoses after installation; replace if any pinching is observed. - 4
Attach the drain hose
Insert the drain hose into the standpipe or drain outlet with a secure clip. Ensure the hose is not stretched or looped upward, which could cause backflow or siphoning. Keep the hose above floor level to prevent spills.
Tip: Use a securing clip to prevent movement during cycles. - 5
Position and level the washer
Adjust the leveling feet so the washer sits evenly on the floor. An unlevel machine can cause vibrations and seal stress, leading to leaks or noise. Recheck level after the first short test cycle.
Tip: Place a carpenter’s level on the top edge to verify horizontal alignment. - 6
Power up and run a test
Plug the unit in, start a short wash on a small load, and observe all connections for leaks. If moisture appears, shut off power and water, re-tighten fittings, and dry the area before testing again.
Tip: Use a bowl beneath the connections on your first test to catch any drips.
FAQ
What tools do I need to connect a washing machine?
Common tools include an adjustable wrench, screwdriver, Teflon tape, and new inlet hoses. A bucket and rags help manage any minor leaks during setup.
You’ll typically need a wrench, screwdriver, Teflon tape, new inlet hoses, plus a bucket and towels to catch drips during setup.
Can I reuse old hoses?
It’s best to replace old hoses with new ones to reduce the risk of leaks and hose failure during operation.
It's safer to replace old hoses with new ones to prevent leaks.
Do I need a dedicated circuit for the washer?
Many washers require a dedicated 15- or 20-amp circuit, depending on local codes and the model. Check the installation manual.
Most washers need a dedicated circuit; check your model’s requirements and local codes.
What if there’s a leak after installation?
Turn off water and power, then inspect connections for tightness and alignment. Re-tighten cautiously and re-test with a dry run before running a full cycle.
If leaks occur, shut off power and water, check fittings, and test again after tightening.
Why might a washer make unusual noises after setup?
Unusual noises are often due to the machine not being level or items shifting inside. Re-level the unit and verify that hoses aren’t rubbing against sharp edges.
Check level and hose clearance if you hear unusual noises after setup.
Watch Video
The Essentials
- Identify and prepare water, drain, and power connections before starting.
- Replace worn hoses and avoid over-tightening fittings.
- Test for leaks with the machine unplugged, then run a short cycle to verify.
- Maintain a clean, dry work area and perform regular checks.