LG Washing Machine Door Lock Repair: A Step-by-Step Guide
Learn how to diagnose and replace the door lock on LG washing machines with a clear, safe, step-by-step approach. This guide covers tools, safety, testing, and warranty considerations for reliable lg washing machine door lock repair.

LG washing machine door lock repair involves diagnosing the latch, replacing the lock assembly, and verifying a secure door seal. Start by unplugging the unit and turning off water supply, then gather the right LG-compatible lock kit and basic tools. This DIY guide covers model considerations, safety steps, and testing tips to restore reliable operation.
Why LG Door Lock Maintenance Matters
Door lock reliability directly affects cycle completion and user safety. In the context of lg washing machine door lock repair, a failing latch can trap laundry, trigger false error codes, or create dangerous leakage. Regular attention to the lock assembly helps prevent unexpected outages and costly emergency repairs. According to Best Washing Machine, focusing on the correct part choice and careful, model-aware installation yields the most durable results. A well-executed repair reduces downtime and restores confidence in daily laundry routines for homeowners, renters, and small-business operators alike. Additionally, understanding common failure modes helps you decide when DIY is practical and when to call a technician.
Throughout this guide, you’ll see practical tips, model considerations, and safety steps designed to help you complete lg washing machine door lock repair with minimal risk and maximum reliability.
Understanding LG Door Lock Configurations and Failure Modes
LG front-load and top-load washers use different lock configurations, but most failures fall into a few common categories: direct-acting solenoid locks, motorized actuators, and mechanical latches. A failing solenoid may not energize, causing the door to remain locked or fail to unlock at the end of a cycle. A worn actuator can produce intermittent locking or jamming, while a cracked or misaligned latch can prevent proper sealing of the door. Symptoms like persistent lock errors, the door refusing to open after a cycle, or unusual noises during locking are red flags. Identifying the exact type of lock in your model is crucial because the replacement part and mounting screws vary. In many LG models, the lock is integrated with the door strike and control board, which means incorrect wiring can trigger downstream error codes.
Safety and Prep: Reducing Risk Before You Touch Your Washer
Safety should always come first in lg washing machine door lock repair. Begin by unplugging the machine from the wall outlet and turning off the water supply. If your model is plumbed, disconnect the water inlet hoses after draining any residual water to prevent spills. Place towels or a shallow tray to catch drips. Work on a stable, dry surface and wear safety glasses and insulated gloves to protect against sharp edges or sudden panel movement. Also, power down the control panel if your model allows it and take a few photos of wiring and connectors before you disconnect anything. Keeping screws and small parts organized helps prevent misassembly.
Diagnostic Checklist: Confirming the Fault
Before replacing any part, run through a structured diagnostic checklist. Confirm the door lock error codes shown on the display and test whether the door physically attempts to lock and unlock. Listen for the lock’s audible click during a cycle, and check that the door can be opened after the cycle completes. If the door remains stubbornly locked or unlocks inconsistently, you may be dealing with a faulty lock or wiring harness. If your model supports diagnostic mode, run it to pull fault codes related to the lock. For electrical checks, a multimeter can help verify continuity in the lock circuit, but only if you’re comfortable with basic electronics. Always refer to your model’s service manual for exact test points and safety cautions.
Replacing the Lock Assembly: A Practical DIY Overview
Replacing the door lock assembly involves removing the front panel or access cover to reach the lock mounting. You’ll disconnect the wiring harness, remove mounting screws or clips, and lift out the old lock. Install the new lock in the reverse order, ensuring the latch aligns with the door strike and the wiring harness is routed correctly. Use the manufacturer’s part number or an LG-approved replacement to avoid compatibility issues. After installation, reassemble the cabinet and test door operation without clothes inside to verify engagement and release. The goal is a secure, repeatable lock that opens cleanly every time.
Reassembly, Cable Routing, and Final Connections
During reassembly, route cables away from heat sources and sharp edges, avoiding kinks that could damage connectors. Ensure that all screws are snug but not overtightened to prevent panel cracking. If the harness has multiple connectors, reconnect them in the exact orientation you noted during disassembly. Replacing screws in a cross pattern helps maintain panel alignment and reduces vibration during operation. Once everything is back together, wipe down the interior and exterior surfaces with a microfiber cloth to remove dust and prevent future grime buildup that could affect the latch mechanism.
Post-Repair Testing: Verifying Function and Leak Prevention
With the machine powered and water supply reconnected, run a short wash cycle to observe the door lock’s behavior. Confirm that the door locks securely at the start and unlocks at the end of the cycle. Watch for error codes or unusual noises that might indicate miswiring or a misaligned latch. If available, run the diagnostic mode again to ensure the lock-related codes have cleared. Check for any signs of water leakage around the door seal after the test cycle. A clean test run confirms a successful lg washing machine door lock repair.
DIY vs Professional Repair and Warranty Implications
DIY door lock repair can be cost-effective and educational, especially when you have the right tools and model-specific guidance. However, some warranties may restrict or void coverage for self-repairs, particularly if non-OEM parts are used or if the repair involves exposed wiring. Always review your appliance warranty terms before starting and keep receipts and part numbers for documentation. If you encounter a stubborn fault, or if your model has complex lock circuitry, working with an authorized technician can protect warranty coverage and ensure a safe, compliant repair.
Tools & Materials
- Replacement LG door lock assembly(Ensure compatibility with your exact LG model (check model number and part number).)
- Philips head screwdriver (PH2)(For removing screws securing the front panel and lock.)
- Torx driver (T15/T20)(Size depends on model; check screws on your panel.)
- Flathead screwdriver(Helpful for prying panels gently without damage.)
- Nut driver (1/4" or 6 mm)(Used on some LG models for clamps or bolts.)
- Multimeter (optional)(For verifying electrical continuity in the lock circuit.)
- Safety gear (glasses, gloves)(Protective equipment to reduce risk of injury.)
- Magnetic parts tray(Keep screws and connectors organized during disassembly.)
- Microfiber cloth(Wipe surfaces clean and remove dust from components.)
- Service manual or model-specific guide (optional but recommended)(Helpful for wiring diagrams and torque specs.)
Steps
Estimated time: 45-60 minutes
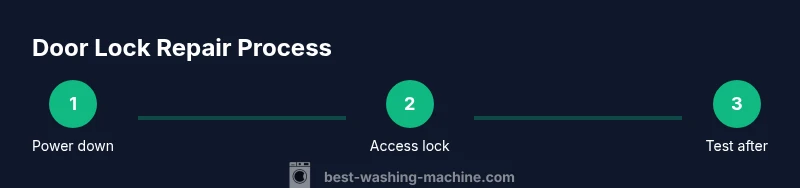
- 1
Power down and secure the area
Unplug the machine from the wall outlet and turn off the water supply. Move the unit to a dry, well-lit workspace. This minimizes electric shock and water hazards during disassembly.
Tip: Take photos of wiring before disconnecting anything to simplify reassembly. - 2
Access the door lock area
Remove the front panel or top access cover as required by your specific LG model, exposing the door lock assembly for inspection.
Tip: Keep all screws in a labeled tray to prevent loss or mix-ups. - 3
Disconnect the door lock harness
Carefully unplug the wiring harness from the lock. Note connector orientation so you can reconnect correctly.
Tip: Label connectors or photograph their orientation for accuracy. - 4
Remove the old lock assembly
Unfasten mounting screws or clips and lift out the lock. Inspect the latch and housing for signs of wear or damage.
Tip: Check for a cracked latch, bent components, or worn springs. - 5
Install the new lock
Position the new lock, align holes, and secure with screws. Ensure the latch aligns with the door strike for proper sealing.
Tip: Avoid over-tightening screws to prevent plastic cracking. - 6
Reconnect wiring
Reconnect the wiring harness, ensuring each connection seats fully with a click.
Tip: If using a multimeter, verify continuity of the lock circuit now. - 7
Reassemble the cabinet
Reinstall the panel and any covers in reverse order of removal. Replace screws evenly and ensure panels sit flush.
Tip: Tighten screws in a cross pattern to maintain alignment. - 8
Run a diagnostic test
Plug in the washer, restore water, and run a short test cycle to verify the door lock engages and releases properly.
Tip: Watch for any error codes and be ready to re-check connections if issues arise.
FAQ
What are the signs of a failing LG door lock?
Common signs include the door not unlocking after a cycle, error codes related to the lock, or unusual resistance or noises when locking. If you see these indicators, a replacement may be necessary.
If the door won’t unlock or you see a lock error, the door lock may be failing and require replacement.
Can I repair the door lock myself?
Yes, many LG door lock repairs are feasible for a confident DIYer with the right part and basic hand tools. Always follow a model-specific guide and safety precautions.
DIY is possible with the right parts and careful steps.
Do I need a service manual to replace the lock?
A model-specific manual helps with wiring diagrams and torque specs, but you can proceed using part instructions if you’re careful and take photos during disassembly.
A model-specific manual helps, but you can proceed with caution.
Will replacing the door lock affect warranty?
Warranty terms vary. Some cover repairs performed by authorized technicians, while others may restrict DIY work or non-OEM parts. Check your LG warranty terms for specifics.
Check your warranty terms to understand coverage.
Where can I find LG replacement parts?
Look for official LG parts, authorized retailers, or reputable repair-part suppliers that list your model number. Avoid counterfeit parts to maintain safety and reliability.
Search for official LG parts from authorized retailers.
Should I drain water before removing the lock?
Yes. Turn off the water supply and drain any remaining water from hoses to minimize spills when panel access is opened.
Definitely drain water first.
Watch Video
The Essentials
- Always unplug and drain before starting.
- Use the correct LG door lock replacement for your model.
- Test thoroughly after installation for reliable operation.
- Check warranty terms before DIY repairs.